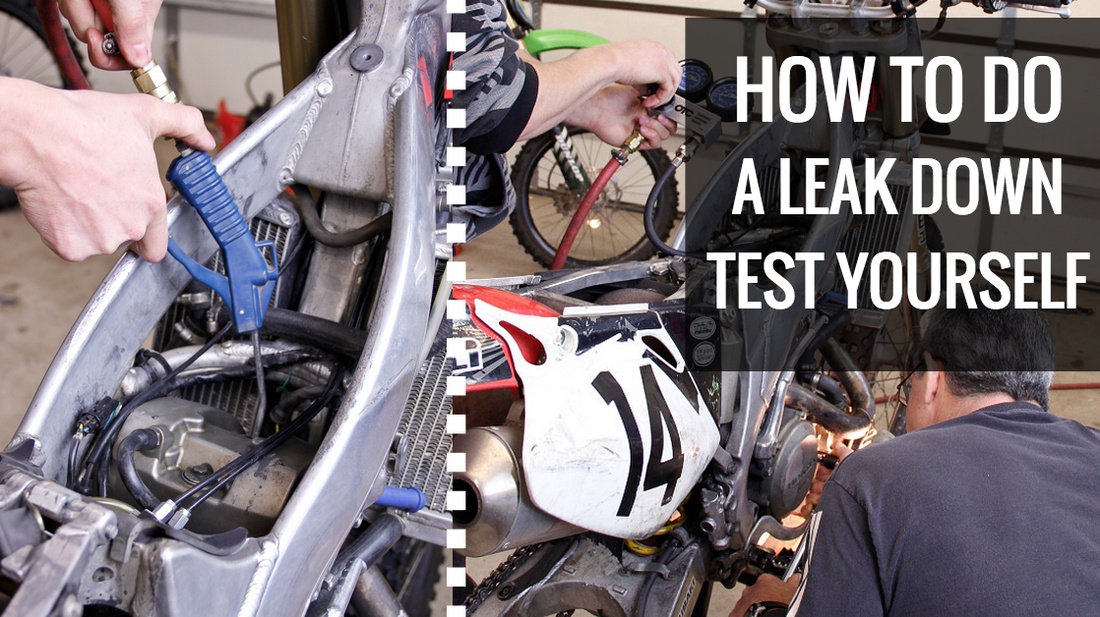
In my last post I covered what a leak down test is and how it can be used to determine engine problems. Today I’ll go through and detail how to do a leak down test on your dirt bike engine step-by-step.
|
How to Perform a Leak Down Test
To perform a leak down test you will need an air source capable of at least 115psi output pressure. Most leak down tests are performed at a regulated pressure of 100psi. This makes testing simple and the correlation of leakage a breeze since you’re working on a scale from 0-100. Lower test pressures such as 90psi can be used in the event that the air system isn’t capable of anything over 100psi or the specific leak down tester you have doesn’t work on a 100psi scale. Just remember if you test at a value other than 100psi, you will need to mathematically determine the leakage percentage since it is no longer a direct correlation. |
Leakage testing can be tricky when working by yourself, so if you’re able to round up a friend to help you out it makes things a lot easier. With 100psi of pressure being applied to the piston it is a full time job making sure the piston and crankshaft don’t move. Even with a long breaker bar, holding the crank in place can be quite a task, couple that with having to operate the pressure regulator and obtain a good reading. Again, I highly recommend having two sets of hands on deck for this procedure.
How To Calibrate Your Leak Down Tester
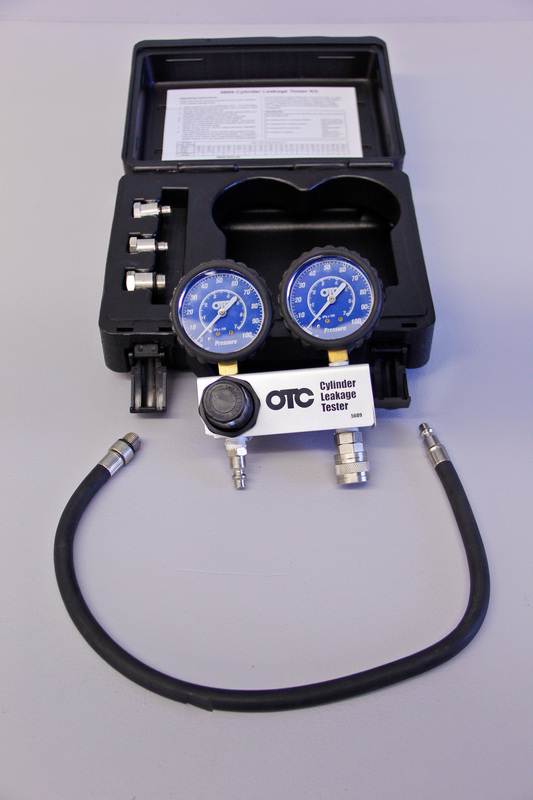
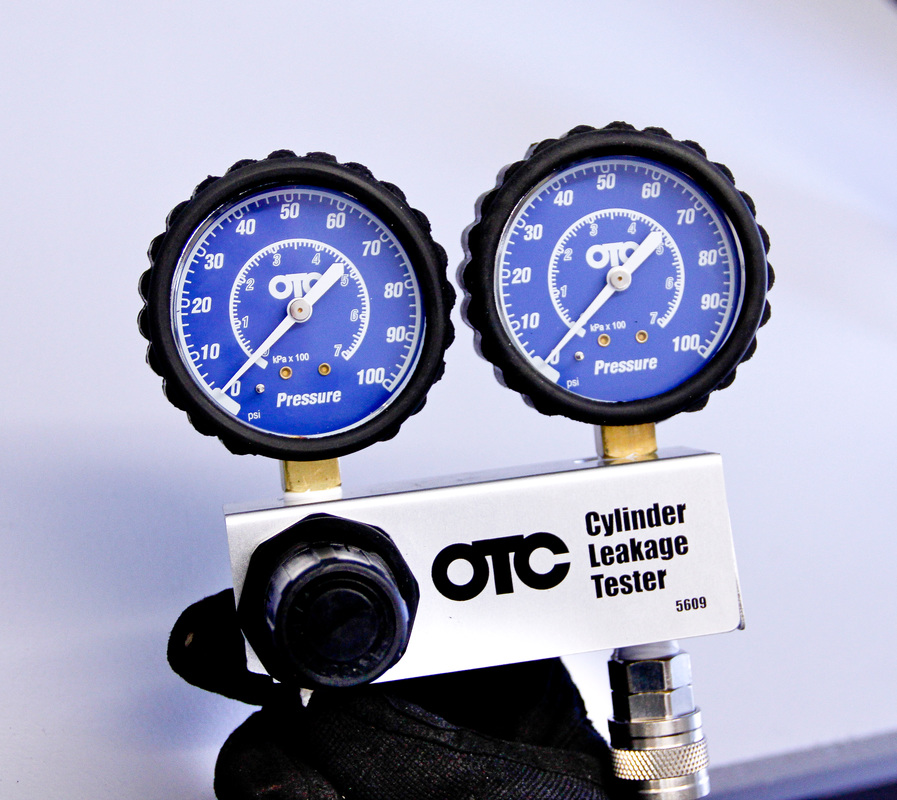
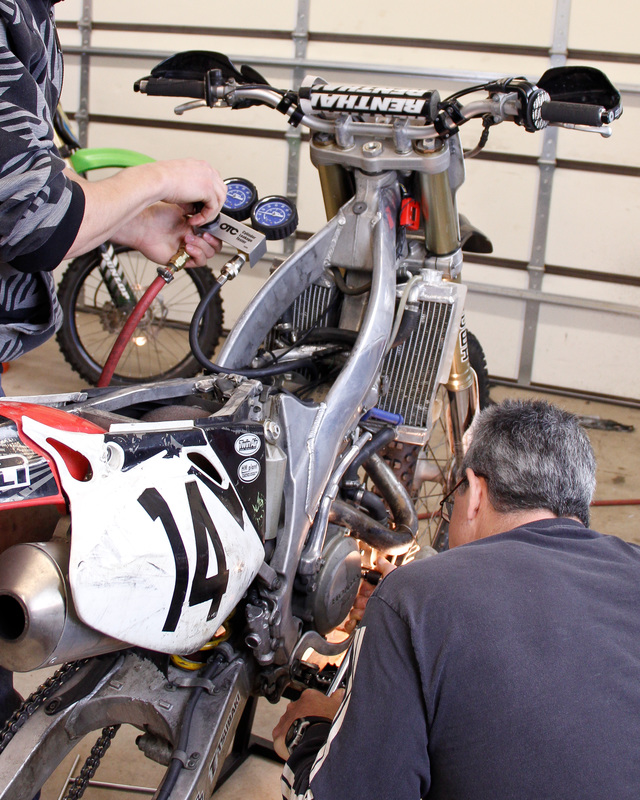
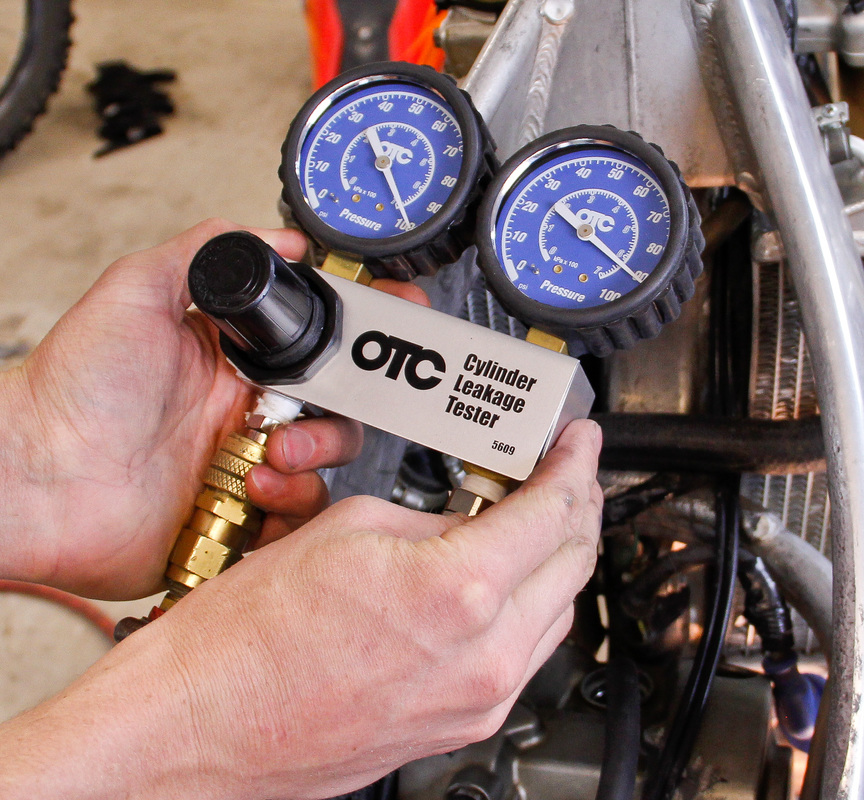
A leak down tester consists of an air inlet, a pressure regulator, two pressure gauges, and an air outlet which pressurizes the cylinder. It is important to check to see if both pressure gauges read the same prior to any testing. If they do this is great, however occasionally the gauges won’t read exactly the same so a baseline will need to be established.
How To Calibrate Your Leak Down Tester
A leak down tester consists of an air inlet, a pressure regulator, two pressure gauges, and an air outlet which pressurizes the cylinder. It is important to check to see if both pressure gauges read the same prior to any testing. If they do this is great, however occasionally the gauges won’t read exactly the same so a baseline will need to be established.
|
1. Start by setting your air source so that its output pressure is 115 psi. By setting the air source higher than the test pressure this will ensure it does not interfere with the pressure regulation during the test.
2. Slowly increase the leak down tester pressure by adjusting the regulator. Set the incoming air pressure to 100psi. |
3. Once the incoming air pressure is set at 100psi read the outlet pressure gauge. If the outlet gauge reads 100psi you are good to go. If the outlet gauge is adjustable set the gauge so it also reads 100psi. If the outlet gauge is non-adjustable (most common) write down the outlet gauge pressure reading.

|
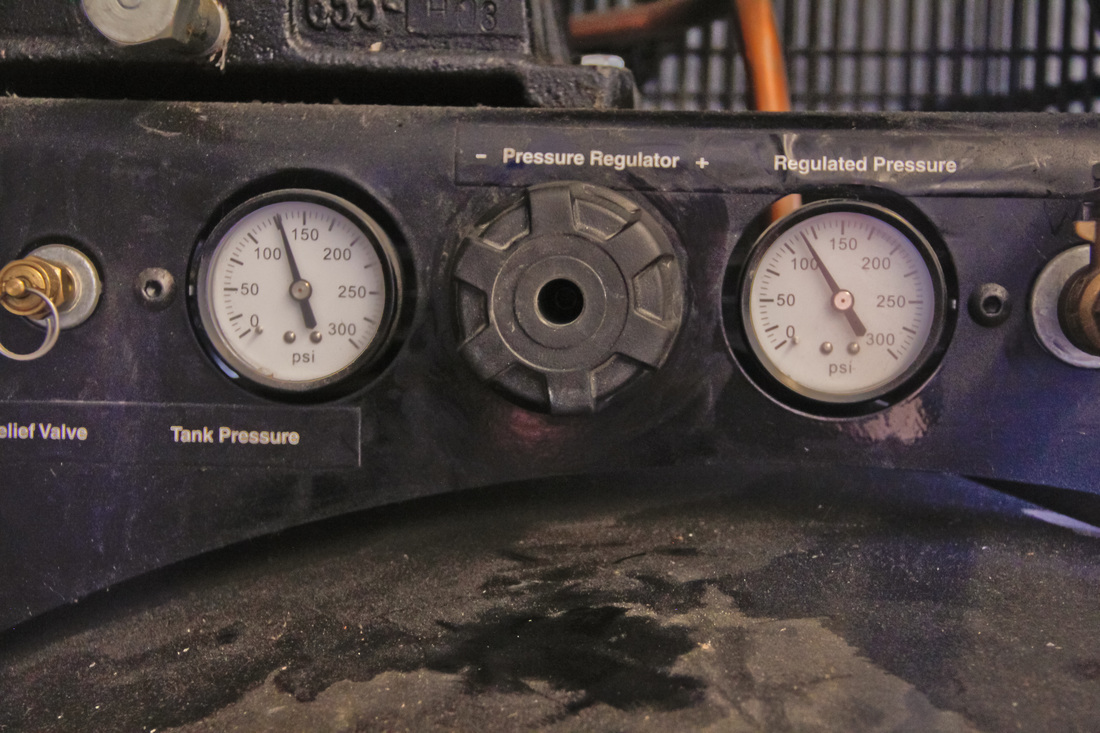
Here you can see the outlet gauge reads 97psi. Since no pressure is being lost between gauges the only explanation for the difference in reading is gauge deviation. The 97psi value will be equivalent to 100psi.
4. After you have recorded the outlet gauge pressure that corresponds to the inlet gauge pressure you are ready to start leakage testing. Set the initial regulated pressure back to 0psi so that the tester doesn’t rapidly and unexpectedly pressurize the cylinder when you reconnect the air line for the test. |
Leak Down Test Steps
1. Make sure the petcock is turned off and remove the fuel line from the carburetor or throttle body. Use a rag to catch any fuel draining from the line.
1. Make sure the petcock is turned off and remove the fuel line from the carburetor or throttle body. Use a rag to catch any fuel draining from the line.
|
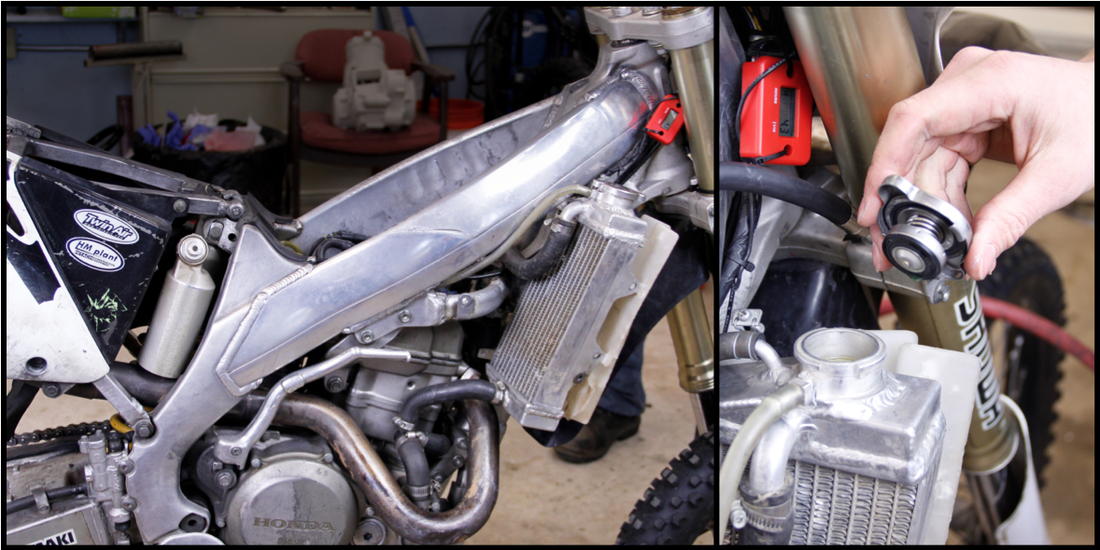
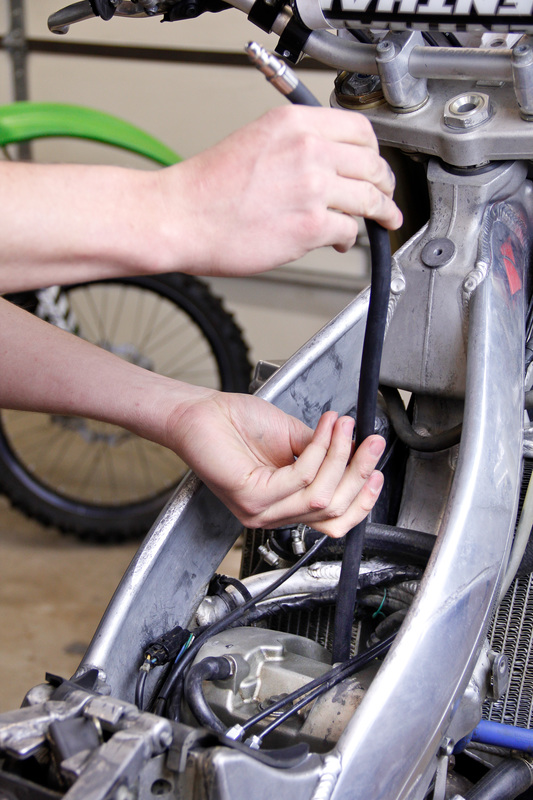
2. Remove the seat and fuel tank from the bike.
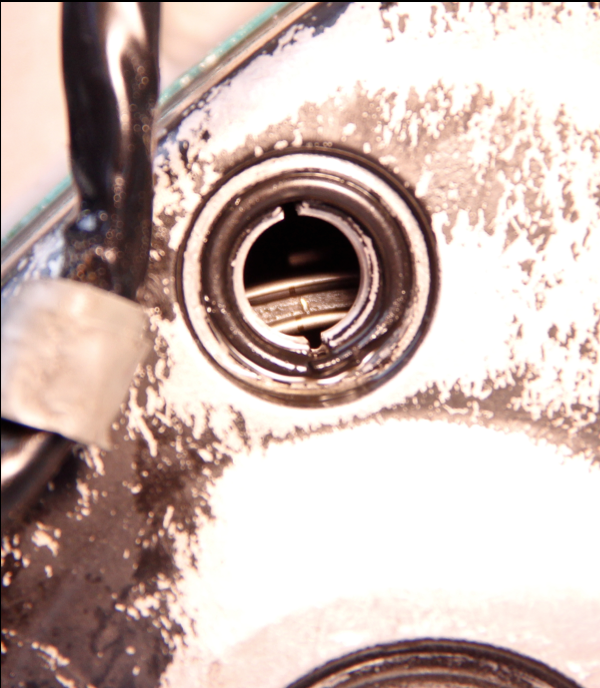
3 . Remove the radiator cap and pull out the crankcase breather tube |
|
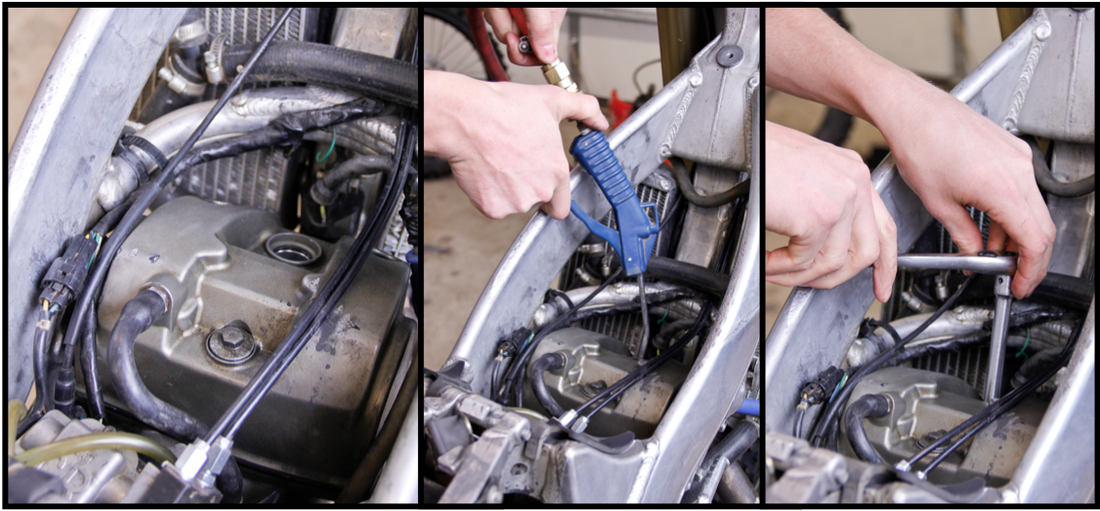
4. Remove the spark plug cap . Prior to removing the plug blow compressed air into the plug cavity to rid it of dust and debris so that it can’t get into the engine. Then remove the spark plug.
|
|
5. Remove the crankshaft hole cap cover so that you can gain access to the crankshaft.
|
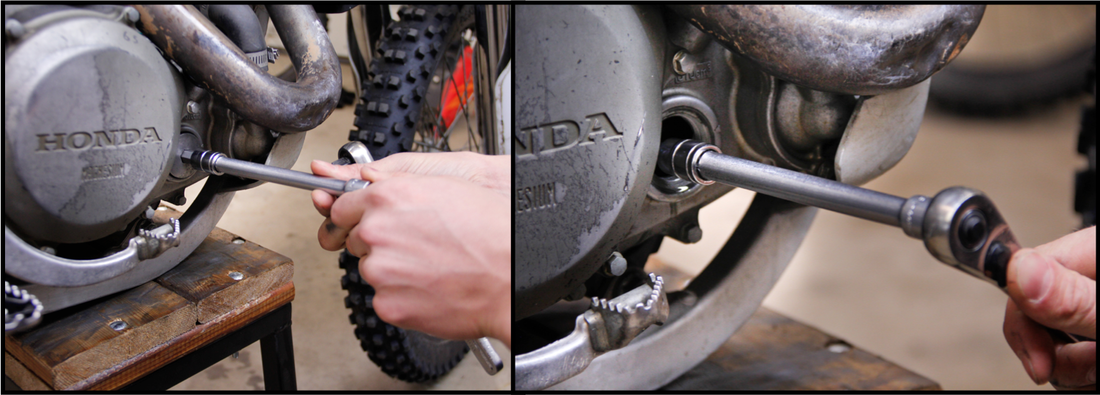
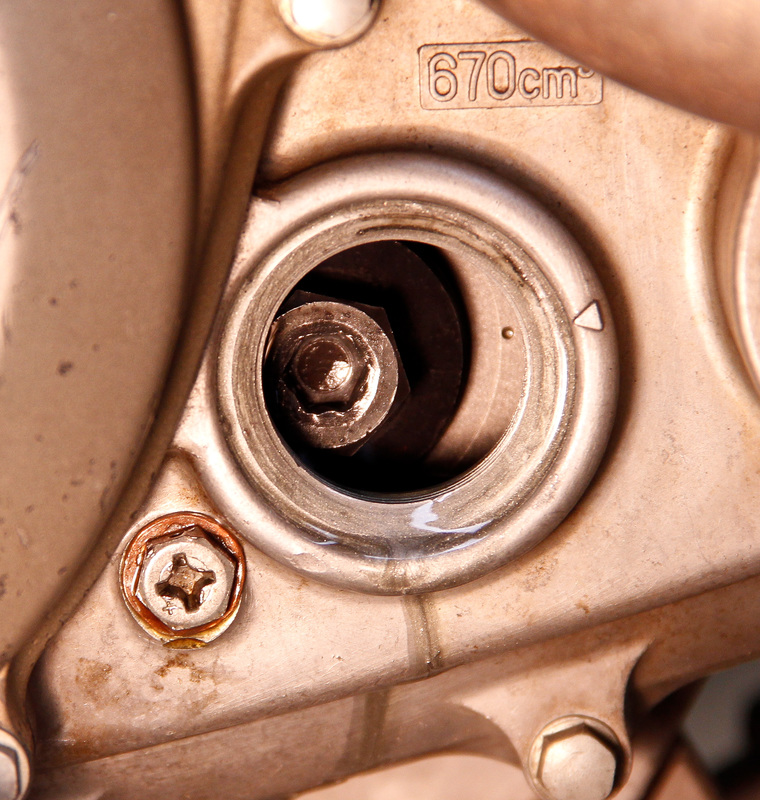
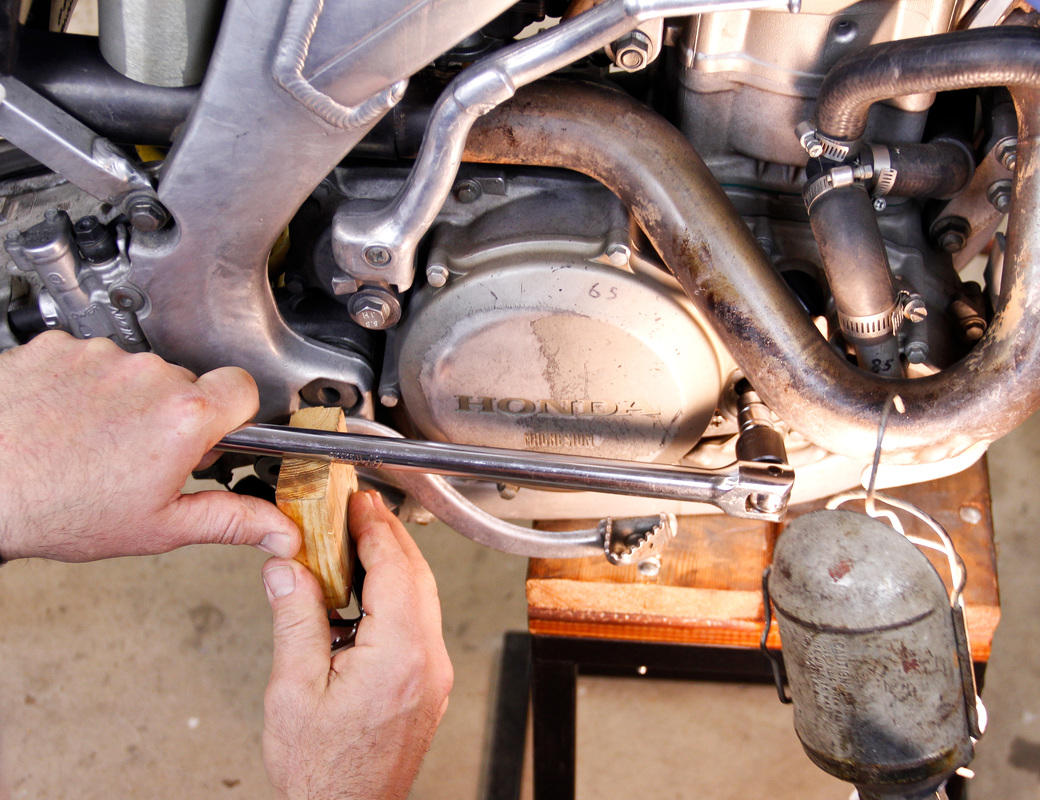
6. If working from the clutch side of the engine, rotate the engine over so that the piston is just shy of TDC (approximately the width of a punch mark off) on the compression stroke. There are usually alignment marks which can be used depending on the manufacturer to help gauge how close to TDC you are. On the Honda pictured there are punch marks on the crank and balance shaft gears denoting TDC. As you rotate through to just shy of TDC feel for resistance. With all the valves closed at the end of the compression stroke there should be no resistance at TDC. If you feel resistance at TDC, the exhaust valves are likely open (you are fighting the springs), you are on the exhaust stroke, and the crankshaft must be rotated once more to get to the compression stroke.
If working from the flywheel side of the engine, rotate the engine over so that the piston passes TDC by around a ¼ of a rotation of the crankshaft. Reverse direction and set the crank so that it is just past TDC using the applicable alignment marks. On the Kawasaki pictured you can see the alignment slots. As you rotate through to just shy of TDC feel for resistance. With all the valves closed at the end of the compression stroke there should be no resistance at TDC. If you feel resistance at TDC, the exhaust valves are likely open (you are fighting the springs), you are on the exhaust stroke, and the crankshaft must be rotated once more to get to the compression stroke. |
|
7. Install the leak down tester in the spark plug hole with the regulated pressure set at 0psi initially.
|
|
8. It usually takes a breaker bar and two hands to lock the crankshaft from moving once the cylinder is pressurized. This is where having an extra set of hands helps immensely. One person should focus on keeping the crankshaft in position while the other operates the leak down tester. Remember to set the piston just shy of TDC (whichever side is applicable for your application) and to lock the crankshaft in place while the piston is still traveling upwards so the rings sit in the bottom of the ring grooves.
|
|
9. Once the crankshaft is locked in place pressurize the cylinder. Slowly turn the pressure regulator up to 100psi.
10. Note the reading of the outlet pressure gauge. This corresponds to the amount of air the combustion chamber is retaining. If both pressure gauges read 100psi when they were calibrated the difference in pressure on the outlet gauge is the cylinder leakage. For example if the outlet gauge reads 95psi the cylinder leakage would be 5%.
10. Note the reading of the outlet pressure gauge. This corresponds to the amount of air the combustion chamber is retaining. If both pressure gauges read 100psi when they were calibrated the difference in pressure on the outlet gauge is the cylinder leakage. For example if the outlet gauge reads 95psi the cylinder leakage would be 5%.
|
If however during calibration both gauges did not read 100psi then the leakage will need to be calculated. For example if the outlet pressure gauge read 97psi during calibration and 92psi when the combustion chamber was pressurized, then the leakage could be found by dividing 92 by 97.
92 ÷ 97 = 0.948 0.948 x 100 = 94.8% 100 - 94.8 = 5.2% leakage |
|
11. Once the leakage has been noted, diagnose the leak. Listen for an audible hissing sound coming from the intake, exhaust, or crankcase breather. Also look in the radiator for air bubbles.
Here are the four problems that can result:
12. Depressurize the combustion chamber by turning the regulator back so it is at 0psi and
no air is entering the combustion chamber. Unhook the air source and disconnect the leak
down tester.
13. Reinstall the spark plug and plug cap.
14. Reinstall the radiator cap and crankshaft hole cap.
15. Reinstall the fuel tank and seat.
I hope you have enjoyed these last two posts detailing how to perform a leak down test. With a little practice you will quickly be able to determine what is going on inside your engine and be better suited to detect major problems before they turn into engine failures. If you have questions or want to leave a comment please do so below.
If you found this post helpful and want more information on how to diagnose engine problems and how to perform high quality engine building in your own garage, check out my book The Four Stroke Dirt Bike Engine Building Handbook.
I'm happy to say the book is now available in both print and electronic versions! The print books just arrived last week and are now up for sale. During the next two weeks I am running a 20% off sale to celebrate the arrival of the print book, so if you order now you can save some money.
Here are the four problems that can result:
- Air passing through the intake indicates leaking intake valves.
- Air passing through the exhaust indicates leaking exhaust valves.
- Air passing through the crankcase breather indicates worn rings.
- Air bubbles forming in the radiator indicates a leaking head gasket.
12. Depressurize the combustion chamber by turning the regulator back so it is at 0psi and
no air is entering the combustion chamber. Unhook the air source and disconnect the leak
down tester.
13. Reinstall the spark plug and plug cap.
14. Reinstall the radiator cap and crankshaft hole cap.
15. Reinstall the fuel tank and seat.
I hope you have enjoyed these last two posts detailing how to perform a leak down test. With a little practice you will quickly be able to determine what is going on inside your engine and be better suited to detect major problems before they turn into engine failures. If you have questions or want to leave a comment please do so below.
If you found this post helpful and want more information on how to diagnose engine problems and how to perform high quality engine building in your own garage, check out my book The Four Stroke Dirt Bike Engine Building Handbook.
I'm happy to say the book is now available in both print and electronic versions! The print books just arrived last week and are now up for sale. During the next two weeks I am running a 20% off sale to celebrate the arrival of the print book, so if you order now you can save some money.

Feel free to sign up for my eNewsletter, where I'll send you weekly dirt bike tips and information to help you with engine maintenance and rebuilding. Click below to sign up!
Sign me up for the eNewsletter!
I'm ready to take my dirt bike knowledge to the next level.