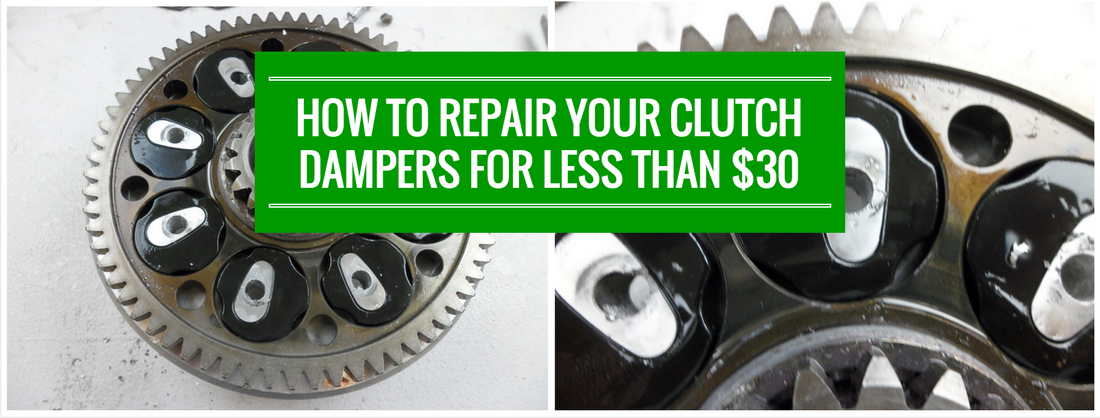
Most modern clutches incorporate rubber dampers which help reduce torque fluctuations through an engine’s drivetrain. Single cylinder engines (four-strokes especially) have high peak torque fluctuations since they only fire once every fourth stroke. The dampers situated between the clutch driven gear and clutch basket help smooth out the delivery of power to the gearbox and rear wheel.
The rubber dampers wear out from normal use and in most cases can be replaced. Replacement of the dampers is a fraction of the cost of buying a new clutch basket, does not require a lot of special tools, and you aren’t out anything if the project doesn’t go as planned.
Before I get into the details of replacing the dampers, you are probably wondering how you can tell the dampers are worn out. When the engine is running some additional gear noise coming from the clutch may be noted, but honestly this is a problem difficult to diagnose when the engine is together. Finding this problem is much more likely when servicing the clutch pack or performing other work on the engine.
The easiest way to determine if the dampers have worn is by trying to rotate the clutch gear independently from the clutch basket. Depending on how worn the dampers are this may take a little bit of force, so it is best to lock out the clutch gear and primary drive gear. Once locked, the basket can be rotated back and forth to check for free play. Alternatively the clutch gear can be clamped in the soft jaws of a vice while trying to rotate the basket back and forth. The clutch basket should not move independently from the clutch gear.
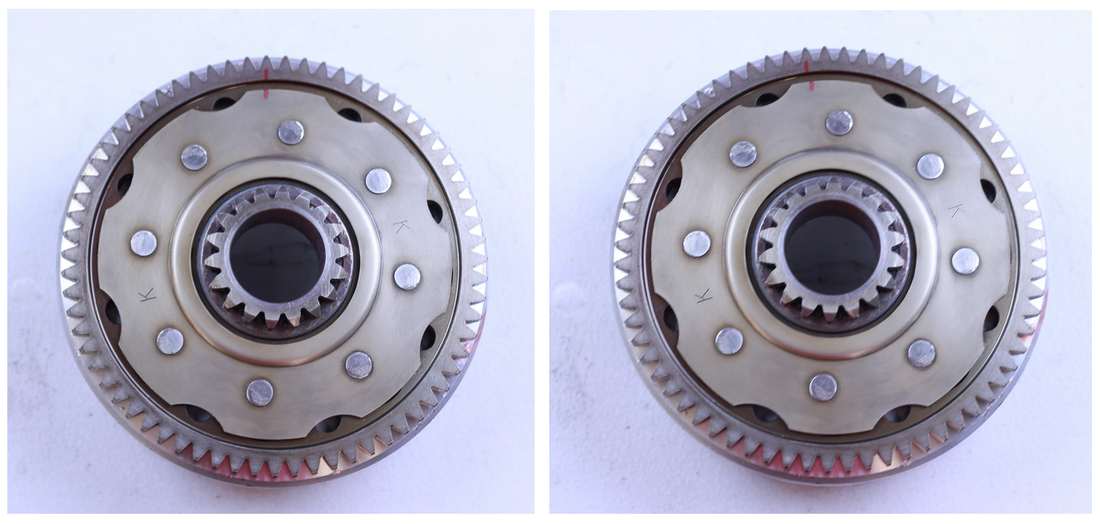
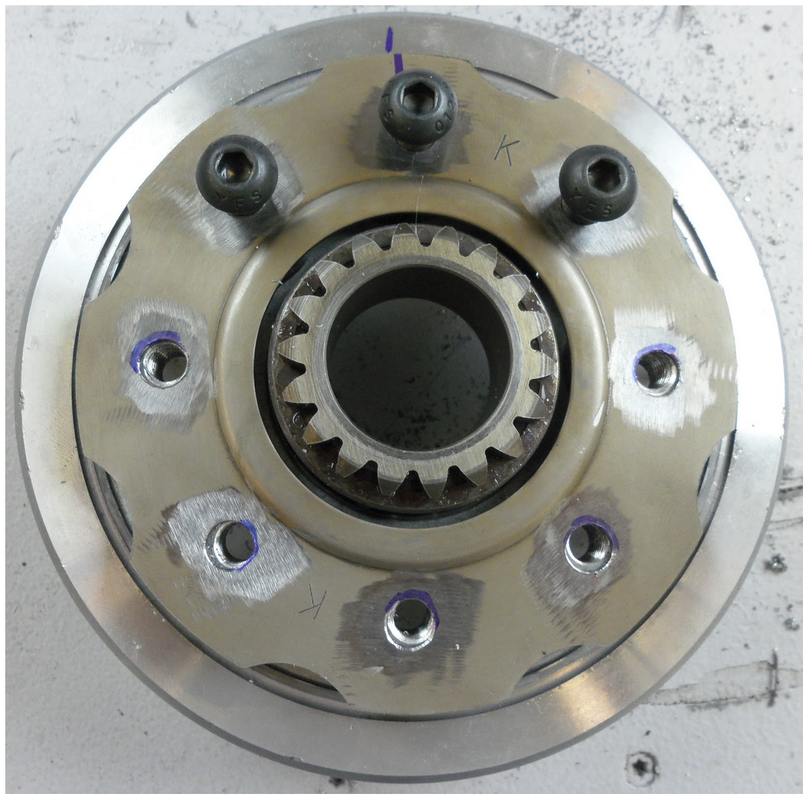
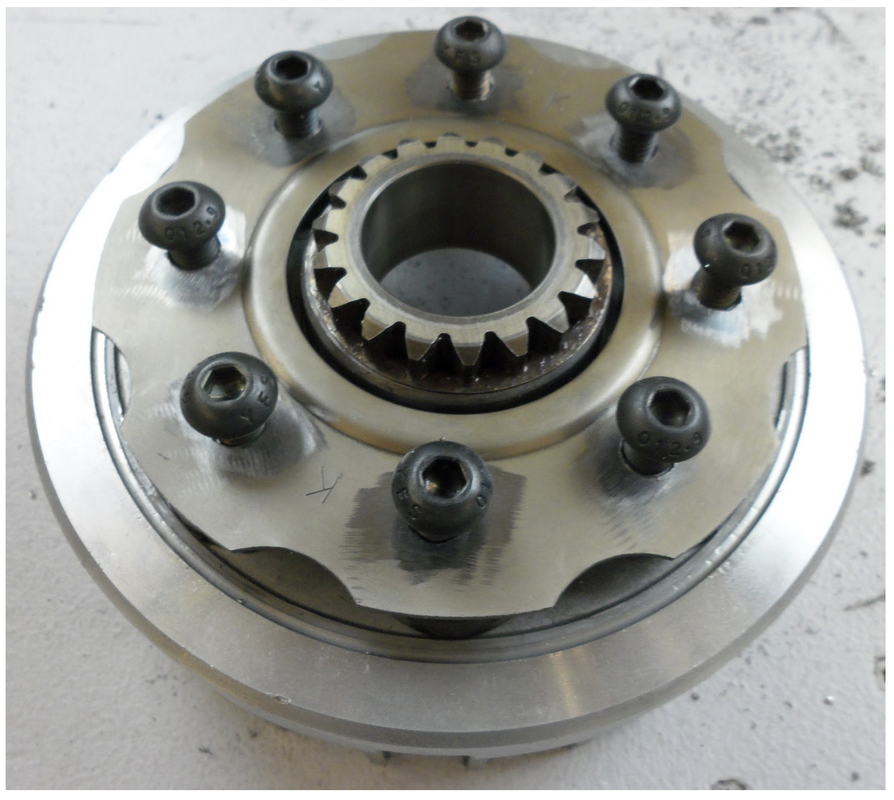
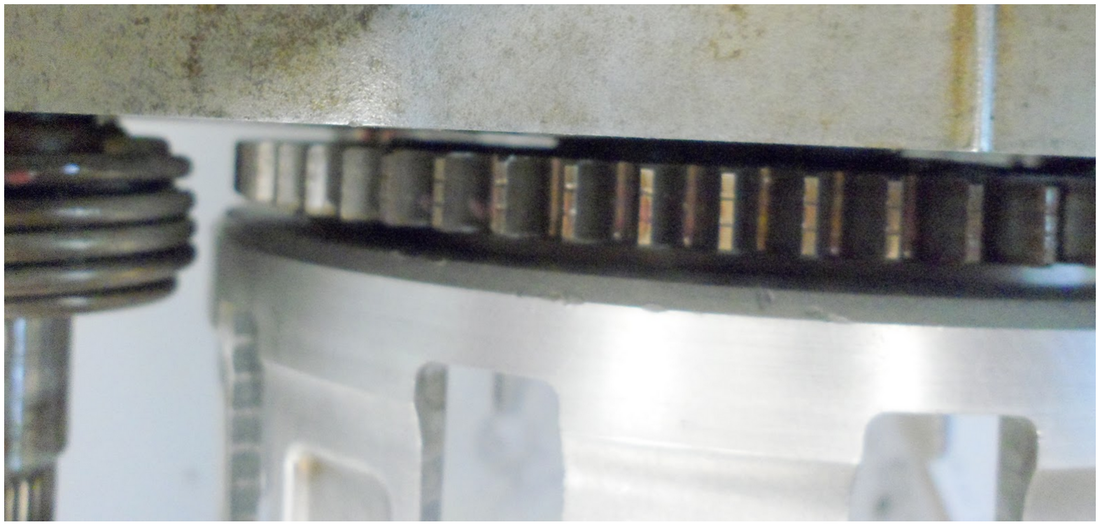
In the first photo note the alignment marks are perfectly aligned. In the second photo the marks have shifted about an ⅛” (3mm). This may not look like much, but it will feel like a lot when you twist the basket.
The rubber dampers wear out from normal use and in most cases can be replaced. Replacement of the dampers is a fraction of the cost of buying a new clutch basket, does not require a lot of special tools, and you aren’t out anything if the project doesn’t go as planned.
Before I get into the details of replacing the dampers, you are probably wondering how you can tell the dampers are worn out. When the engine is running some additional gear noise coming from the clutch may be noted, but honestly this is a problem difficult to diagnose when the engine is together. Finding this problem is much more likely when servicing the clutch pack or performing other work on the engine.
The easiest way to determine if the dampers have worn is by trying to rotate the clutch gear independently from the clutch basket. Depending on how worn the dampers are this may take a little bit of force, so it is best to lock out the clutch gear and primary drive gear. Once locked, the basket can be rotated back and forth to check for free play. Alternatively the clutch gear can be clamped in the soft jaws of a vice while trying to rotate the basket back and forth. The clutch basket should not move independently from the clutch gear.
In the first photo note the alignment marks are perfectly aligned. In the second photo the marks have shifted about an ⅛” (3mm). This may not look like much, but it will feel like a lot when you twist the basket.
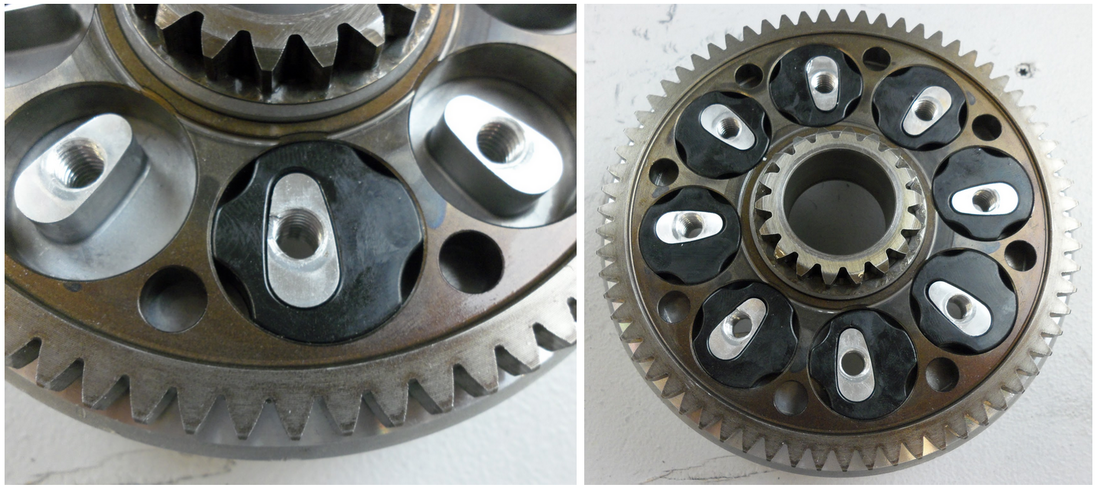
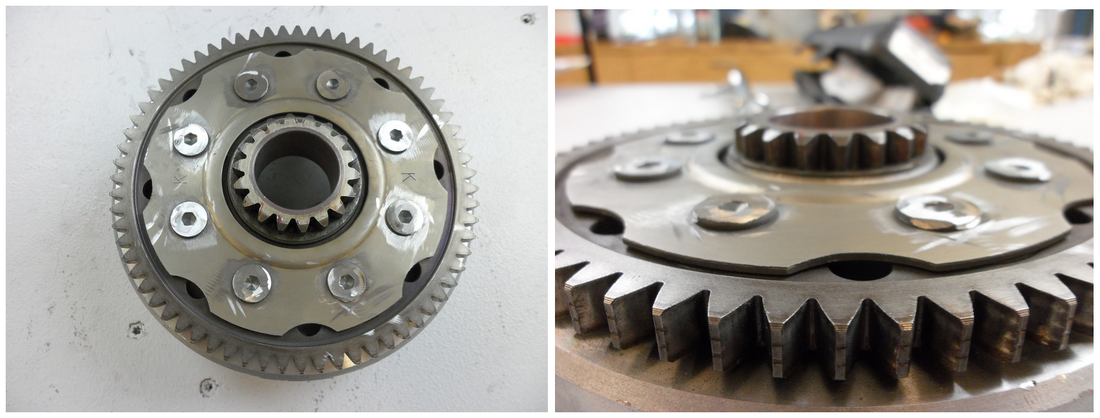
In order to replace the worn dampers the clutch gear will have to be removed from the clutch basket. Rivets are used to secure the gear to the basket and the rivets will have to be drilled out in order to remove the backing plate, gear, and dampers. Once the rivets have been removed, the old holes can be tapped and bolts installed to secure the gear to the basket.
Prior to starting this project you’ll want to make sure you can source new dampers for the clutch basket. Aftermarket clutch manufacturers often offer replacement dampers for their clutches which can work equally well in a stock basket. Hinson, Wiseco, and others supply “cushion kits” which can be purchased from their respective websites, through Ebay, Amazon, or anywhere else you may like to do your motorsport shopping.
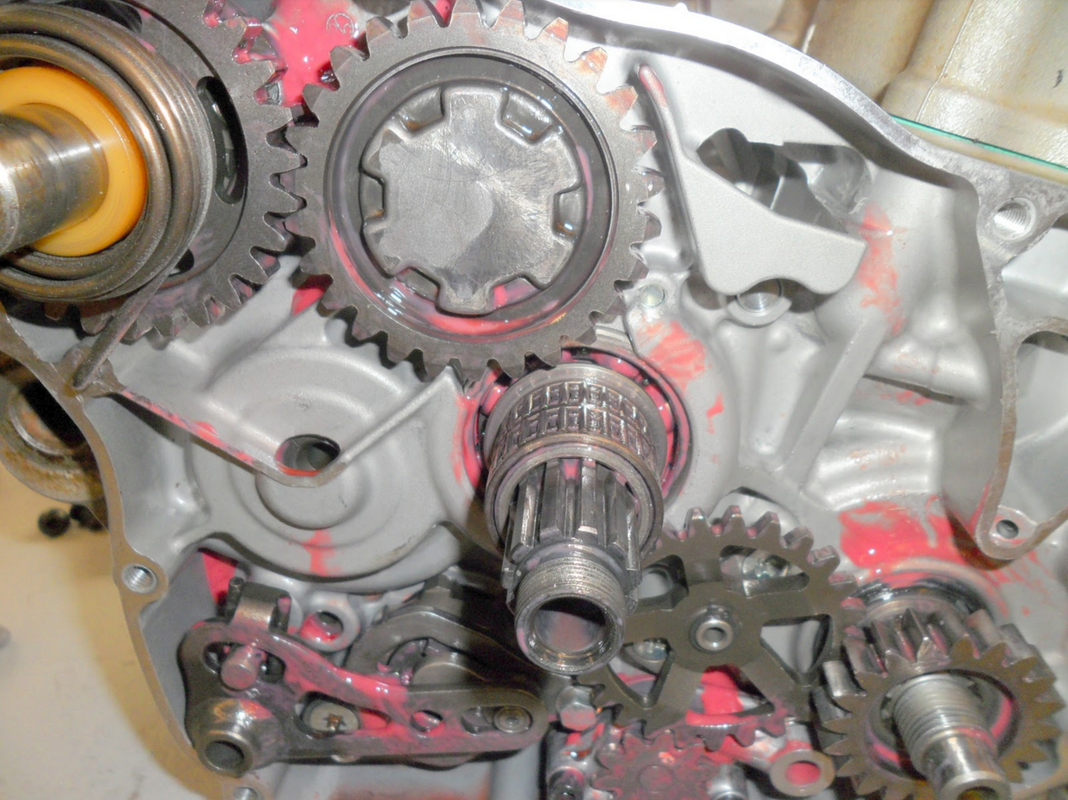
Before attempting to dismantle the clutch basket, check to see how much clearance is between the rivets and other features on the engine. Usually the idler gear will be the closest in proximity to the rivets. If the engine has an oil pump gear driven off the clutch, the oil pump gear may also be close to the rivets. Make a mental note of the clearance for future reference. The clearance between the parts when using bolts should be roughly equal to the clearance between the parts when the original rivets were used.
Prior to starting this project you’ll want to make sure you can source new dampers for the clutch basket. Aftermarket clutch manufacturers often offer replacement dampers for their clutches which can work equally well in a stock basket. Hinson, Wiseco, and others supply “cushion kits” which can be purchased from their respective websites, through Ebay, Amazon, or anywhere else you may like to do your motorsport shopping.
Before attempting to dismantle the clutch basket, check to see how much clearance is between the rivets and other features on the engine. Usually the idler gear will be the closest in proximity to the rivets. If the engine has an oil pump gear driven off the clutch, the oil pump gear may also be close to the rivets. Make a mental note of the clearance for future reference. The clearance between the parts when using bolts should be roughly equal to the clearance between the parts when the original rivets were used.
How successful you are at removing the old rivets will in large part dictate the size of the new bolts required. I made a couple of mistakes when repairing my clutch basket, so I ended up using bolts larger in size than I intended.
The first mistake I made was a very silly one in hindsight. I didn’t realize that on this particular clutch the rivets are countersunk. Anytime countersunk rivets are used, grinding their heads off won’t work.
The first mistake I made was a very silly one in hindsight. I didn’t realize that on this particular clutch the rivets are countersunk. Anytime countersunk rivets are used, grinding their heads off won’t work.
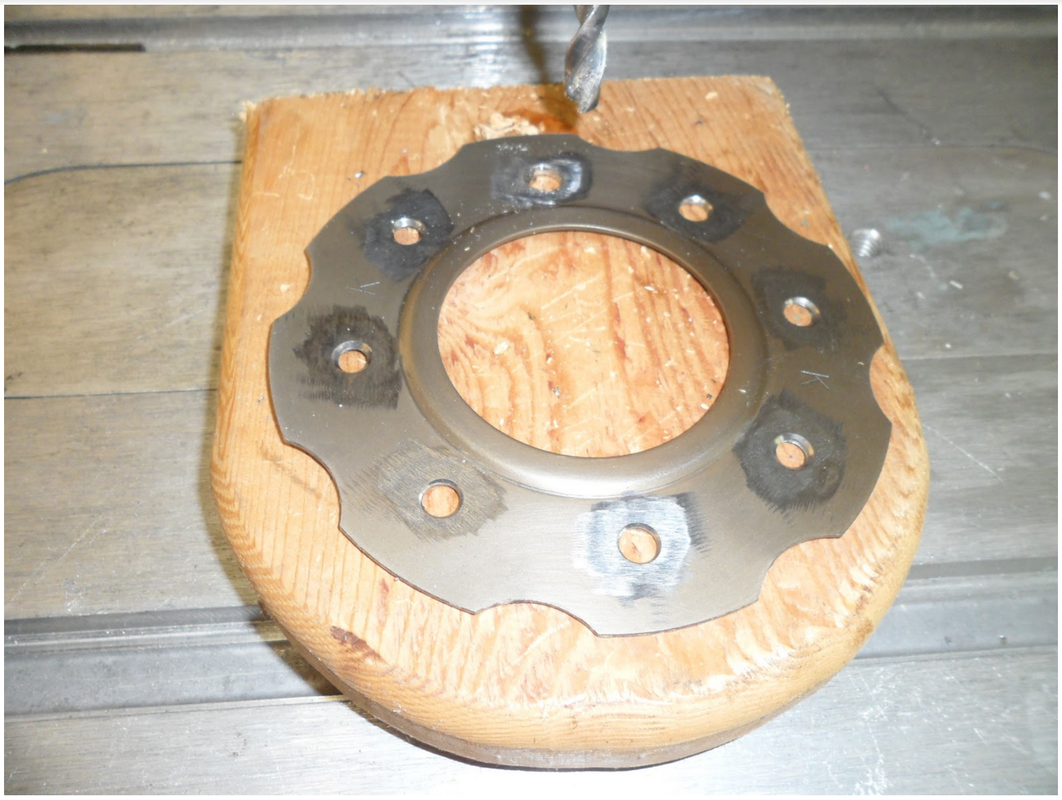
Instead of grinding, the rivets should be drilled from the back side. Use a center punch to help get the drill bit started on the right track.

Start with a small bit to create a pilot hole. Once the pilot has been created estimate the diameter of the rivets and select the corresponding bit size.
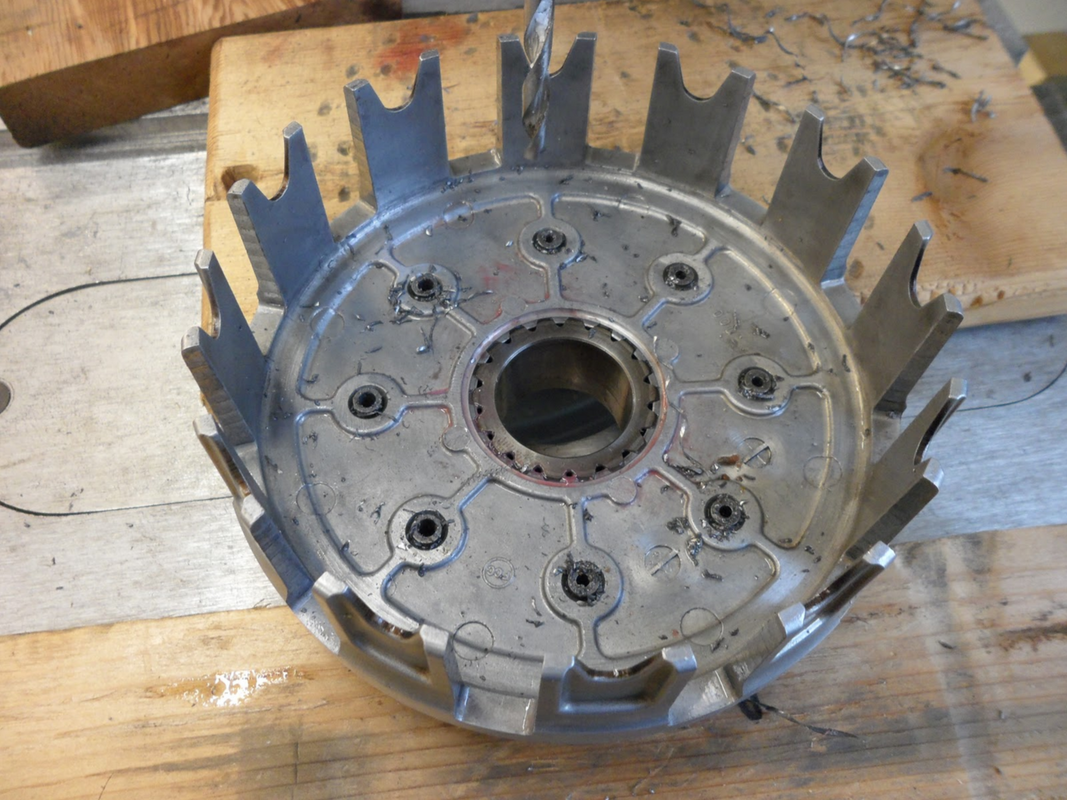
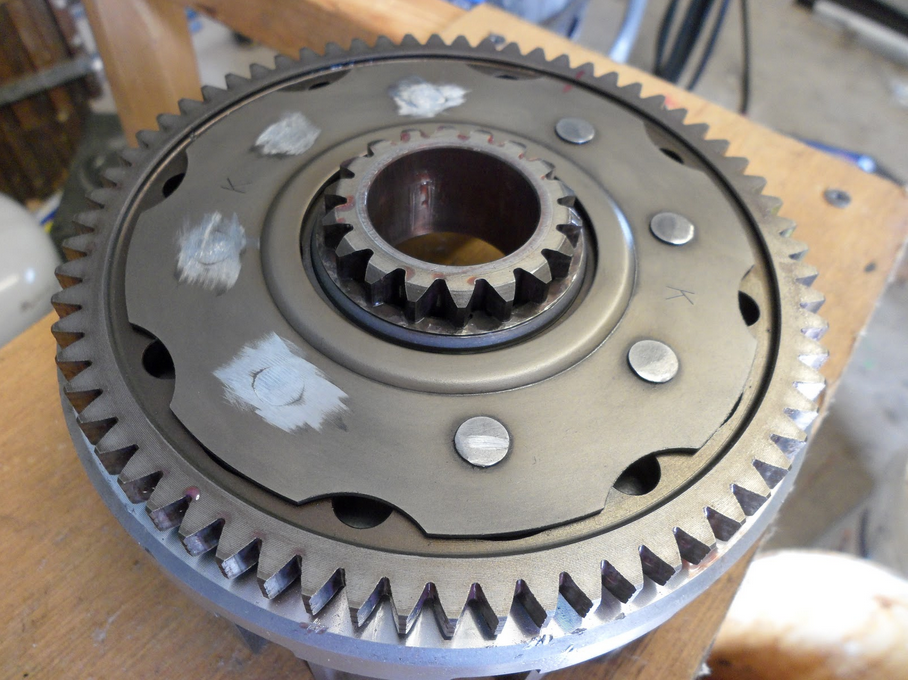
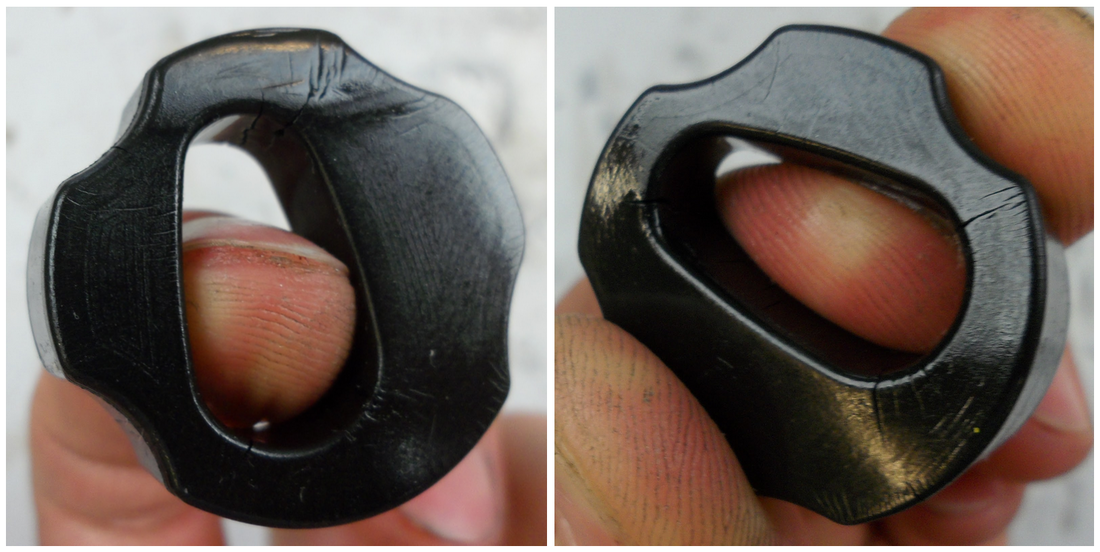
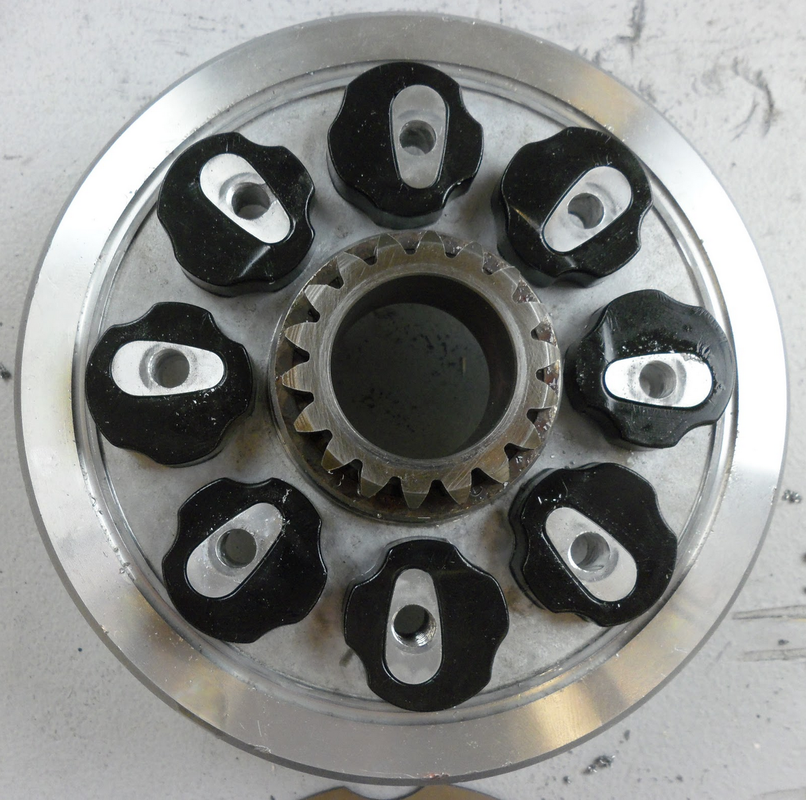
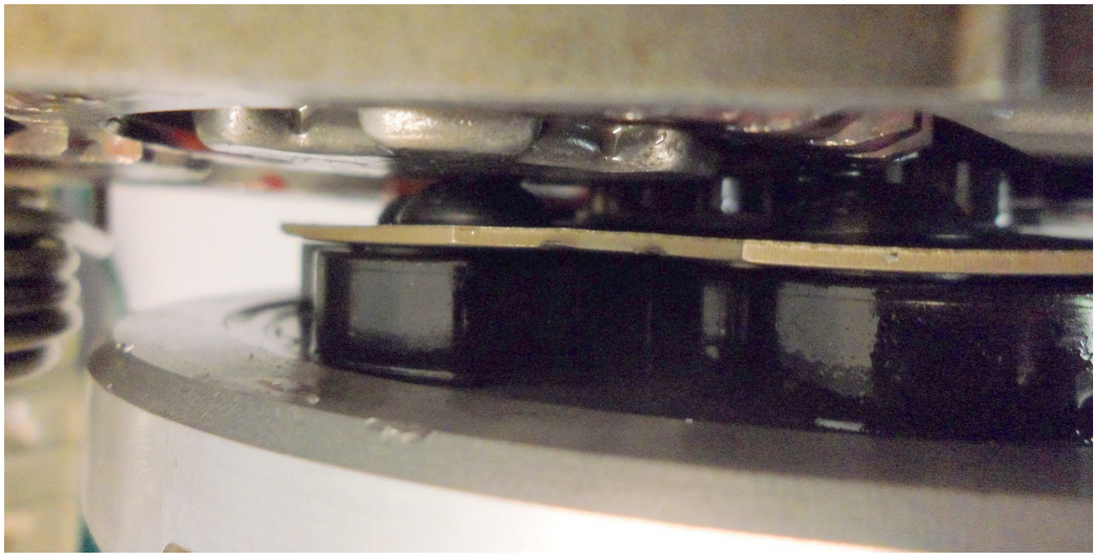
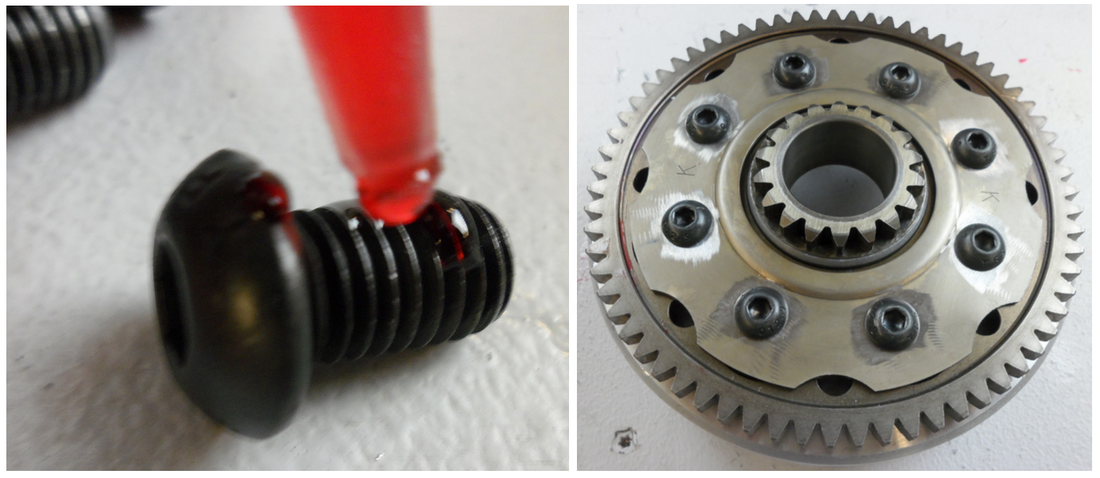
Once all the rivets have been drilled, the backing plate can be removed and the rubber dampers will expose themselves. At this point it should be easy to see how the dampers have deformed and no longer fill in the holes properly. The dampers can be directional so take note of the orientation of the dampers at this time.
The diameter of the rivet can be deceptive since both ends have been mushroomed. Most rivets will either be 5 or 6mm in diameter. Err on the safe side and start with a 5mm (#9 bit) before moving up in size. This way if everything is done correctly a 6mm x 1.00 tap can be used to thread the holes. I made the mistake of thinking I was dealing with 6mm rivets so I drilled my holes larger than necessary leaving me with no option but to use an 8mm x 1.25 tap and large 8mm bolts.
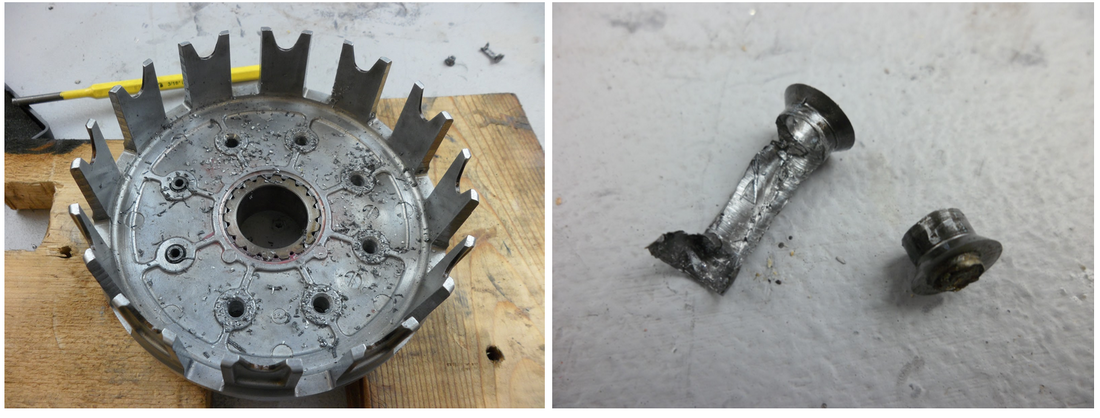
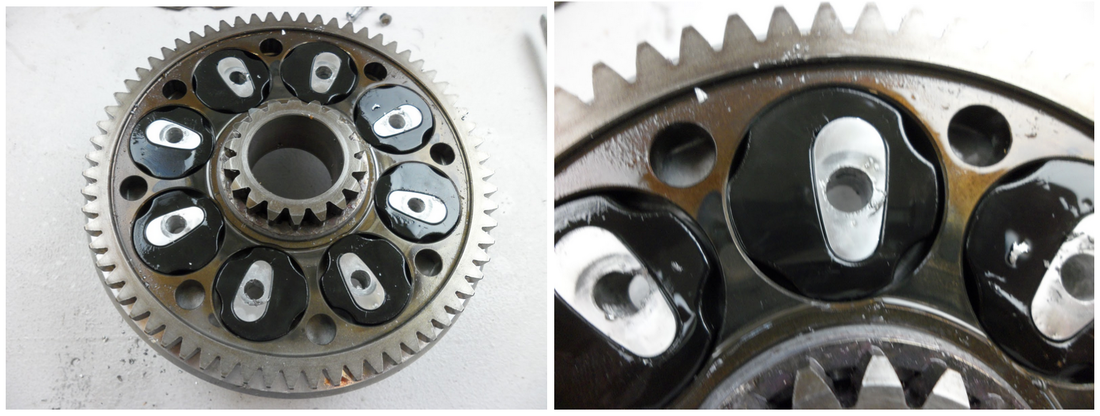
The dampers may also show signs of cracking and other damage.
Next, you’ll want to determine what bolts to use to secure the gear and backing plate back onto the clutch when it comes time to reassemble the clutch basket. Bolt size will strictly depend on the hole size you drilled to in order to remove the rivets. Ideally, the bolts will only be slightly larger than the original rivet, as this will allow for the easiest clearance between the bolt head and the idler gear. Keep in mind the following tap drill sizes for common metric bolt diameters and thread pitches.
6.00mm x 1.00 - #8 drill bit
7.00mm x 1.00 - letter “B” or 15/64” drill bit
8.00mm x 1.25 - letter “H” or 17/64” drill bit
The bolt head type will come down to your given clearance requirements between the backing plate and idler gear. You may find that a countersunk or button style head will work well. A great resource for selecting fasteners is at McMaster-Carr. If you’ve never explored McMaster-Carr you’ll quickly come to find that they sell just about everything under the sun and if you’re not careful you may part with more money than you originally intended! A few other good sources for metric hardware include Ebay (simply type in the bolt type you’re searching for in the search to turn up lots of results), Maryland Metric, and Boltnet.
For my basket I chose an 8mm x 1.25 Grade 12.9 socket head button which was 14mm long. Once the bolt has been selected, the backing plate and basket can be modified to suit. Start by enlarging the backing plate so that it will accept the bolts.
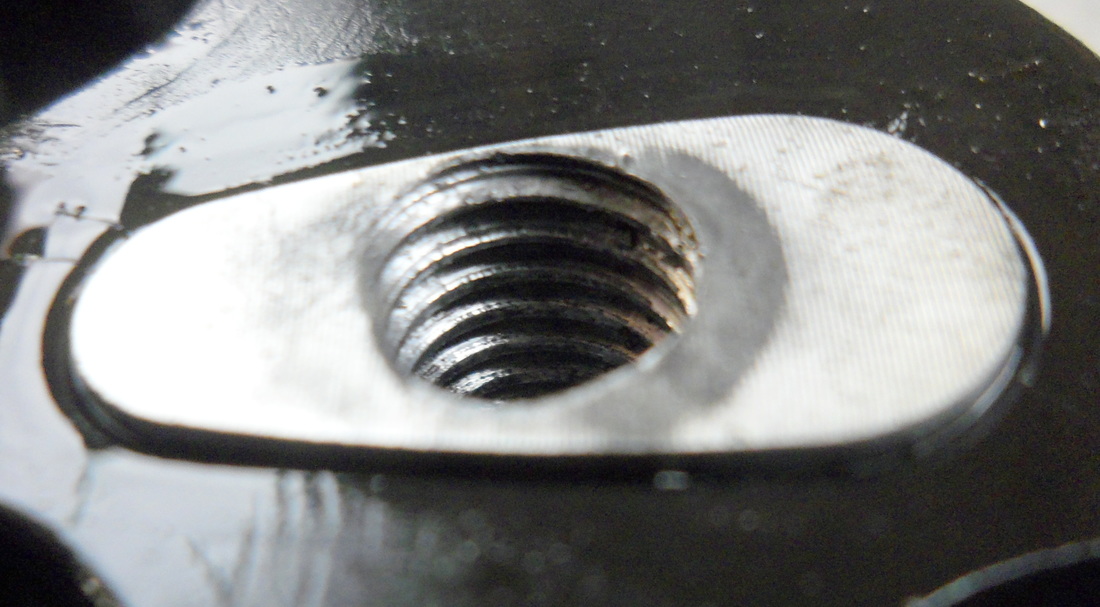
Once the backing plate has been drilled, if necessary, drill the basket rivet holes to the correct size so that the holes can be tapped. Be very careful when centering the drill bit in the hole. The more precise you are in this step the better the backing plate holes will align. Since the bit may have wandered a little bit when drilling the rivets out, it may be impossible to get everything centered just right. This isn’t the end of the world and adjustments can be made to the backing plate to get it to fit correctly.
|
|
Once all the holes have been drilled, carefully tap them using an appropriately sized tap. Once all the holes have been tapped, carefully add a chamfer to the top of the hole. This will deburr the hole and remove any raised edges which may keep the backing plate from sitting flat against the bosses. A drill bit larger in diameter than the hole or a deburring tool can be used to deburr the edge of the hole.
Proceed to fit the backing plate to see how the holes are lining up. As you can see, my holes wandered quite a bit when I drilled them so my backing plate holes don’t align well with the basket holes. I’ve shaded in with blue marker where I need to elongate the hole in order for the bolt can fit. Make sure an alignment mark is added to the backing plate and basket since the hole pattern is no longer symmetrical.
I used a rotary burr to elongate the holes, however, a hand file will work just as well. It will require a little more elbow grease and take a little longer though. Deburr the backing plate to remove any burrs which may keep it from sitting flat against the clutch basket bosses. After making adjustments to the holes, all the bolts should easily thread into their respective holes.
At this point the clearance between the bolt heads and gears can be checked. As you can see, my bolt heads are too tall and will need to be ground down once they are permanently installed.
Grinding the heads is not ideal, but it ended up being inevitable for my application. Any necessary grinding will take place after final assembly since there may not be enough engagement between the bolt and bit.
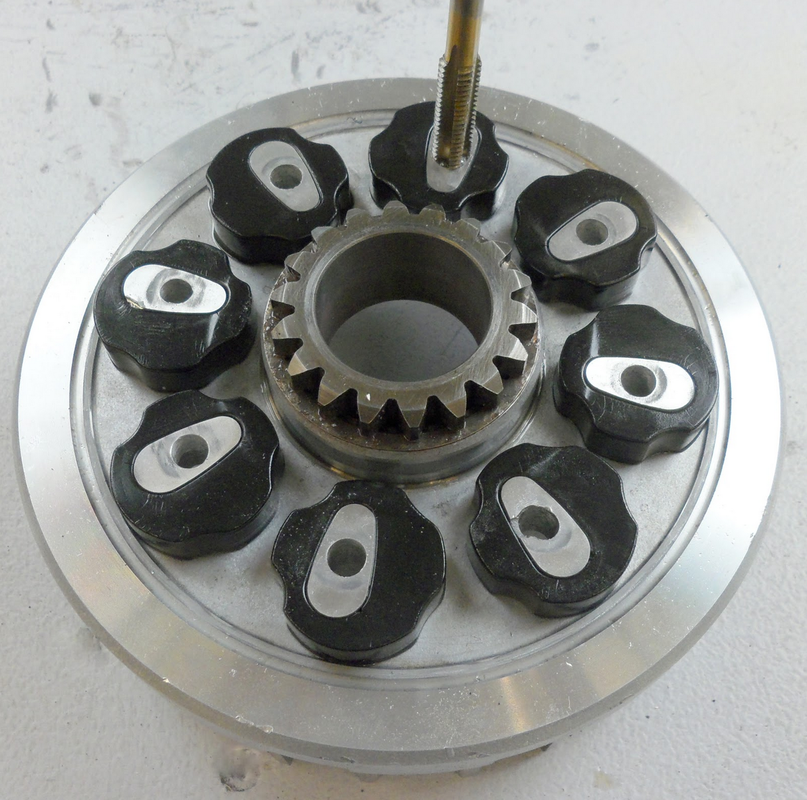
After clearances have been checked and everything is ready for final assembly, the parts should all be thoroughly cleaned to remove any metal debris stuck to them. The clutch gear and new dampers can be reinstalled. If the dampers are directional, make sure they are installed in the correct orientation.
After clearances have been checked and everything is ready for final assembly, the parts should all be thoroughly cleaned to remove any metal debris stuck to them. The clutch gear and new dampers can be reinstalled. If the dampers are directional, make sure they are installed in the correct orientation.
Next, install the backing plate. Apply a permanent thread locking agent to the bolts. Then install all the bolts. The diameter of the bolt and grade will dictate how it should be torqued. For your reference with the locking agent applied, I torqued my Grade 12.9 8mm x 1.25 bolts to 30Nm. Follow this link to view guidelines for torque specs on other metric fasteners.
If you were successful in selecting a bolt that clears the gears behind the clutch then you can give yourself a pat on the back as your work is done! If you are using bolts which must have their heads shortened this can be done using a grinding disc, mill, or any other suitable tool. Remove material from the bolt heads slowly and take just enough away so that the head clears the idler gear and any other obstacles.
I ended up removing most of the head and won’t be able to tighten or loosen the bolts, however, I planned for this prior to grinding. Removing the bolts isn’t a great concern because other parts of the basket such as the fingers will wear out sooner than the dampers will.
In total this fix cost me just under $30 and will prolong the life of my clutch basket. With this write up you should also be able to repair clutch baskets with worn dampers, save yourself money, and prolong the life of expensive engine parts. If you have questions, comments, or want to share your experiences leave a comment below!
If you liked this post and want more dirt bike info, I send out a weekly eNewsletter with tons of free tips and tricks. Enter your email below to get signed up.
If you liked this post and want more dirt bike info, I send out a weekly eNewsletter with tons of free tips and tricks. Enter your email below to get signed up.
Sign me up for the eNewsletter!
I'm ready to take my dirt bike knowledge to the next level.