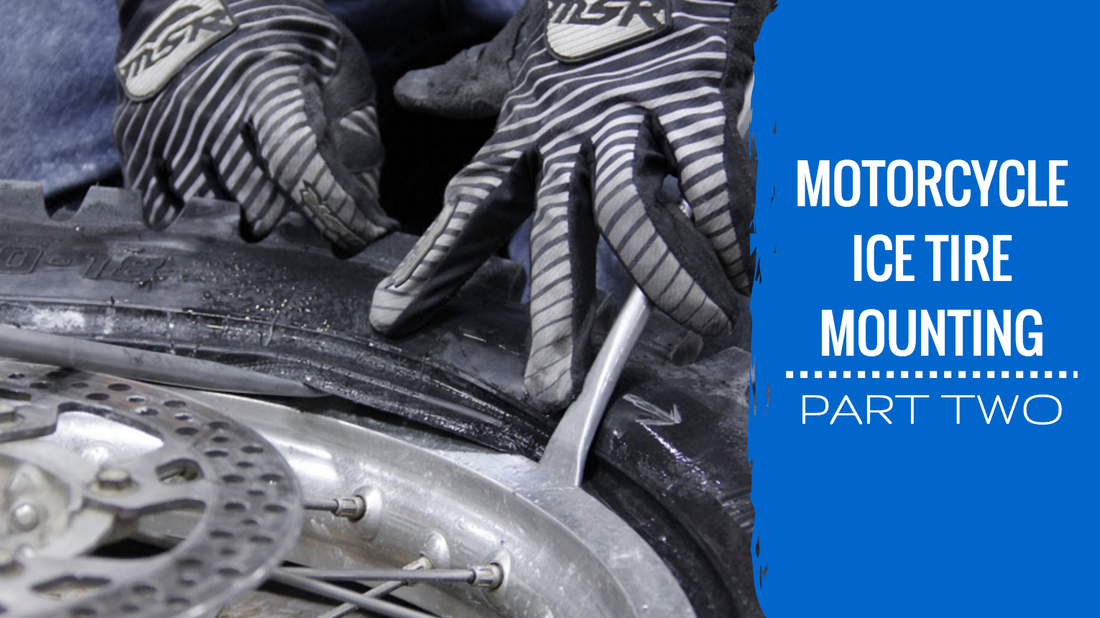
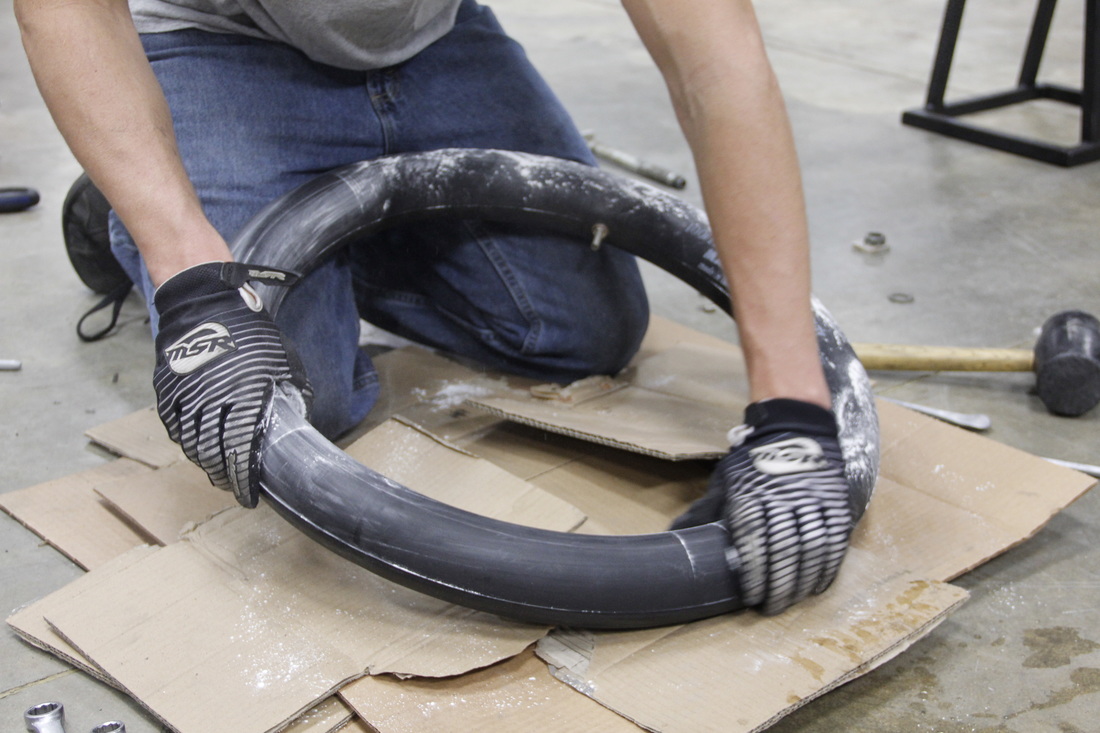
In today’s post Jarrett and I are primarily going to focus on mounting ice tires. Most ice tires are heavy duty, they may require an additional tire liner to be installed during the mounting process, and in general they can be difficult to work with. I’ll be working through the mounting process with Jarrett’s guidance and using his tips to ensure I don’t puncture a tube.
To best illustrate the mounting process, studding process (next week’s post), and all the knowledge Jarrett shared in our previous post, I’ll be preparing a new set of tires. Jarrett will continue to chime in with (much needed) guidance and commentary. We’ll get into more detail on why things are done in a specific way, and share examples of tire builds that you can use as a reference.
My first set of ice tires was a Bridgestone front and Kenda rear combo built by Jeff Fredette. I liked the Bridgestone front, but have had some trouble maintaining traction with the Kenda rear on anything but clean ice. I decided this year that I wanted to try something new and after talking with Jarrett, I was sold on the Mitas Ice Kings. Full disclosure, I am not an affiliate of Mitas Ice King Tires, I just love their product. To me, the Mitas ice tires are advantageous for a number of reasons. First, they were designed for the ice and have a rubber compound that was specifically made for cold weather riding. Second, the tires don’t require any internal tire liners, which simplifies the mounting process and may save a little weight. Third, the tread pattern was designed to work in conditions where the ice isn’t perfectly clean. Finally, since the tires were designed knowing that screws would be installed, the tires are also more tolerant of being screwed into. This results in a longer lasting tire. Needless to say, the following walkthroughs on mounting and studding will feature a set of the Mitas Ice Kings
Mounting Ice Tires
Paul: Ice tires are inherently more difficult to mount than normal MX tires due to their thickness, stiffness, and extra liners (if any are used). I’ve always hated mounting tires and have never been great at it, so every year when it is time to mount my ice tires I’ve always despised the task. Jarrett compiled a list of awesome tips that I applied as I mounted my new tires this year. Some of his tips I’ve been doing for years and some were completely new to me. Regardless, his pointers are great reminders for everyone and the new info Jarrett provided made the job so much easier.
Paul: Ice tires are inherently more difficult to mount than normal MX tires due to their thickness, stiffness, and extra liners (if any are used). I’ve always hated mounting tires and have never been great at it, so every year when it is time to mount my ice tires I’ve always despised the task. Jarrett compiled a list of awesome tips that I applied as I mounted my new tires this year. Some of his tips I’ve been doing for years and some were completely new to me. Regardless, his pointers are great reminders for everyone and the new info Jarrett provided made the job so much easier.
Jarrett: After 8 years of ice racing and approximately 500+ ice tire swaps (we did 30 sets in one week once!) I can assure you our way is the best way, tested through attrition.
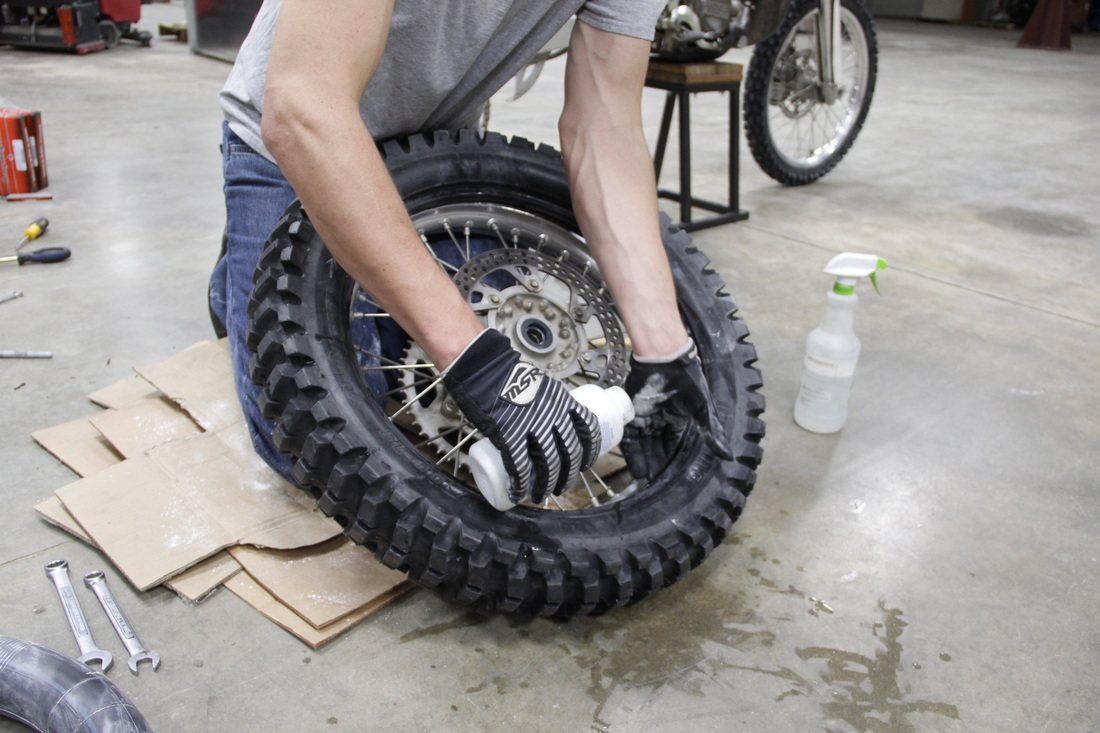
Paul: The tires I’ll be mounting are the Mitas Ice Kings. These tires are very thick and were designed to be studded after they have been mounted. Some tires which require a liner (pretty much everything other than a Mitas) will need to be studded before they are mounted. Studding lined tires before mounting is important to ensure the liner is situated inside the tire correctly and that all the screws have found their way into the liner and won’t puncture the tube.
What You Will Need
Paul: I’m going to start at the beginning with the tire completely off the rim. A lot of Jarrett’s knowledge comes into play once the tire is halfway on, at which point he’ll chime in with many pointers.
I’ve already checked my rim for trueness, felt for sharp spots, and installed a new rim strip so I know it’s good to go. If you haven’t, you should definitely complete these steps before going through the trouble of mounting the tires.
Paul: The tires I’ll be mounting are the Mitas Ice Kings. These tires are very thick and were designed to be studded after they have been mounted. Some tires which require a liner (pretty much everything other than a Mitas) will need to be studded before they are mounted. Studding lined tires before mounting is important to ensure the liner is situated inside the tire correctly and that all the screws have found their way into the liner and won’t puncture the tube.
What You Will Need
- 2 -3 tire irons
- Bead Buddy
- Tire Tamer
- 4 - 5 wrenches
- Soapy water in a spray bottle
- Baby powder
- Tube Snake (Optional)
Paul: I’m going to start at the beginning with the tire completely off the rim. A lot of Jarrett’s knowledge comes into play once the tire is halfway on, at which point he’ll chime in with many pointers.
I’ve already checked my rim for trueness, felt for sharp spots, and installed a new rim strip so I know it’s good to go. If you haven’t, you should definitely complete these steps before going through the trouble of mounting the tires.
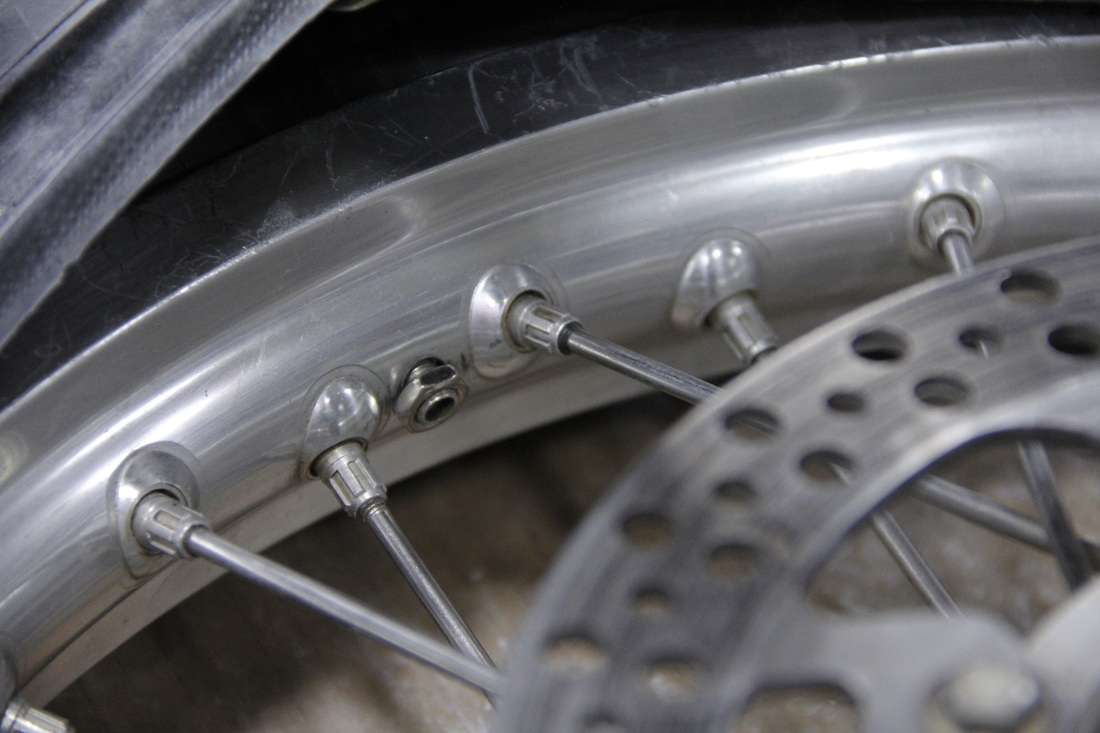
Jarrett: I want to point out that the Motion Pro composite rim locks are great for ice applications. They are lighter than a standard rim lock and aid in tire mounting as they don’t catch on the tube.
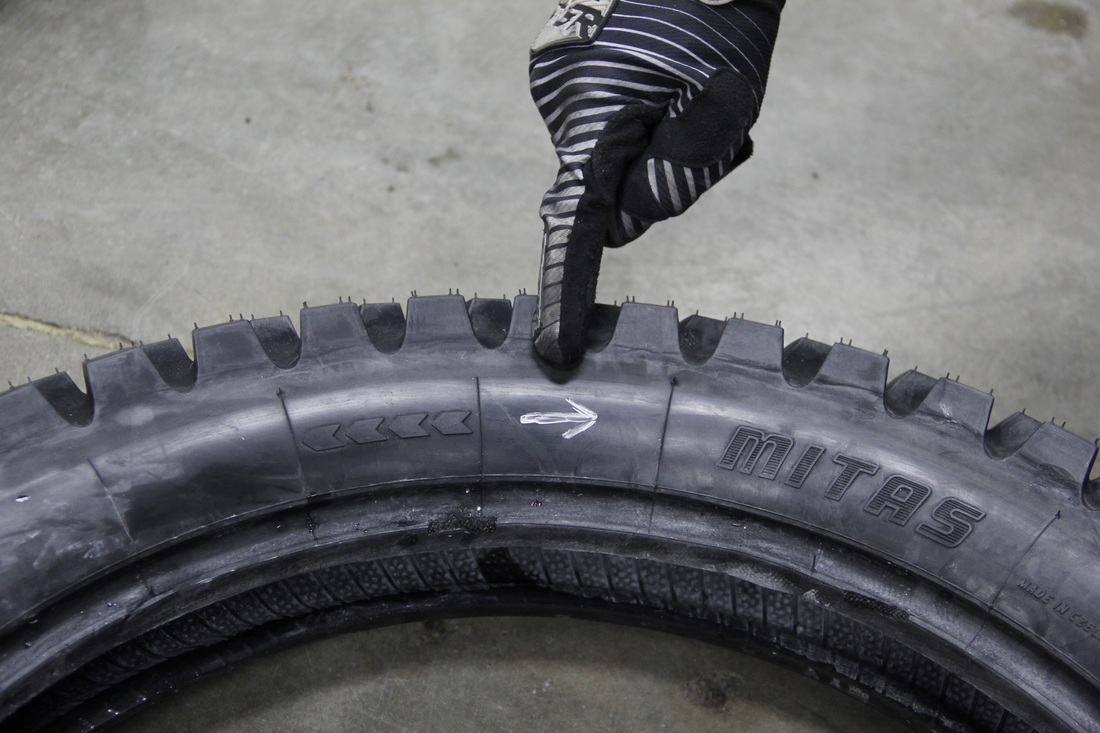
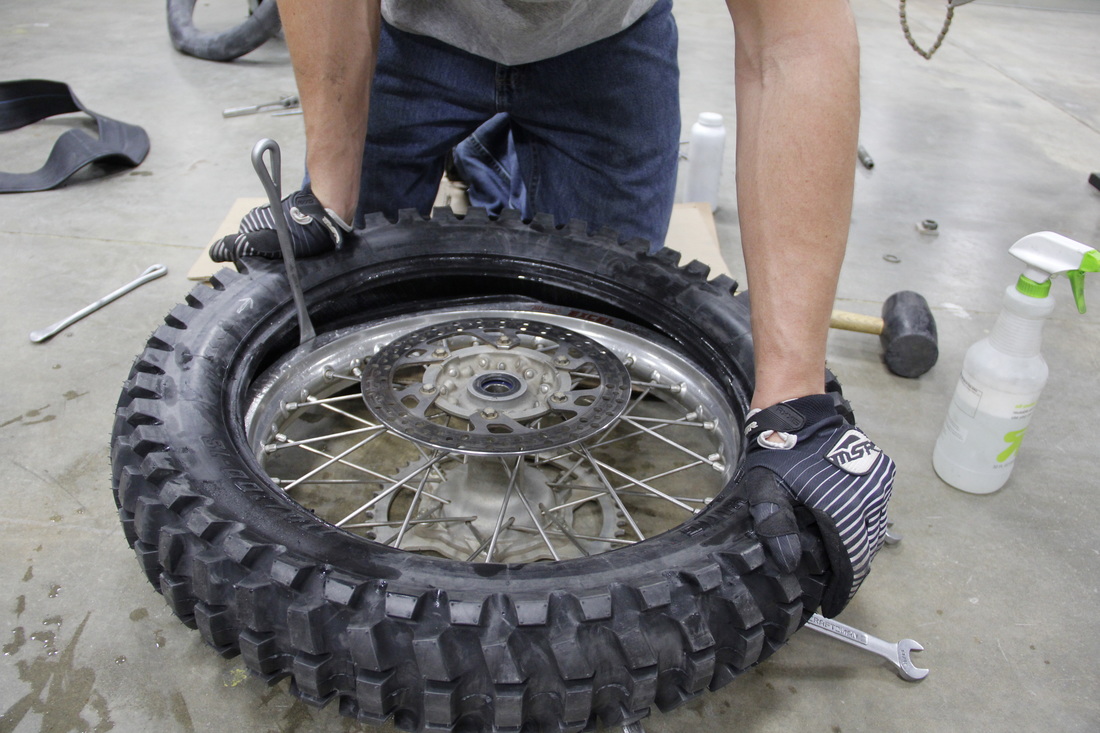
Paul: The first order of business is to get half the tire over the rim. The Rear Mitas Ice King must be mounted backwards from the prescribed directional arrows.
Paul: The first order of business is to get half the tire over the rim. The Rear Mitas Ice King must be mounted backwards from the prescribed directional arrows.
I like to start by installing the sprocket side of the tire into the rim first. This allows the majority of the work to be completed with the sprocket facing down and keeps bloody appendages and cursory phrases to a minimum.
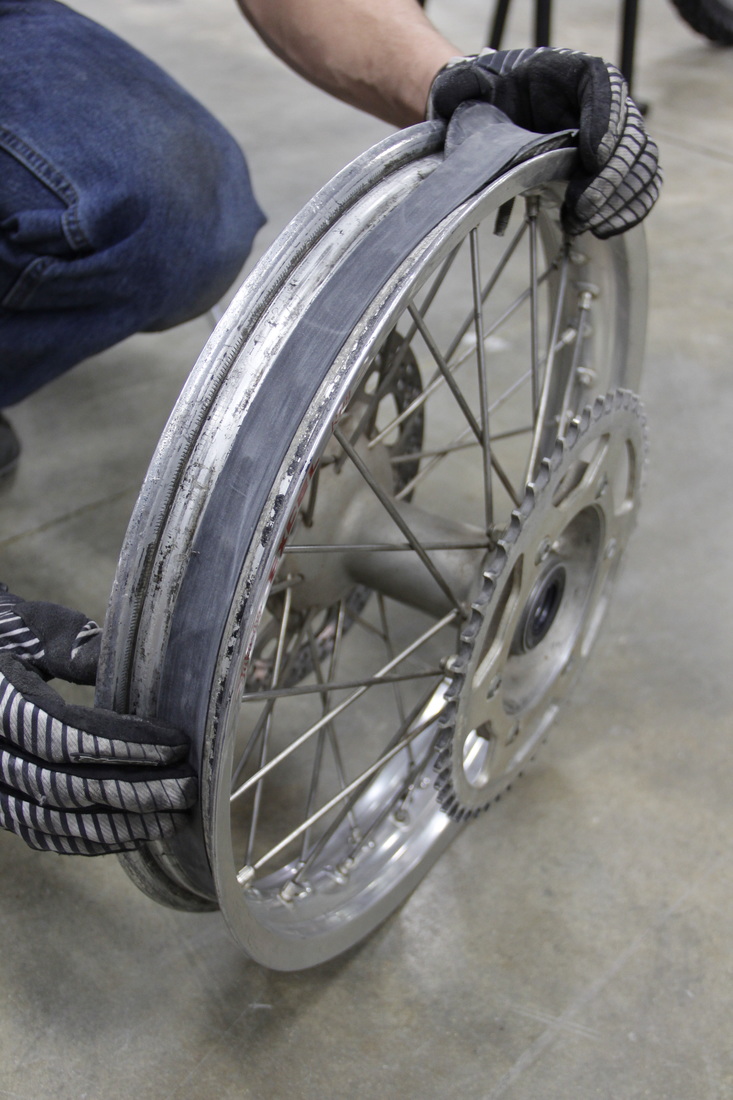
Start by aligning the rim so that the rim strip faces up. Then position the rim so that the bead falls into the drop center (deep dished, center portion of the rim). Force the tire around as much of the rim as possible.
Next, flip the tire and rim over so that the sprocket faces down.
Next, flip the tire and rim over so that the sprocket faces down.

Generously apply lube to the bead of the tire.

Use a pair of tire irons to work the tire over the rim.
Make sure the bead of the tire stays in the drop center of the rim as you work.
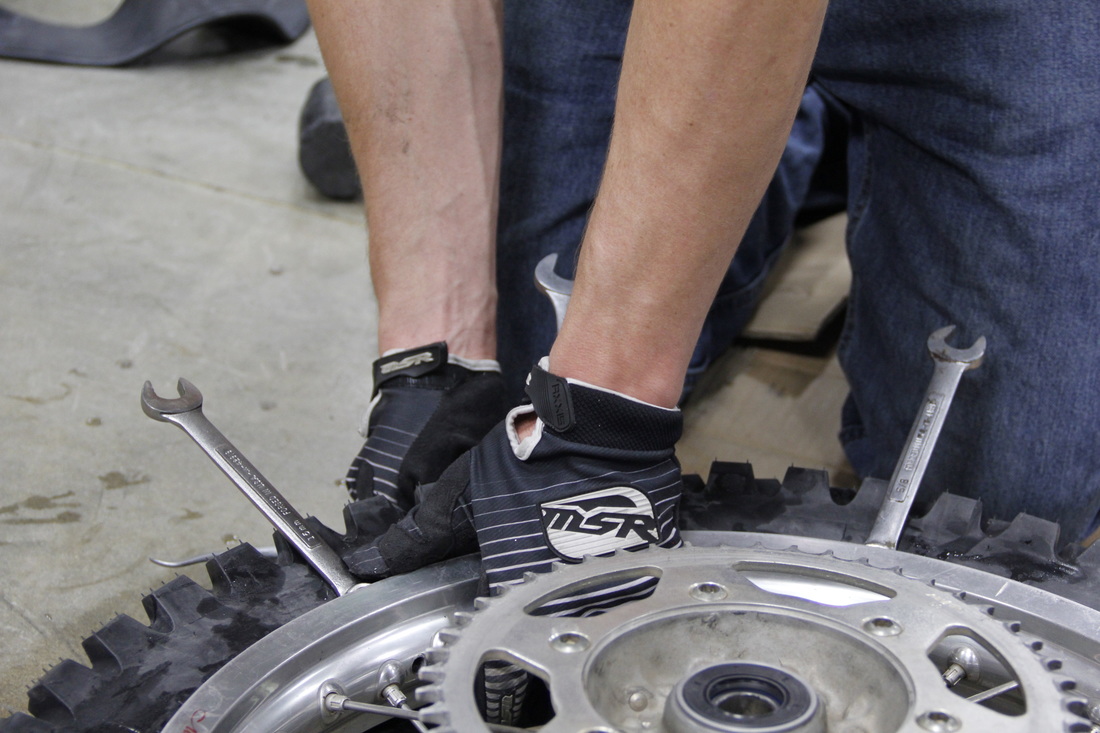
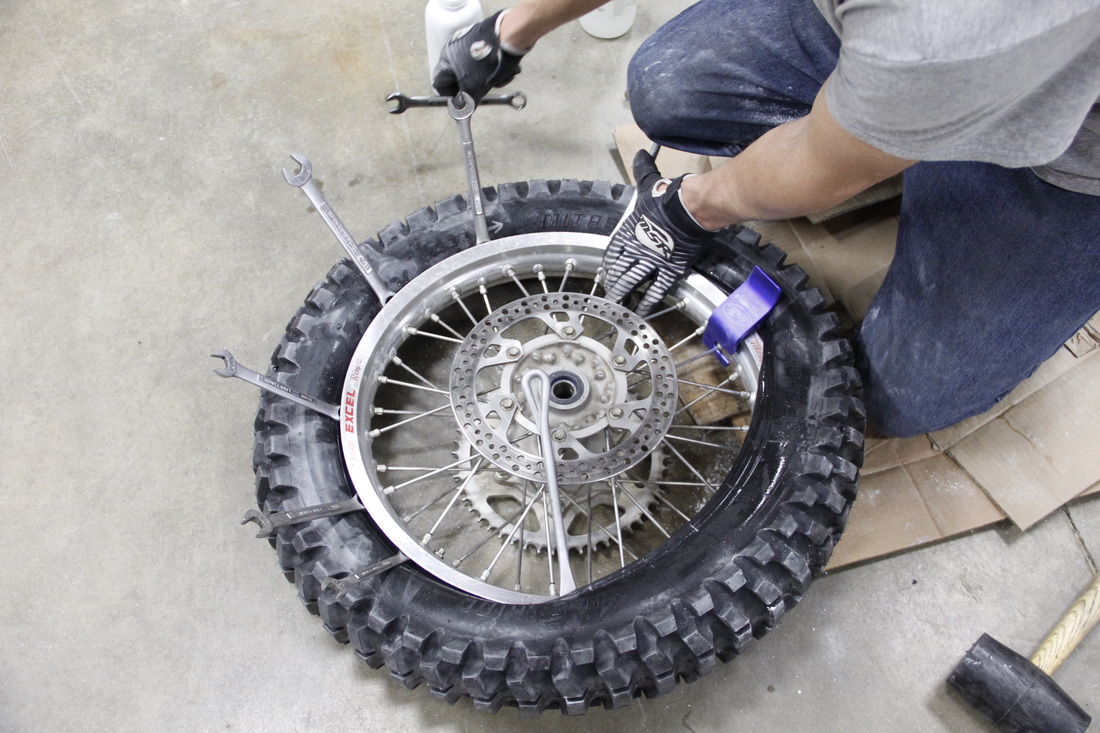
Jarrett: To help keep the bead down, an old trick we use is to insert wrenches between the bead and the rim.
Paul: Thanks to Jarrett I just started incorporating this trick and it makes a world of difference!
Paul: Thanks to Jarrett I just started incorporating this trick and it makes a world of difference!
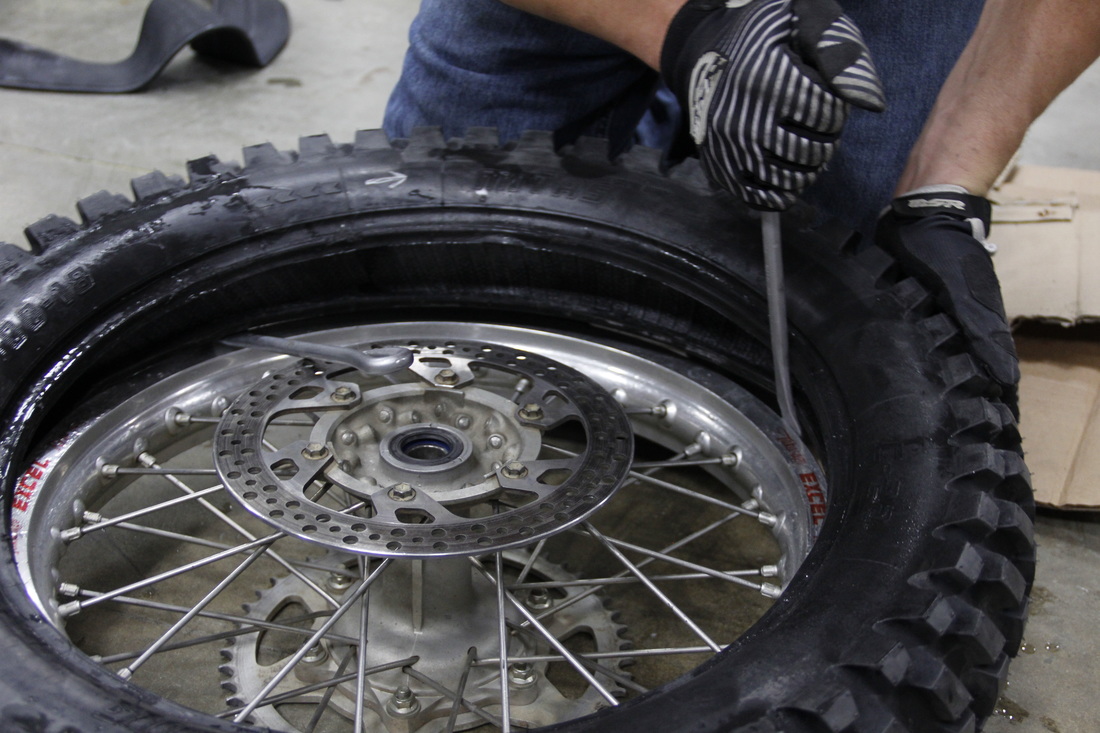
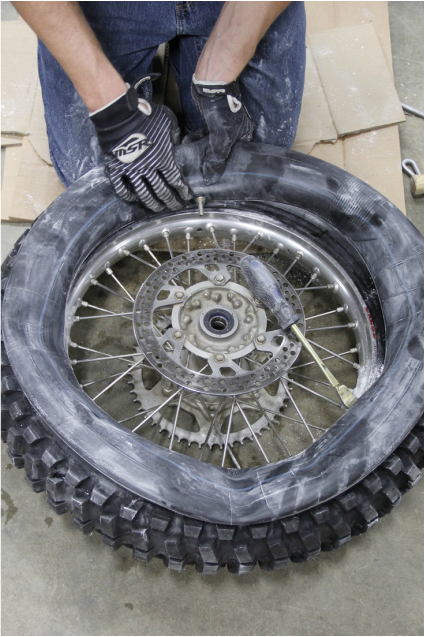
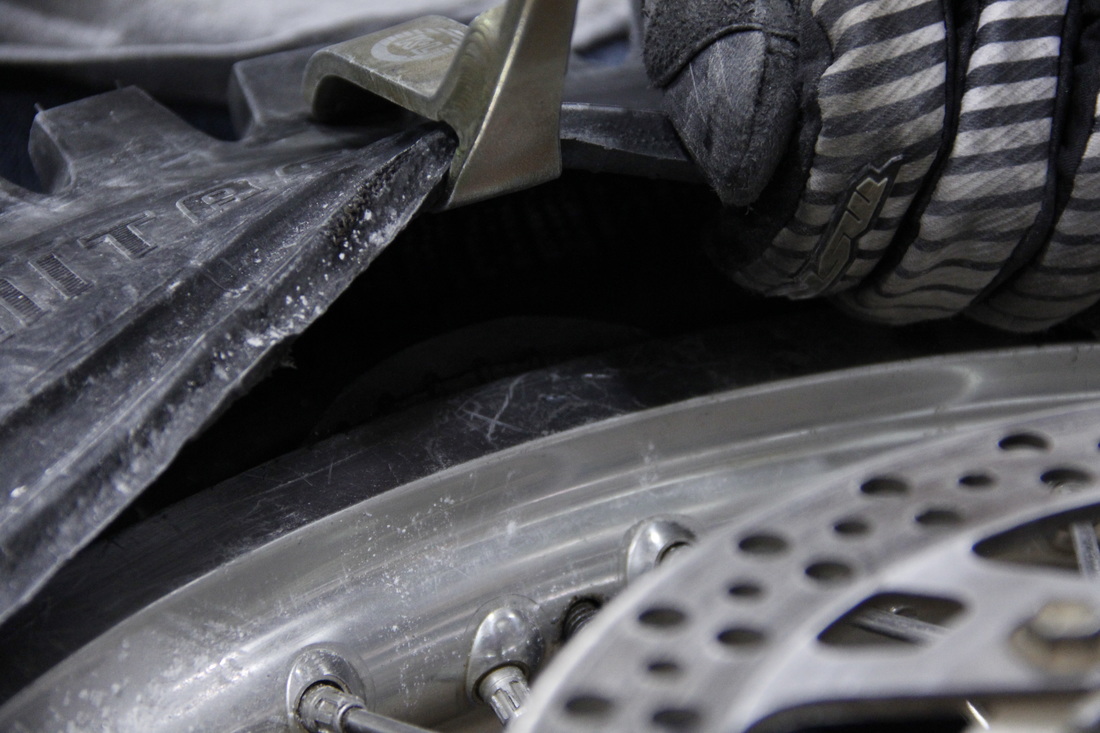
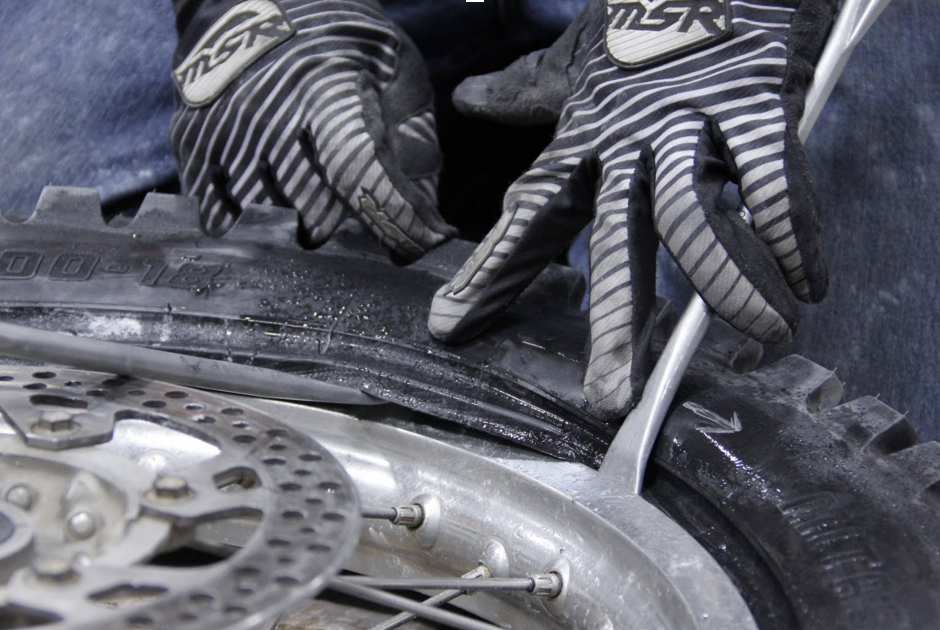
Before pulling the tire completely over the rim make sure the bead lock is pulled all the way in against the rim so that it doesn’t snag the bead.
Once the tire is on the rim the bead is still above the rim lock. In order to situate the bead down between the rim lock and rim, the bead must be pulled over across the rim.
To do this, the tire is flipped over so the sprocket faces up. Then tire irons are inserted on both sides of the rim lock.
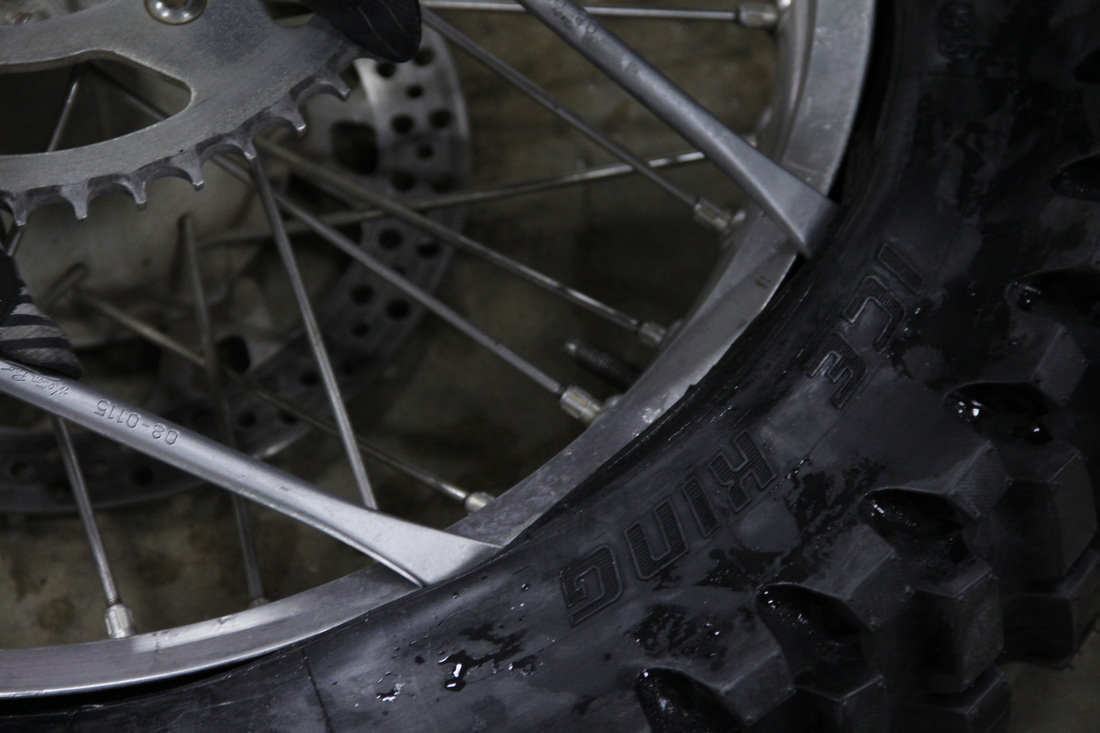
This allows the bead to be pulled completely over the rim lock. Then the rim lock is pushed up while the irons are removed from the rim and the bead falls back down into the rim.
At this point the first half of the tire is seated correctly in the rim. Next, preparations will be made to install the tube.
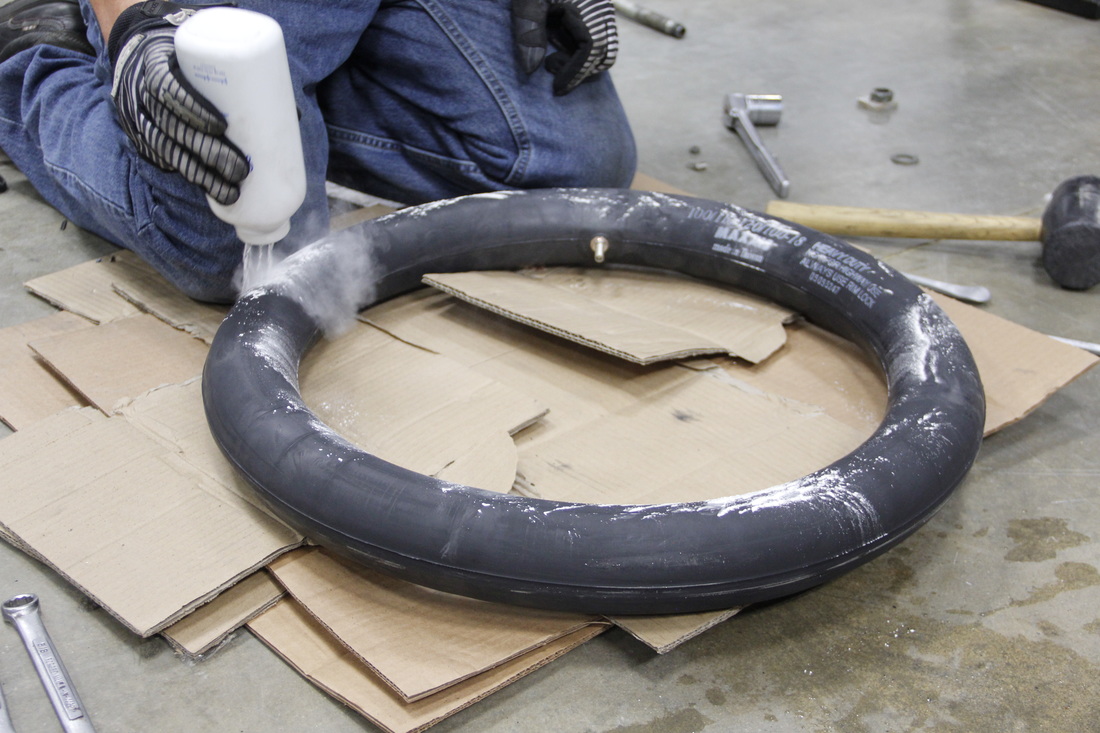
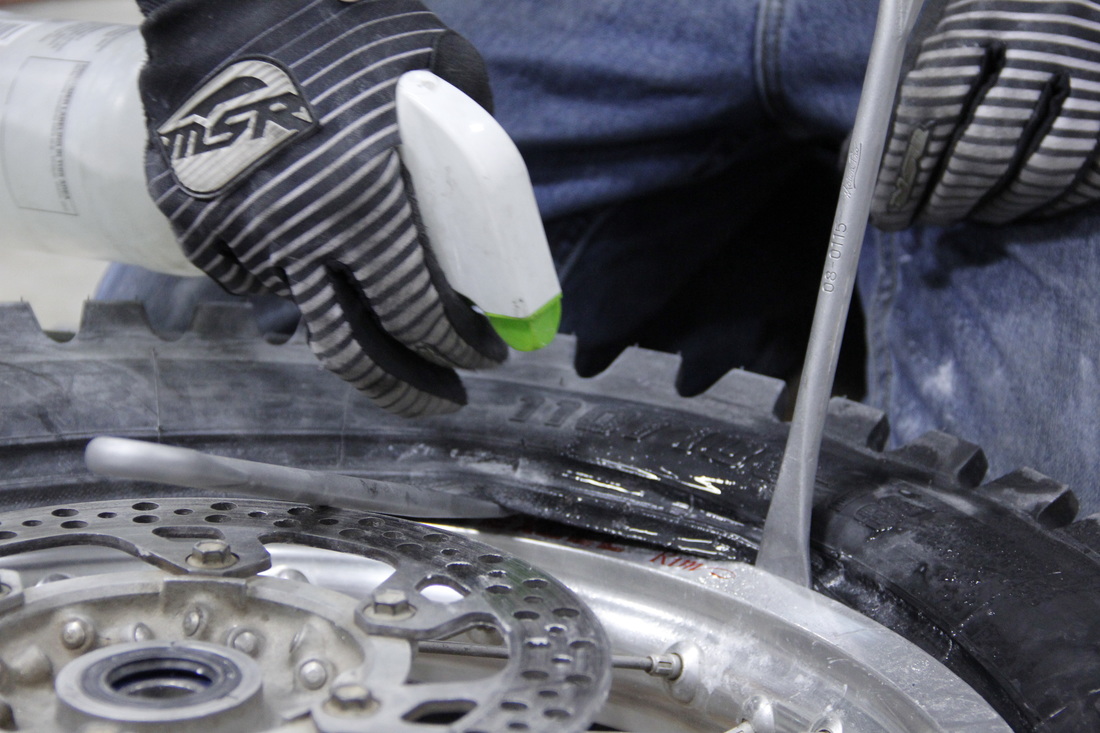
Jarrett: Prior to installing the tube, heavily apply baby powder to the tube and inside of the tire. This will help the tube slide against the tire as it expands.
Paul: This is an awesome tip that I’ve used in the past with great success. Temporarily inflate the tire so that it is easier to apply the powder. Then coat the tube with powder and disperse it evenly by rubbing the tube.
Paul: This is an awesome tip that I’ve used in the past with great success. Temporarily inflate the tire so that it is easier to apply the powder. Then coat the tube with powder and disperse it evenly by rubbing the tube.
If you haven’t already powdered the inside of the tire be sure to do so before installing it.
Jarrett: Install the tube with the valve stem removed. You don’t want trapped pressure.

Paul: Overlay the tube onto the tire and line up the valve stem with its mating hole in the rim.
Jarrett: Use a tire tamer to get the tube down into the tire.
Paul: After speaking with Jarrett I bought a tire tamer specifically for this project. It has been one of the best additions to my toolbox I’ve made. Simply pry the side of the tire up and work the tube evenly into the tire. No more bloody knuckles!
As you work the tube into the tire, make sure the tube lays flat and doesn’t twist.
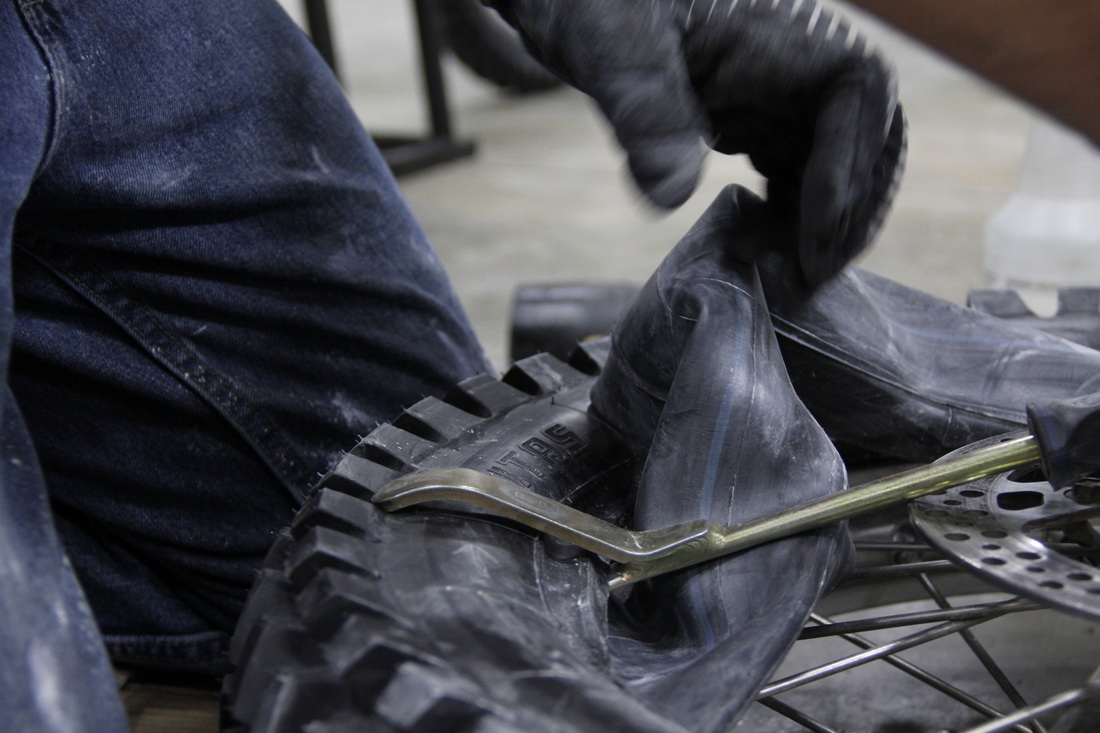
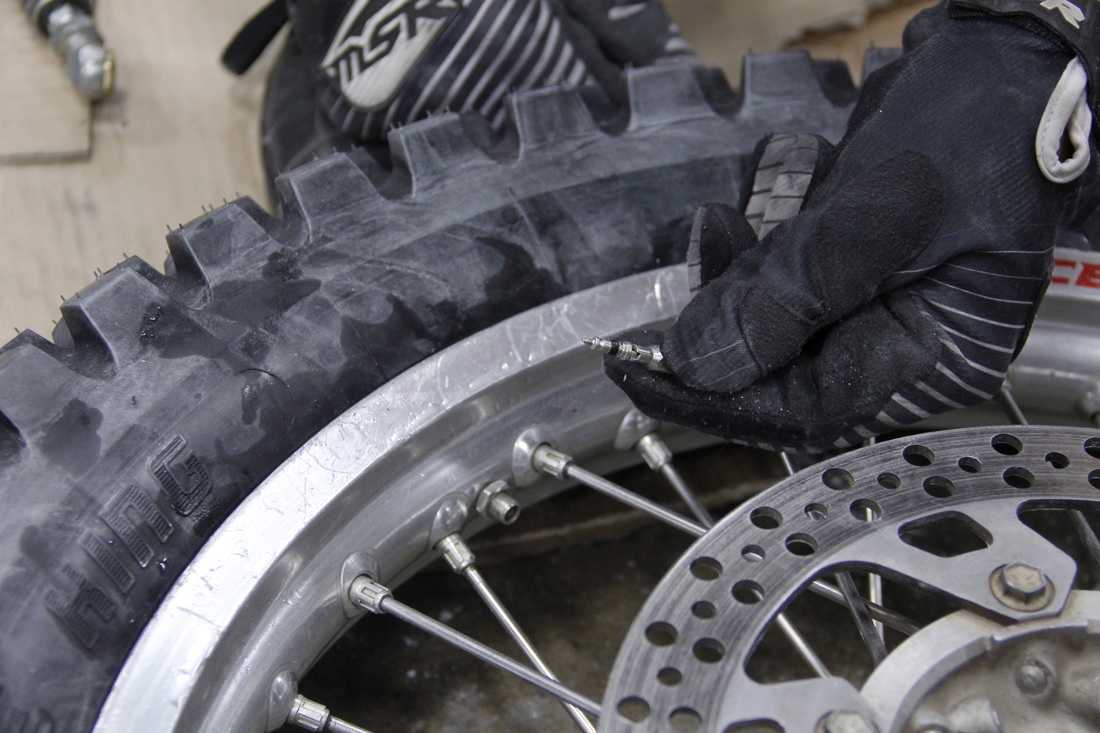
Once tube has been tucked into the tire, the valve stem will need to be guided through its mating hole in the rim. I bought a tube snake to do this, but it didn’t show up in time, so I’m stuck with having to use my fingers to work the valve stem into its hole. Use the tire tamer to lift up on the tire, then use your fingers to fish the valve stem through the hole.
Then quickly install the valve stem nut before it recedes back into the tire cavity.
Jarrett: Make sure the tube doesn’t pinch on the rim lock.
Paul: Before the remaining bead is pulled over the rim, pull the tire up near the rim lock and make sure the the tube isn’t pinched between the rim lock and rim.
It is now time to pry the remaining bead over the rim. Before I get started I want to allow Jarrett to chime in and provide a couple of pointers.
Jarrett:
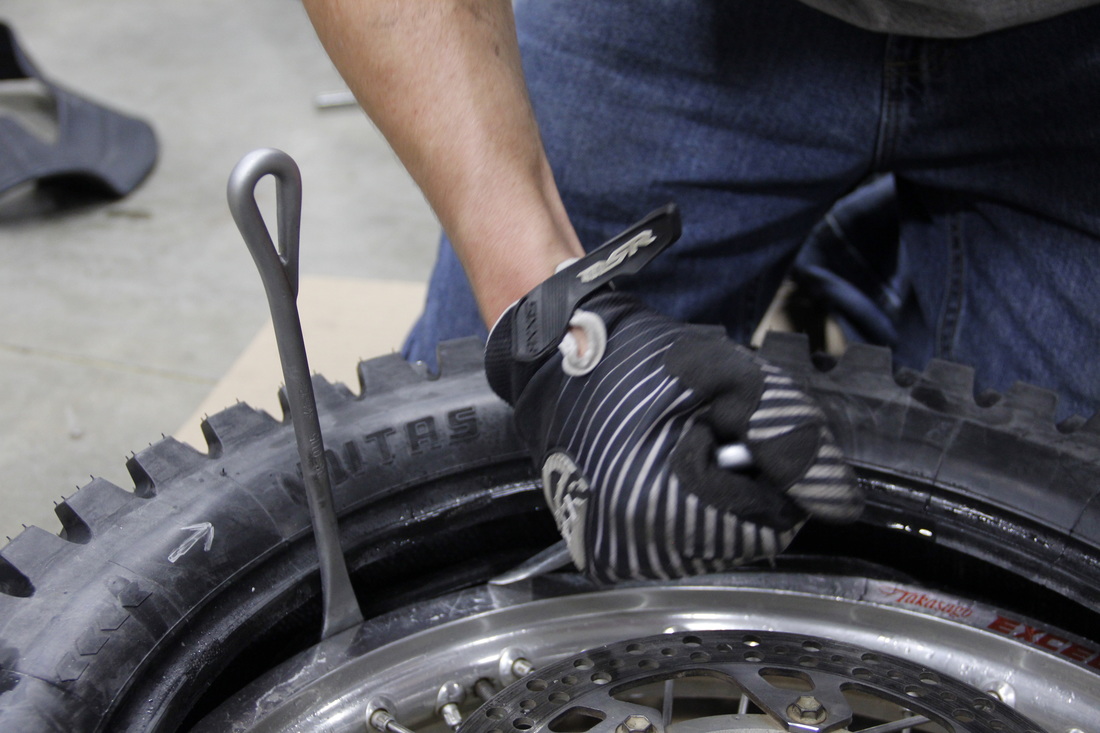
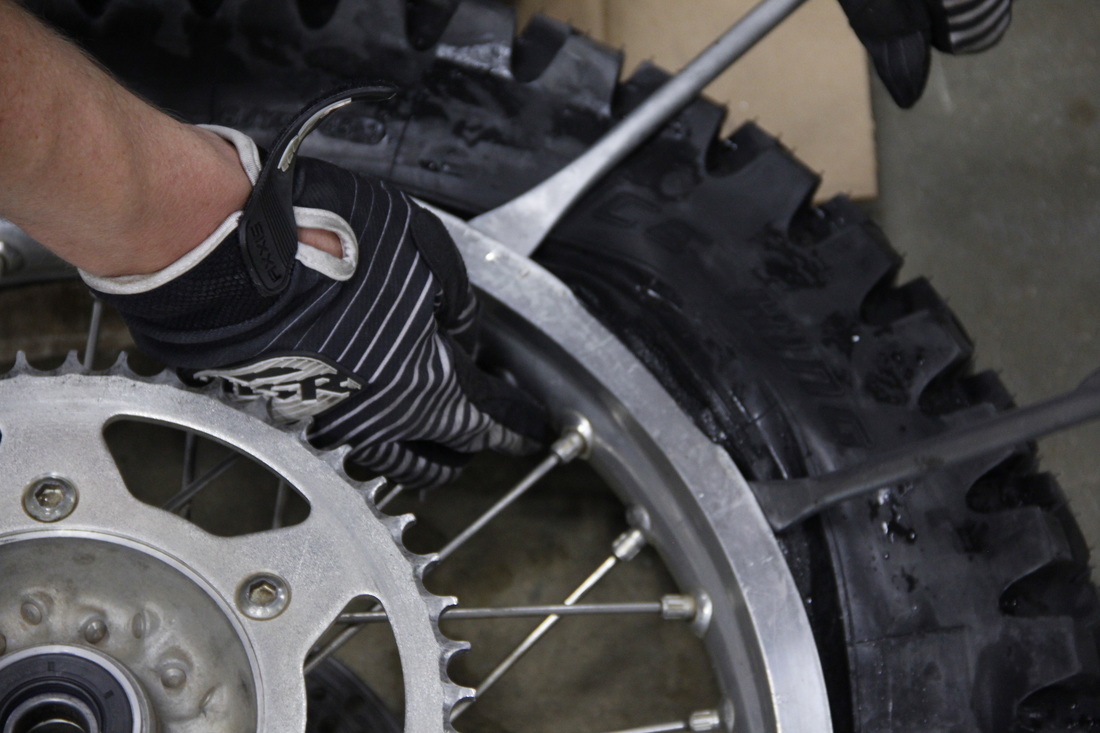
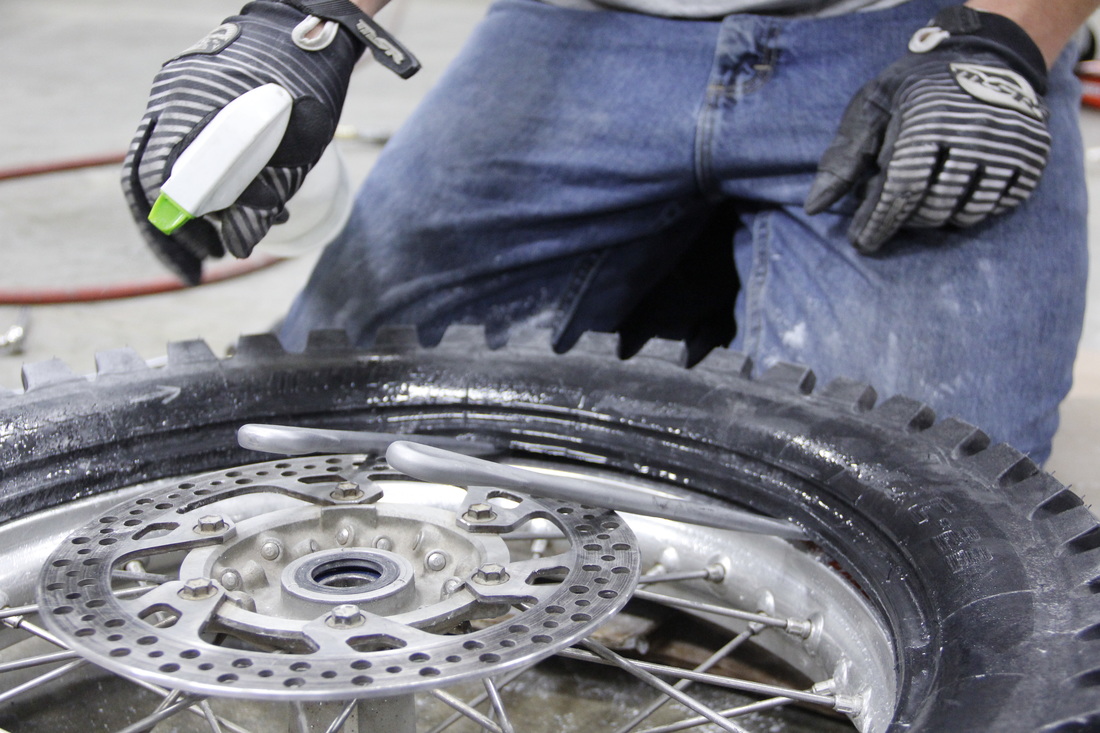
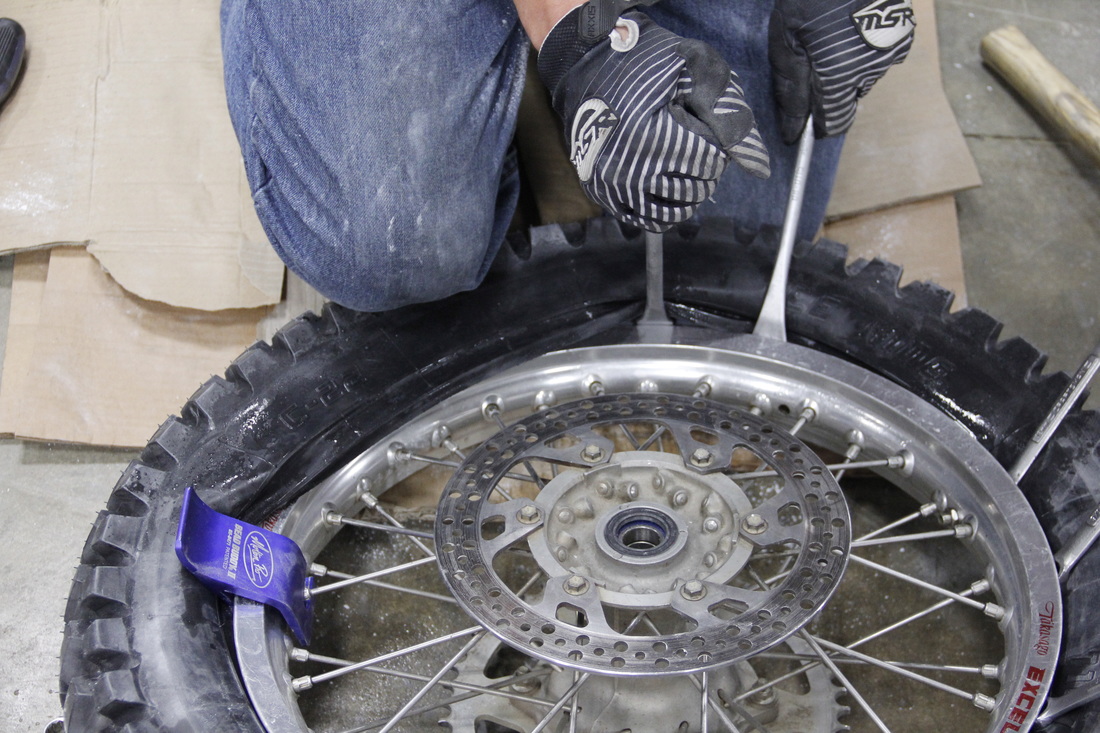
Paul: In the picture below I’ve inserted two tire irons just to the left of the rim lock and am spraying the tire with lube in preparation for prying the bead over the rim.
Paul: Before the remaining bead is pulled over the rim, pull the tire up near the rim lock and make sure the the tube isn’t pinched between the rim lock and rim.
It is now time to pry the remaining bead over the rim. Before I get started I want to allow Jarrett to chime in and provide a couple of pointers.
Jarrett:
- Always use tons of soap/water lubricant on the tire.
- Be sure to take small pulls with the tire irons. As soon as you feel like it takes a really big pull something is wrong and it is time to make tweaks to the setup.
- Once the tube has been installed start to the left of the rim lock.
Paul: In the picture below I’ve inserted two tire irons just to the left of the rim lock and am spraying the tire with lube in preparation for prying the bead over the rim.
Jarrett: Use two tire irons to get a Bead Buddy on the spoke (or two) to the left of the rim lock.
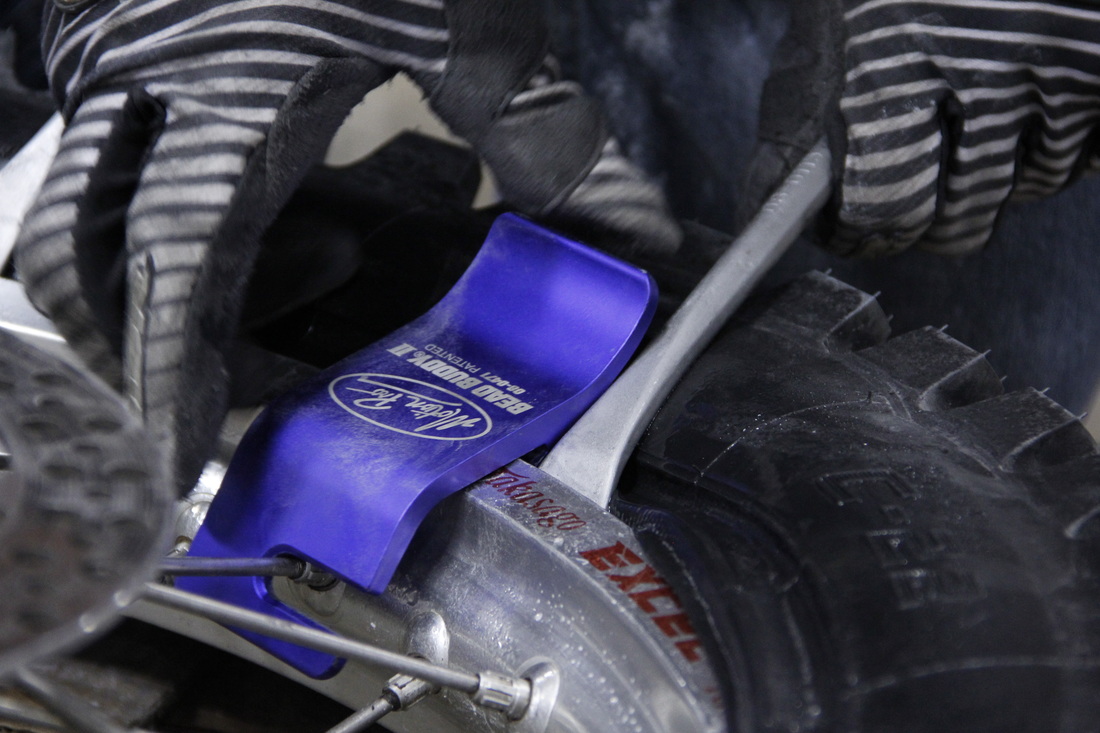
Work towards the right. This will make things easy because you are never fighting the rim lock as you work back around towards it.

Take pulls with the tire irons that are no more than four inches apart. Make sure to use plenty of lube.
 |  |
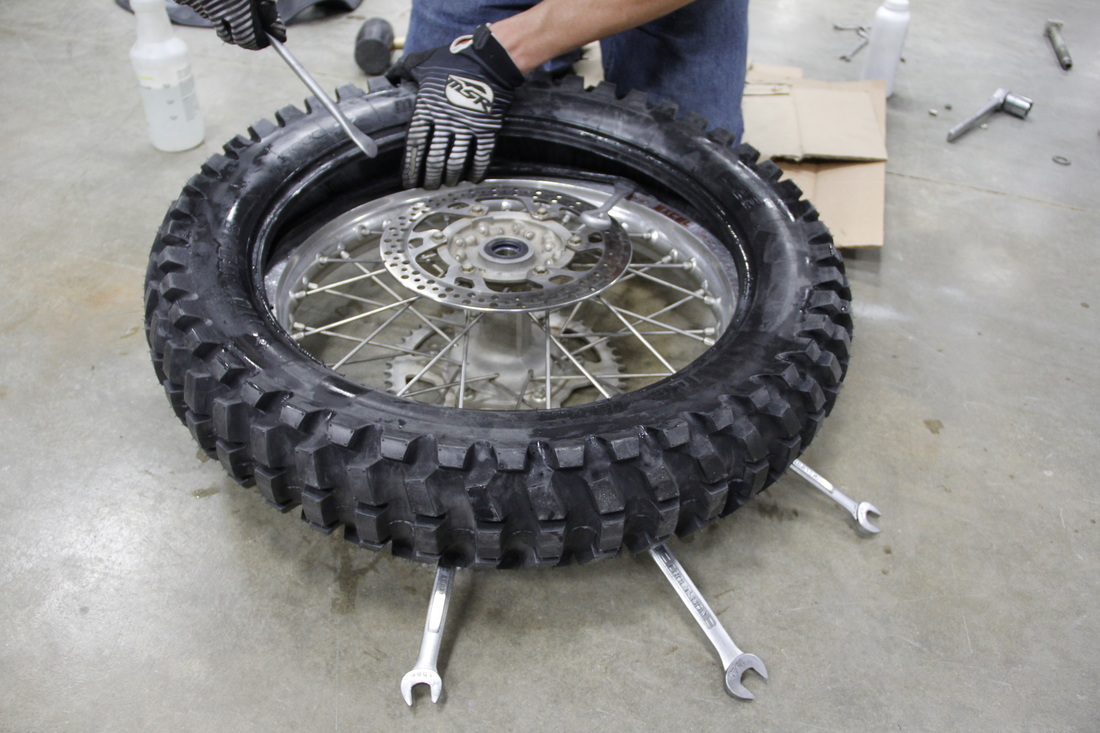
Once you get about ⅓ of the way around the tire, insert a box end wrench between the rim and bead of the tire. This holds the tire down in the drop center, creating a bigger “oval” in the bead so it will work its way around the rim easier.
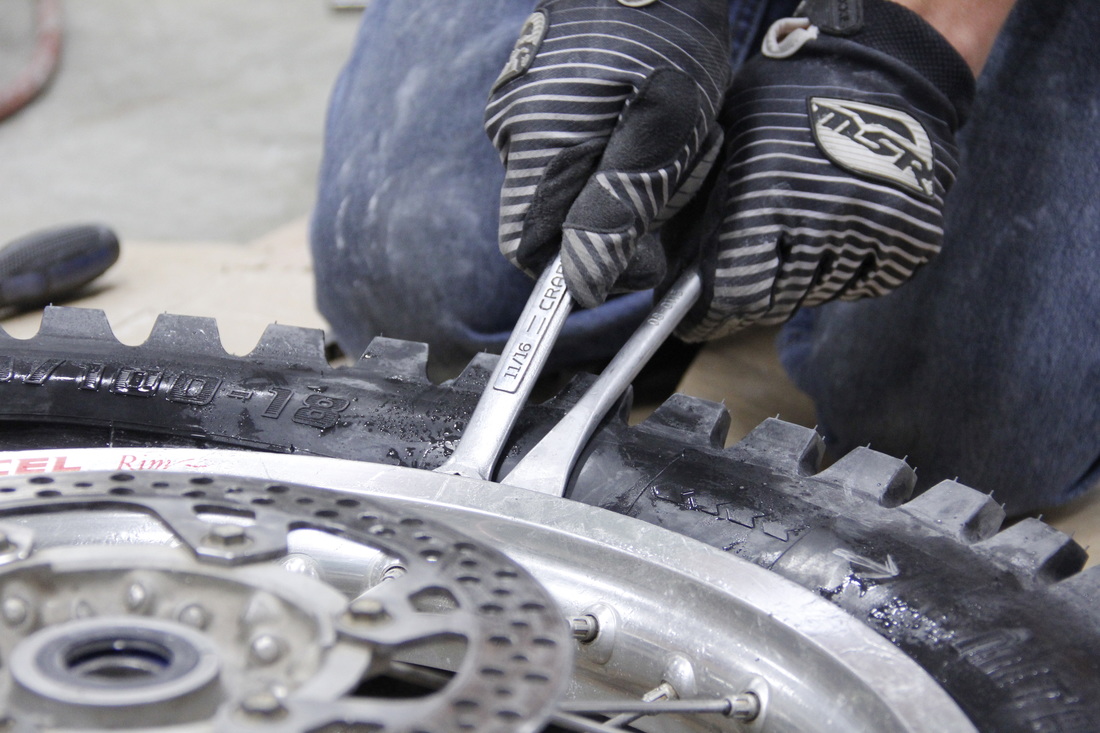
Repeat the process with four more wrenches approximately 4” apart from each other so they cover at least ⅓ of the tire’s radius. Try to position the wrenches so they are straight across from where the tire will finish mounting on the rim.
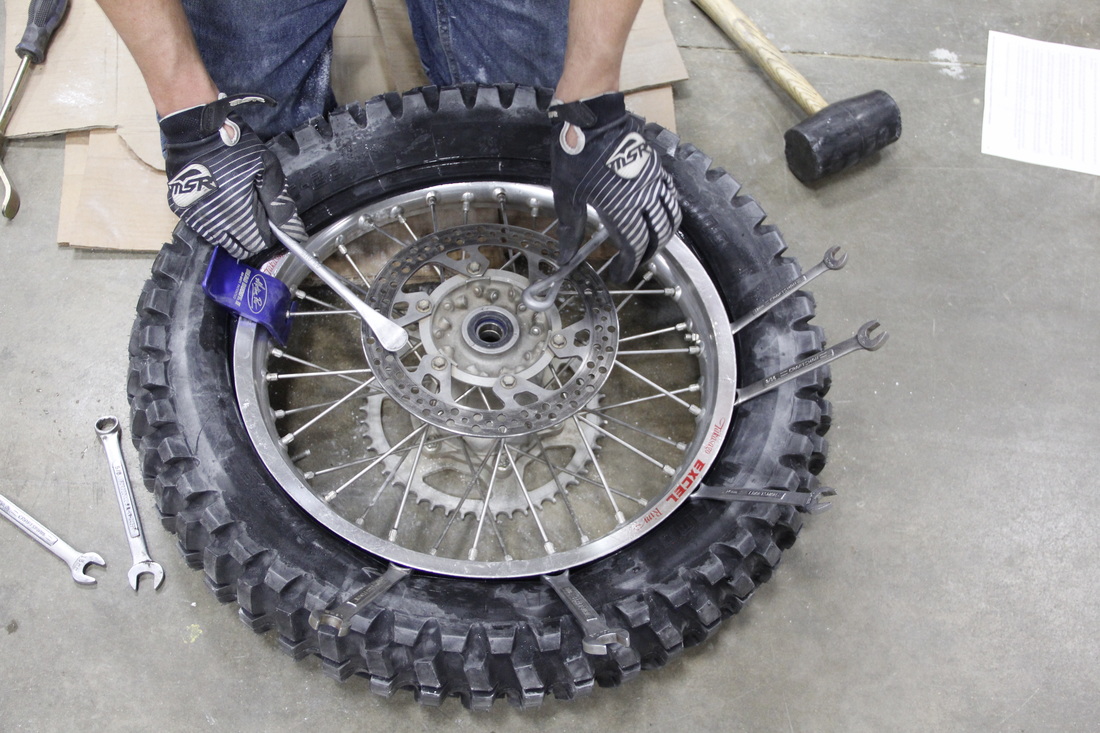 |  |
Continue working towards the rim lock being sure to apply lots of lube. Take smaller bites as the tire becomes more difficult to work with.
Be careful not to pull the tire iron too far to the point where it pinches the tube. The tire iron should never go more than approximately 30 degrees from level with the ground. Past this, and the iron will very likely pinch and puncture the tube.
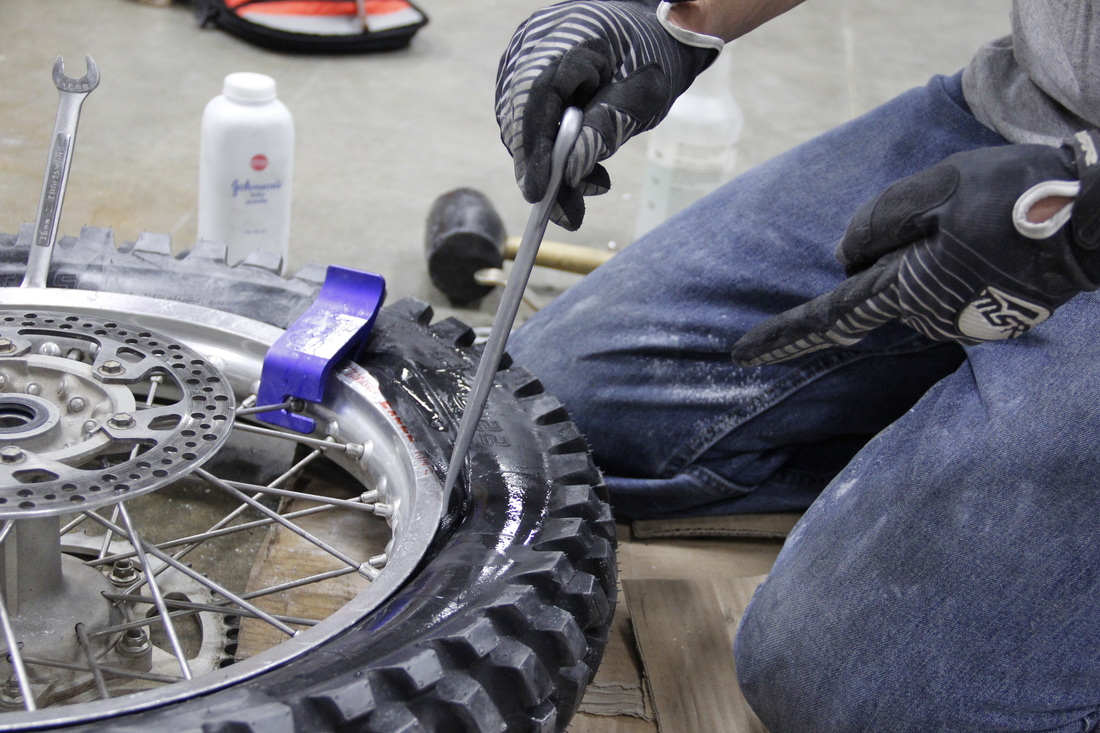
The very last section of the bead may be tricky. Use leverage from the first tire iron to back off of the bead. Then push a second tire iron into the remaining section. In addition, a large rubber mallet can be used to help persuade the remaining section of tire over the rim.
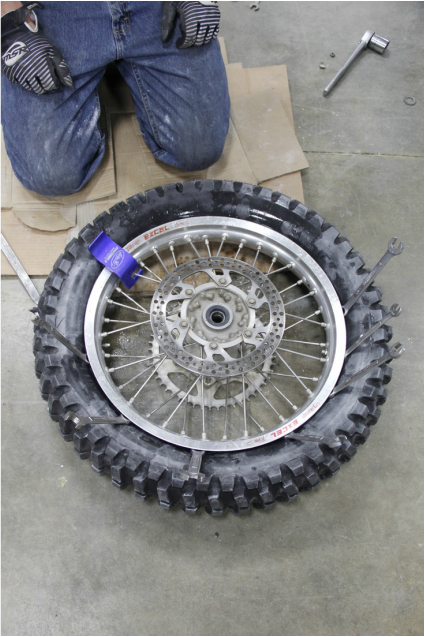
Paul: The method Jarrett prescribed is by far the best I’ve used for mounting ice tires and made my life a lot easier. Inserting the wrenches as you work to keep the bead down in the drop center is definitely key.
Paul: The method Jarrett prescribed is by far the best I’ve used for mounting ice tires and made my life a lot easier. Inserting the wrenches as you work to keep the bead down in the drop center is definitely key.
Once the tire is on the rim, the valve core can be reinstalled.
Before inflating the tire I like to lube up both sides of the tire and rim to help facilitate easy seating of the bead against the edge of the rim.
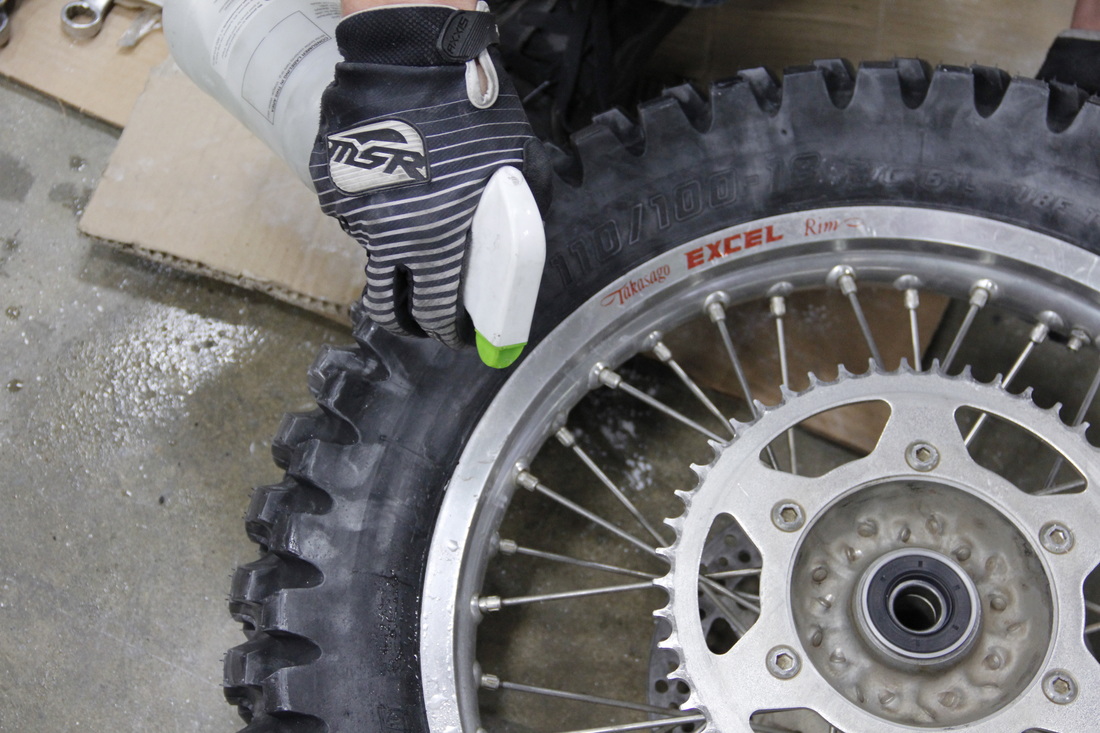
Initially I like to give the tube a quick burst of air which allows the tube to expand and take shape. After the quick burst I like to remove the valve core and release all the pressure. The thinking here is that if the tube isn’t quite adjusted correctly it has a chance to reposition itself a little bit before it is fully inflated.
Once the valve core has been reinstalled after the quick burst, I’ll inflate the tire to full pressure and seat the bead against the rim.
Once the valve core has been reinstalled after the quick burst, I’ll inflate the tire to full pressure and seat the bead against the rim.
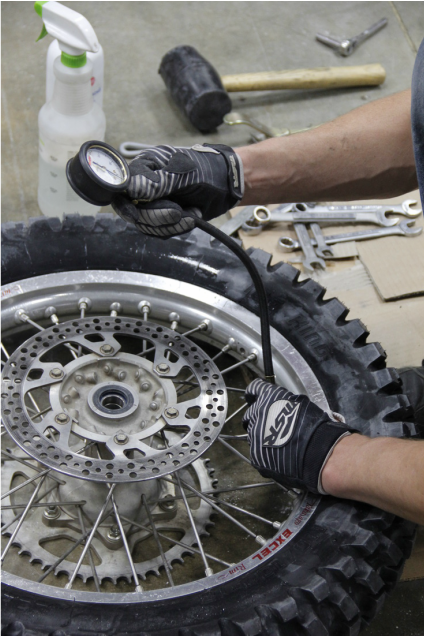
After the tire has been inflated fully and the bead has seated, all that is left to do is install the rim lock nut and washer and make any necessary final adjustments to the valve stem nut.
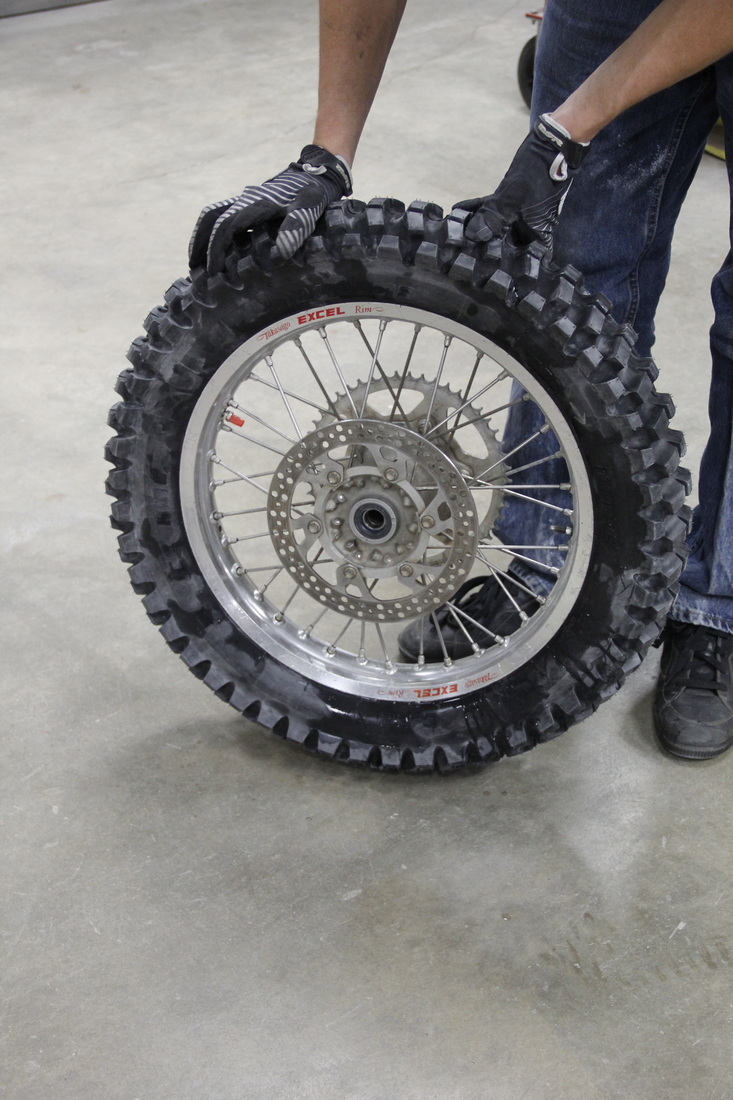
With any luck you should have an ice tire that is ready to be studded!
With any luck you should have an ice tire that is ready to be studded!
Do you have any mounting tips and tricks you want to share? Leave a comment below and let everyone know what has worked well for you. Stay tuned, in Part Three we’ll get going on the studding process!