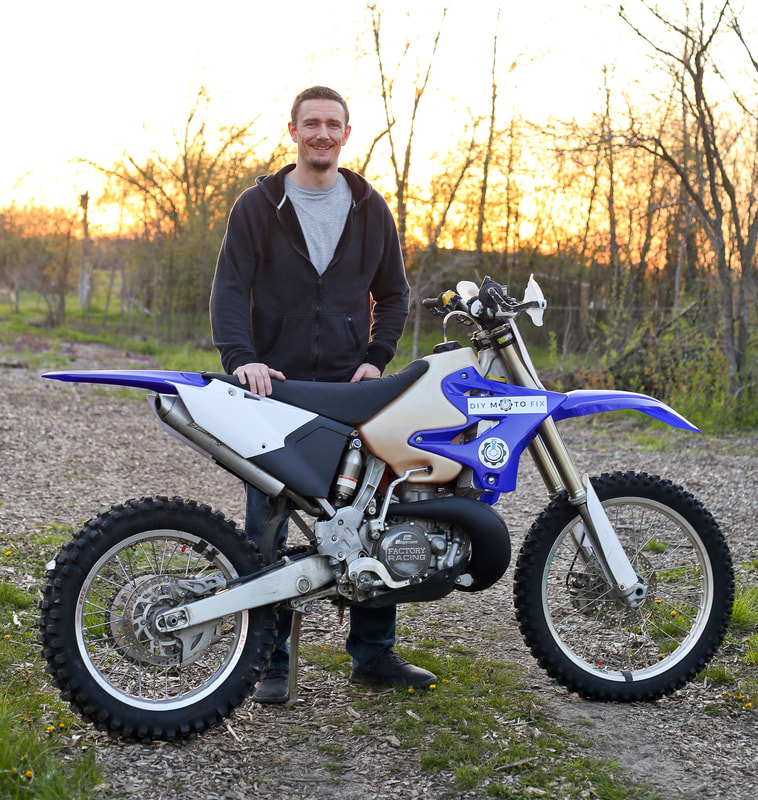
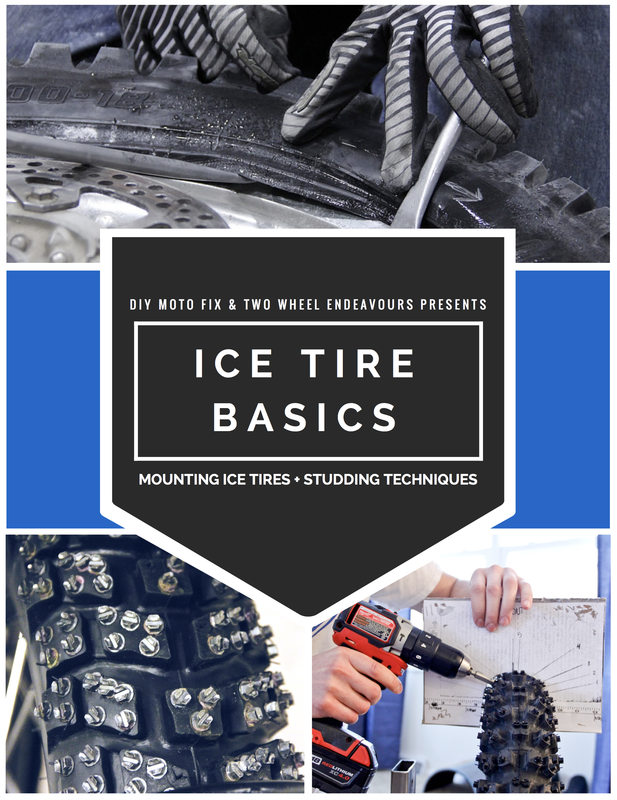
In my previous post with the help of Two Wheel Endeavor’s, Jarrett King, I successfully mounted my Mitas Ice Kings to my dirt bike rims. This week I’m going to stud my tires, with Jarrett’s help. We’ll be covering how to determine the number of screws you need, sharing Jarrett’s recommended process for studding, and providing tips and tricks to help ensure you have the best performing and longest lasting tires once they have been studded.
|
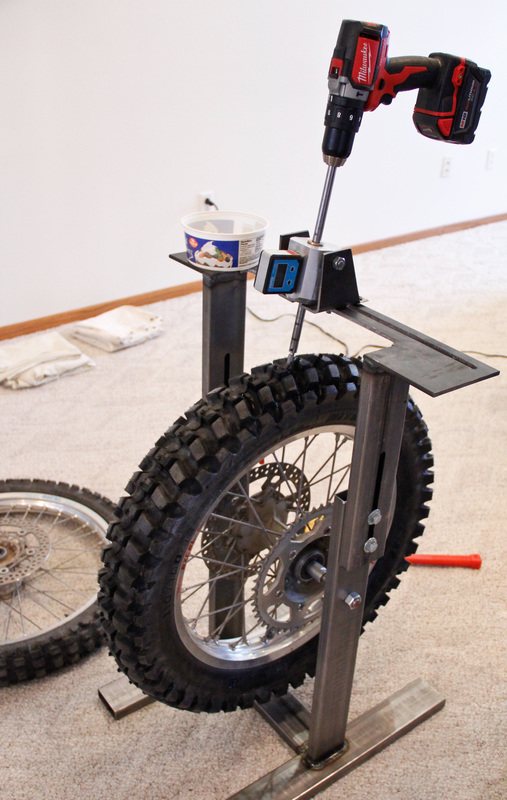
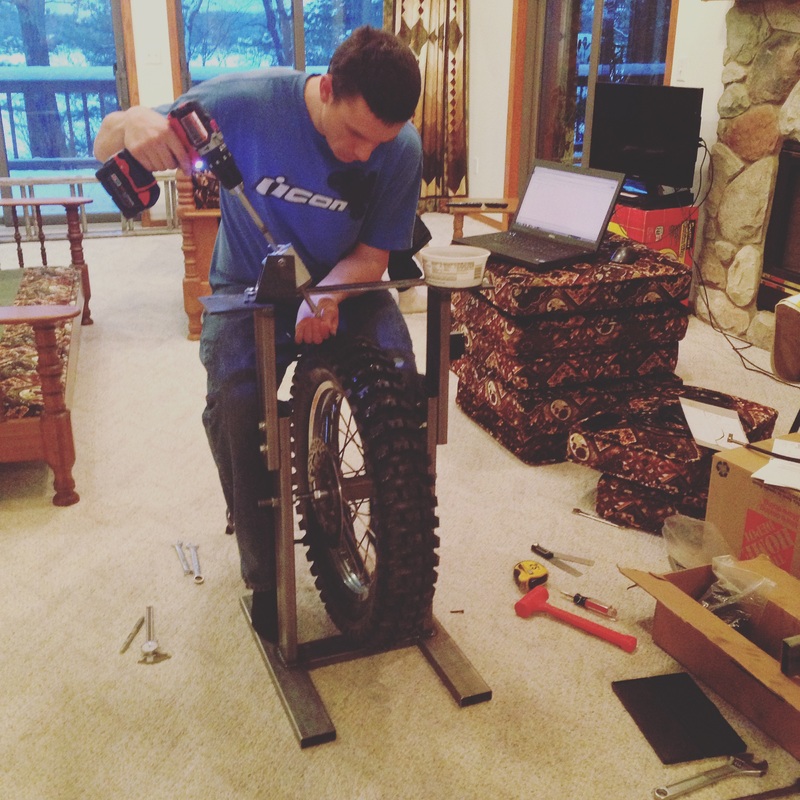
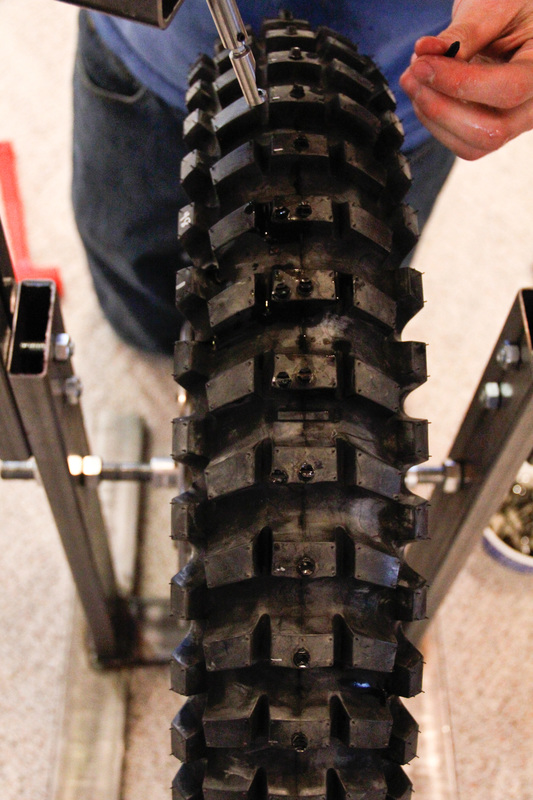
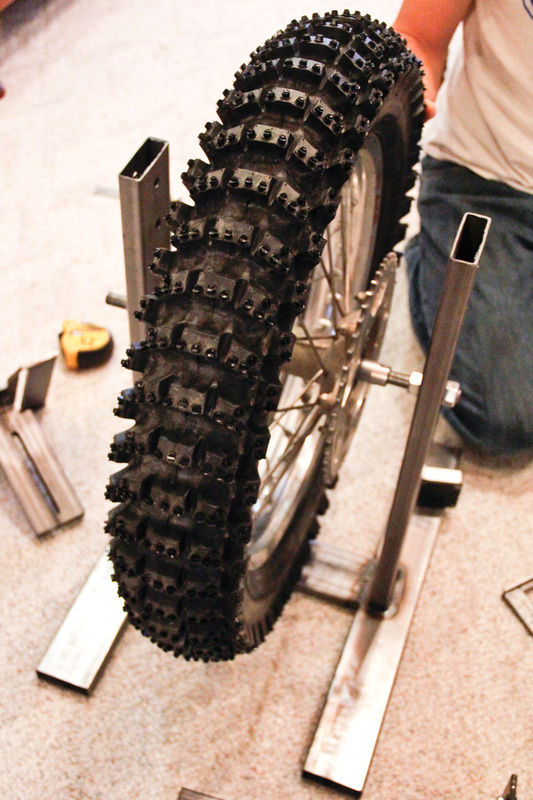
I know many of you won’t bother building a fixture like mine, and to be honest, it is probably overkill for those of you less OCD than myself. You can still do yourself a favor though when getting started by securing the tire in a truing stand, in the swingarm, or another device which will make the tire easier to work on.
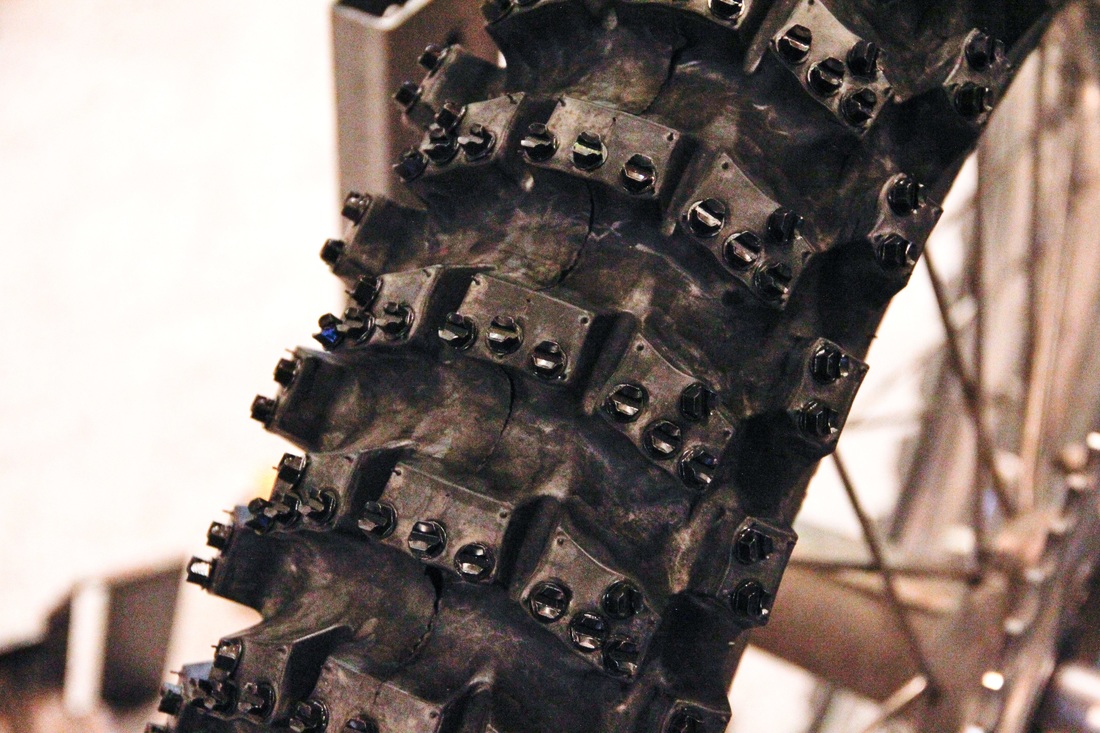
Determining the Number of Screws Required There is nothing worse than starting a project and not being able to finish because you ran out of supplies. Do yourself a favor and calculate how many screws you’ll need before getting started. Doing this is easy. Simply count the number of rows of lugs on your tire. Then multiply this number by the number of screws required to complete your stud pattern across that row. For example: Mitas Rear = 50 rows of lugs Mitas Rear Pattern = 15 screws per row 50 x 15 = 750 screws |
Prior to Screwing
Jarrett: Ideally the tire should be mounted on a perfectly straight and true rim or on the rim it will be used on. The consistency of the screws is paramount, so even if the tire or wheel is not true, smooth straight lines make for better performing ice tires.
Paul: If you need a refresher on how to true a rim check out my post on the subject by clicking here.
|
Jarrett: The following are some tips to consider before studding:
|
|
- Screws with fine thread will do less damage to the rubber and be easier to tune to exact heights (for those super picky tuners out there)
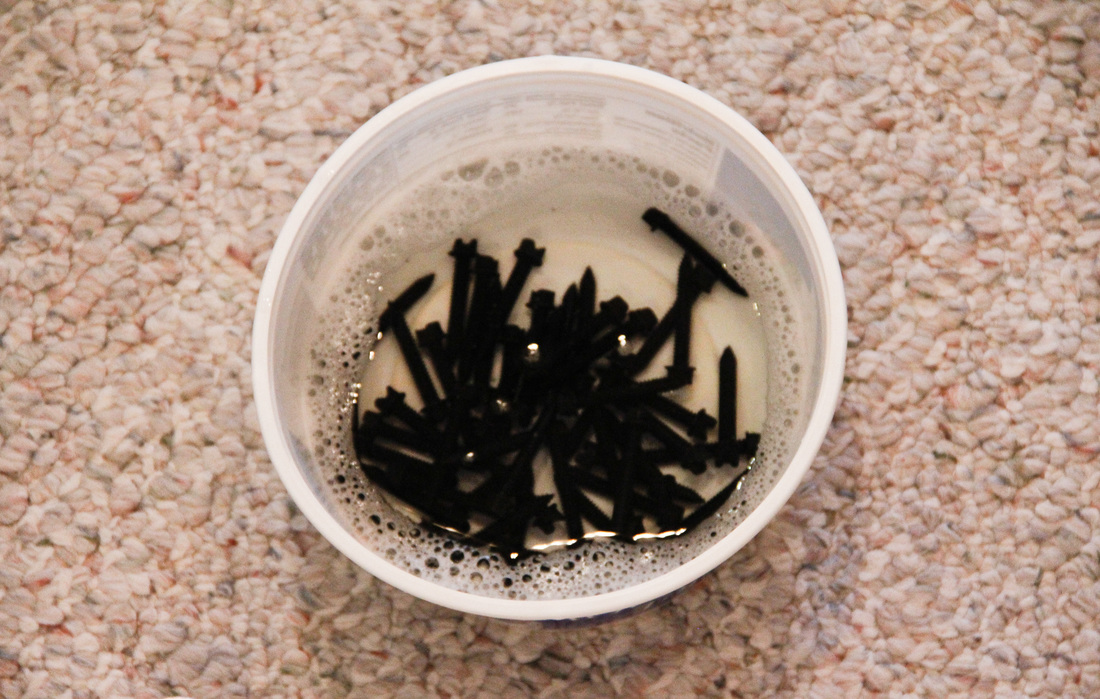
- Establish your pattern in advance to make sure you have enough screws. Running one set in advance will also allow you to confirm they don't penetrate the carcass in the case where you are running lined tires.
- For the Mitas Ice Kings we currently recommend adding studs with the rear set at 30psi and front at 25psi.
|
Studding
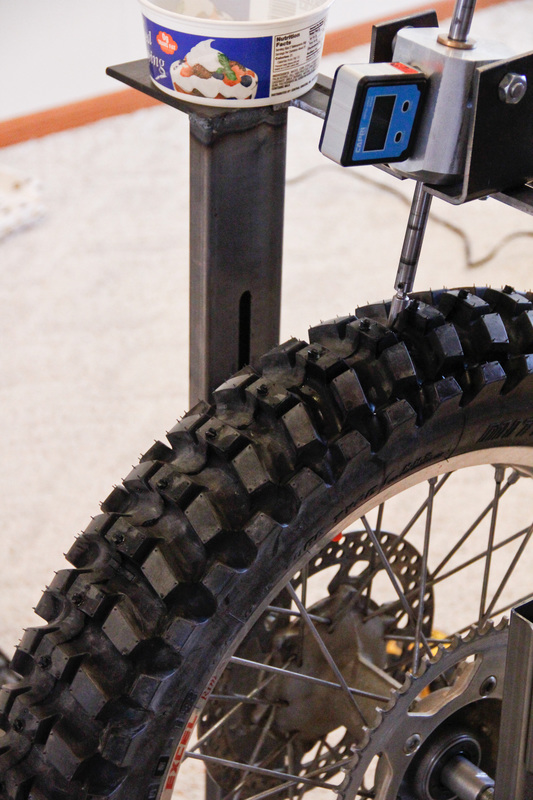
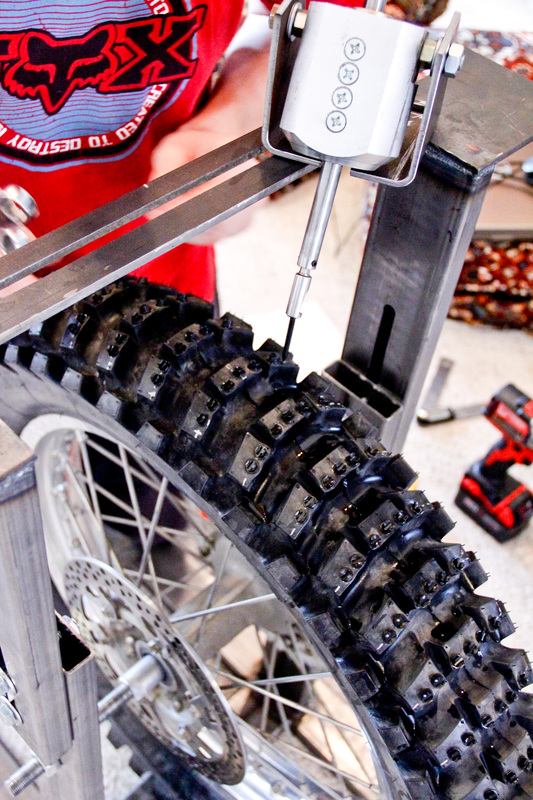
Paul: Per Jarrett’s advice I’ve got my tire set at 30psi and am ready to start studding. My technique will differ from what Jarrett recommends since I’m giving my jig a trial run. The takeaways and principles are the same though. Jarrett: Our technique is to add enough screws for one row to a magnetic bowl, spray with lubricant and sit in a position where your arm pushes a direct line into the head of the screw on the angle it will go into the tire (directly parallel) in this way, your arm will only move in one plane, preventing angle changes. |
Now run one full row of screws. We like to start at the center row since consistency is not nearly as important in these driving screws.
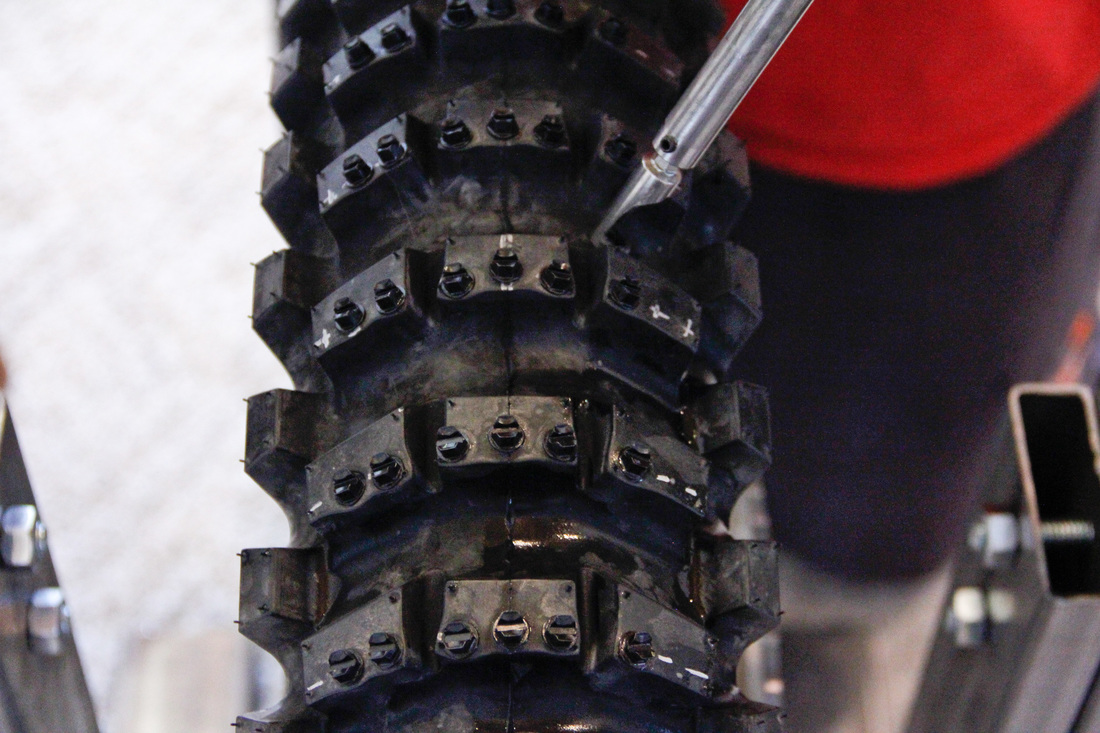
Paul: While side to side positioning of the screws was less of an issue for me since I had my jig, locating the screw in the correct location from front to back on the lug was still a challenge. To help with this I used a silver Sharpie and marked each lug where I wanted the screw to go. This certainly added some time to the process but improved my accuracy a lot.
Paul: While side to side positioning of the screws was less of an issue for me since I had my jig, locating the screw in the correct location from front to back on the lug was still a challenge. To help with this I used a silver Sharpie and marked each lug where I wanted the screw to go. This certainly added some time to the process but improved my accuracy a lot.
|
|
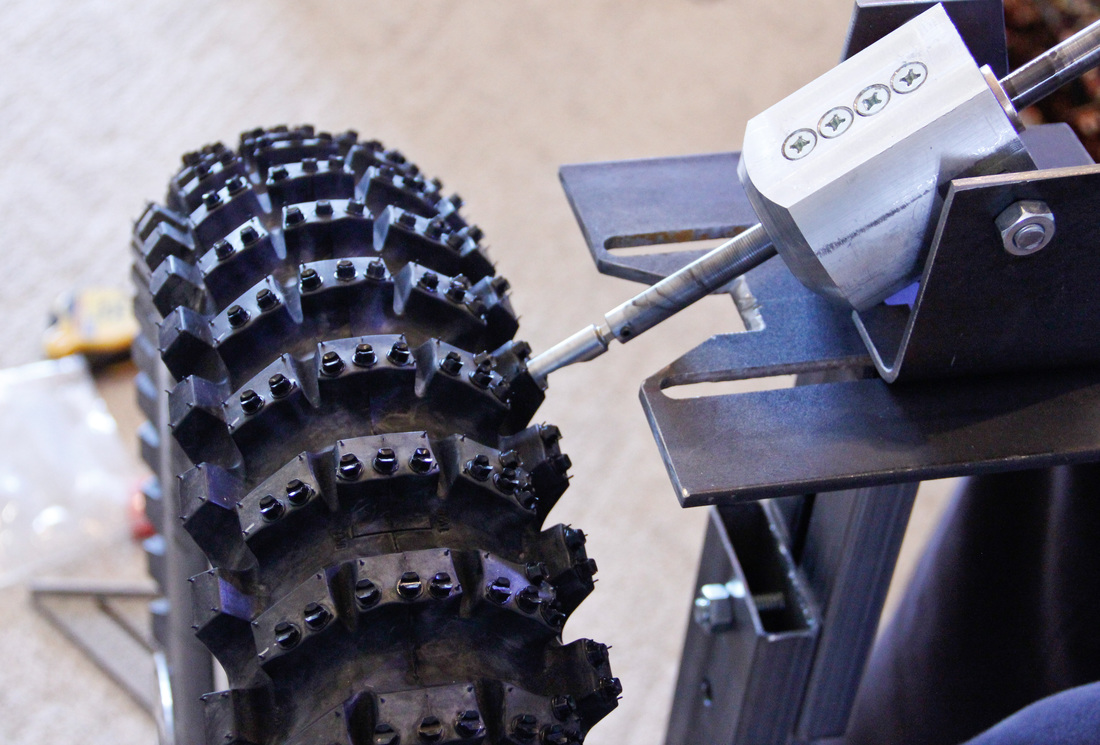
Jarrett: For AMA screws they should be slightly rocked back on plane so that only one edge is catching the ice. For Canadian style open screws (chisel tips) you can run them straight in (watch sides rows if running 1.5" in rear, they can poke through at the wrong angle).
Paul: On my tire I rocked my acceleration screws back 10 degrees.
Paul: On my tire I rocked my acceleration screws back 10 degrees.
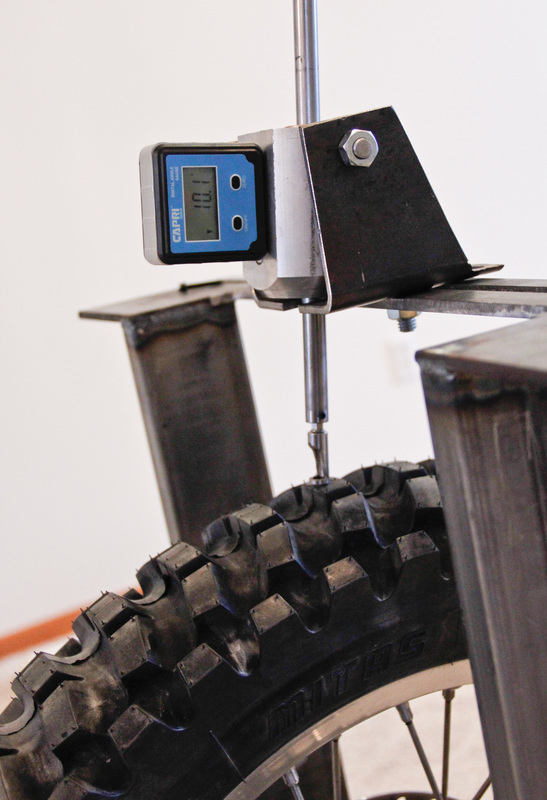
Jarrett:-To check the row, spin the tire slowly and watch to see they are all in line in all three planes. Adjust the ones that are way out. Tune after finishing all rows.
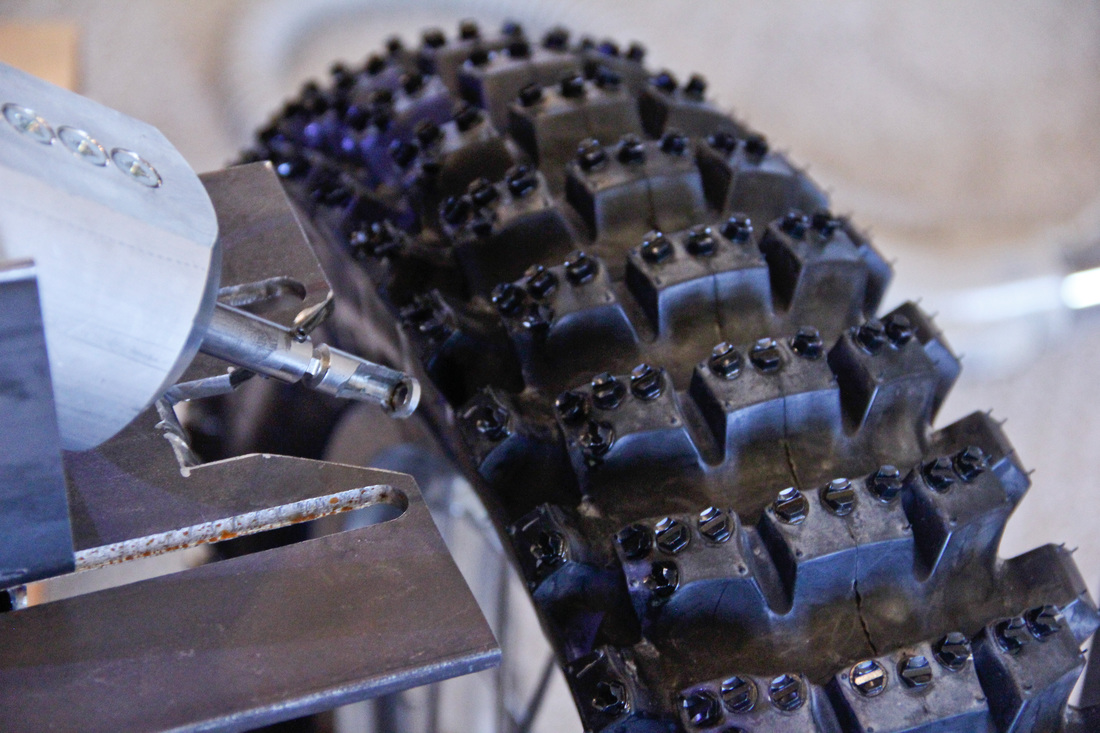
Paul: Here you can see I’m off to a decent start and my first row is nice and straight.
Paul: Here you can see I’m off to a decent start and my first row is nice and straight.

Jarrett: Ideally the screws will be perfectly angled in all three planes to each other, not to the tire or rim. Adjust heights before the lube dries to get maximum tire life and check after the first couple rides.
Paul: Once I got into a rhythm I was able to align the flat in the screw heads consistently with one another and wasn’t terribly far off on head height between the screws in each row. I found it easiest to position the slot simply by rotating the drill without engaging it. Once the entire row was complete I went back through and looked for screws that were inconsistent in height. To tweak these screws I just used a screwdriver to set their final height and slot position.
Jarrett: Work your way out and complete the outer edge last, it's your best chance and getting practice before you get to the critical outer rows.
Paul: This point is particularly important in my opinion. As I got acquainted with the process I made a couple mistakes early on which I’m glad happened in the middle of the tire instead of at on the edge.
|
|
|
|
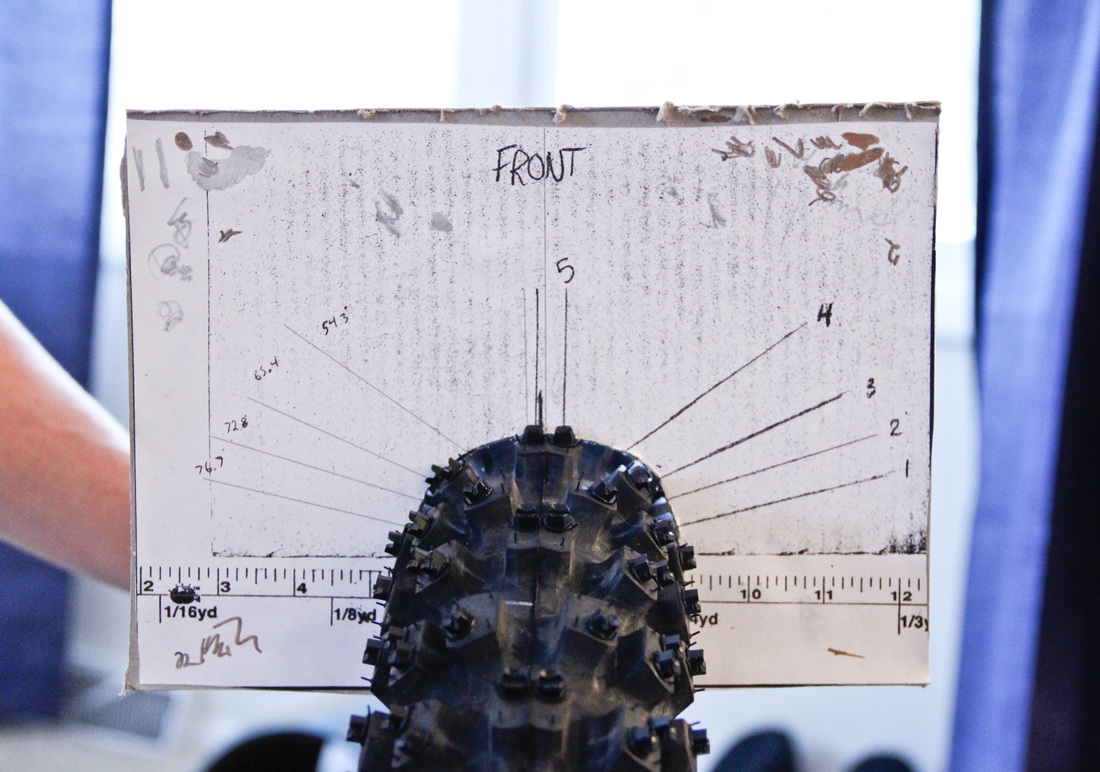
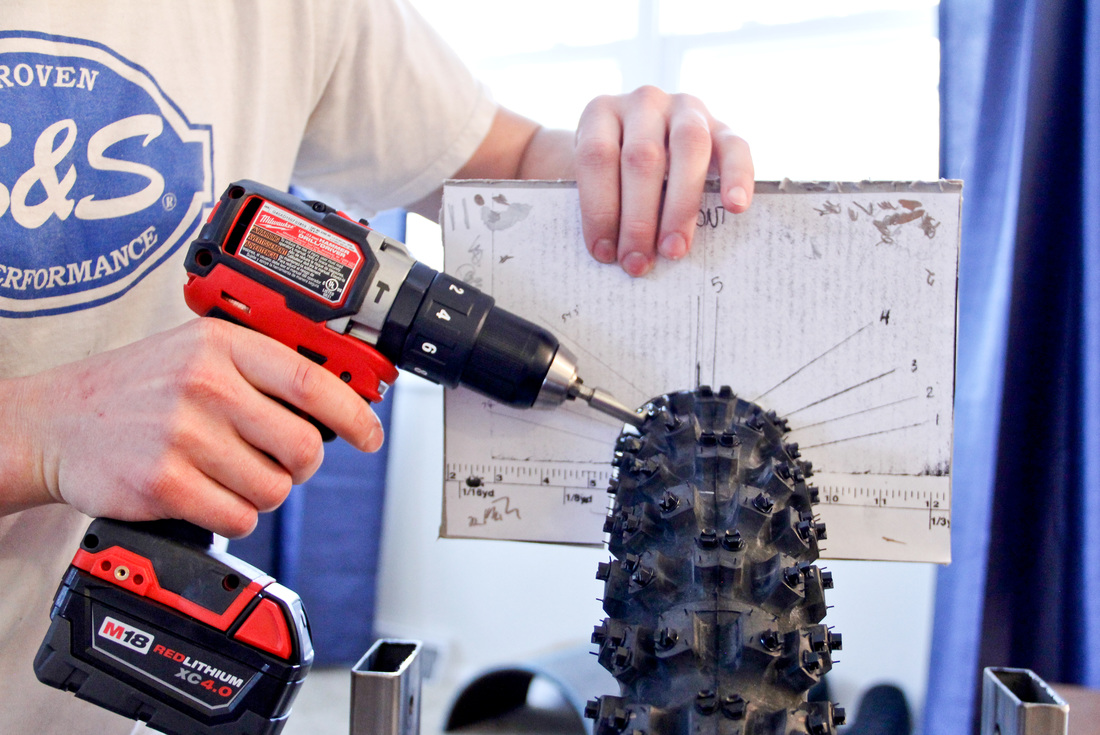
Jarrett: Lay a template down at the centerline of the axle and record the angle of all the screws. If you didn't get it quite right then the next time you have a point of reference for what to change.
Paul: Jarrett was kind enough to supply me with the templates he uses to stud the Mitas tires. In the image below you can see how the template can be used to record screw angles as well as help ensure accuracy when studding without a fixture. For your convenience, the templates for the Ice Kings can be downloaded in our Ice Tires Guide we put together (click the button at the end of this post).
Paul: Jarrett was kind enough to supply me with the templates he uses to stud the Mitas tires. In the image below you can see how the template can be used to record screw angles as well as help ensure accuracy when studding without a fixture. For your convenience, the templates for the Ice Kings can be downloaded in our Ice Tires Guide we put together (click the button at the end of this post).
|
|
Jarrett: As usual, the tips and recommendations provided are only GUIDELINES. We've built hundreds of tires over the years and have dozens of other small tricks and so do the tire builders. That being said, we encourage you to ask questions and provide feedback so that more people can enjoy getting out onto the ice with their motorcycle during the winter! Cheers.
Paul: Overall, I’m very pleased with the way my tire studding project turned out and am eternally grateful for Jarrett’s help, advice, and willingness to share knowledge with others. Without him I would’ve definitely made some big mistakes. Having studded my first set of tires I can say that it is a time consuming job and requires patience, however, I don’t think it is outside the realm of what a DIYer can do. As you can see from some of the pics, patience is the name of the game, having a decent stool to sit in, and a warm place to work is key!
I hope you’ve enjoyed this three part series on ice tire studding. I know I had a great time learning from Jarrett and soaking up the finer details of tire studding. Hopefully with the information provided in this post you’ll decide to stud your own tires and take up ice riding! If you have any questions or comments please leave them below.
For those of you interested in the Mitas Ice Kings here is some additional information Jarrett provided on them.
Mitas Ice King Tips and Settings
- Available in the USA through Tri-R distribution, in Quebec through Eskape.ca (online sales & distribution) and in Western Canada through Maverick Distribution via your local dealer.
- This tire accepts 1.5" screws in the 18" & 19" rear tire and 1.25" screws in the 21" front.
- We are currently using MF4 (1.25") long screws front and rear.
- Mount the rear backwards of the arrows (the same mold is used for one of Mitas' summer tires), when you look at the tire from the rear of the bike you will see a "Smile" or upwards pointing curve.
- Currently we recommend adding studs with rear at 30psi, front at 25psi, recommended race pressures are 25-35psi in the rear and 20-30psi in the front. Note that lower pressure will cause early sidewall failure and that the Ice King is very sensitive to tire pressure changes.
- The 19" rear is slightly wider and has a flatter profile than the 18", be weary of swingarm clearance on older bikes, some models of Honda and Kawasaki also have tight clearance.
- Always leave as much clearance as possible between the swingarm and the tire to prevent damage from the screws. Also, running the axle further back stabilizes the bike at higher speeds by increasing wheelbase.
- Run a chainguide regardless of screw type. Always use two hose clamps or multiple mounts... a failure means it will fall into your wheel and can cause damage and injury.
Grab the Free ICE TIRES Guide
After compiling all the great information in these three posts, I figured it would be easiest on you to put it into a free guide. If you want all this info organized and in one place, click the link below to grab it for free!
|
|
Thanks for reading and here's to many seasons of ice riding on high quality studded tires!