This year has been full of changes, including becoming a workshop owner-- I mean homeowner, for the first time. I was the lucky guy who was able to purchase a property which had a house, a shop, and some land, all within his budget. The property is by no means perfect, however it lends itself well for future improvements and is all I could have ever asked for in terms of a place to call home.
I know many of you out there love spending time in your garage or shop and in this post I want to share my plans for my shop. Some of the projects I’ve already tackled, while others will require larger monetary commitments in the future. Hopefully some of the features, projects, and plans I’m thinking about incorporating into my shop will give you some ideas and inspiration of your own.
I know many of you out there love spending time in your garage or shop and in this post I want to share my plans for my shop. Some of the projects I’ve already tackled, while others will require larger monetary commitments in the future. Hopefully some of the features, projects, and plans I’m thinking about incorporating into my shop will give you some ideas and inspiration of your own.
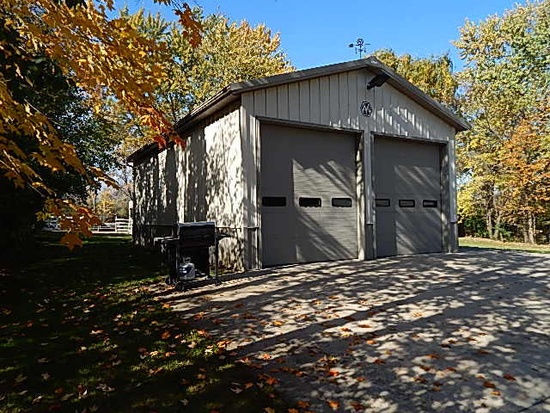
THE BEFORE
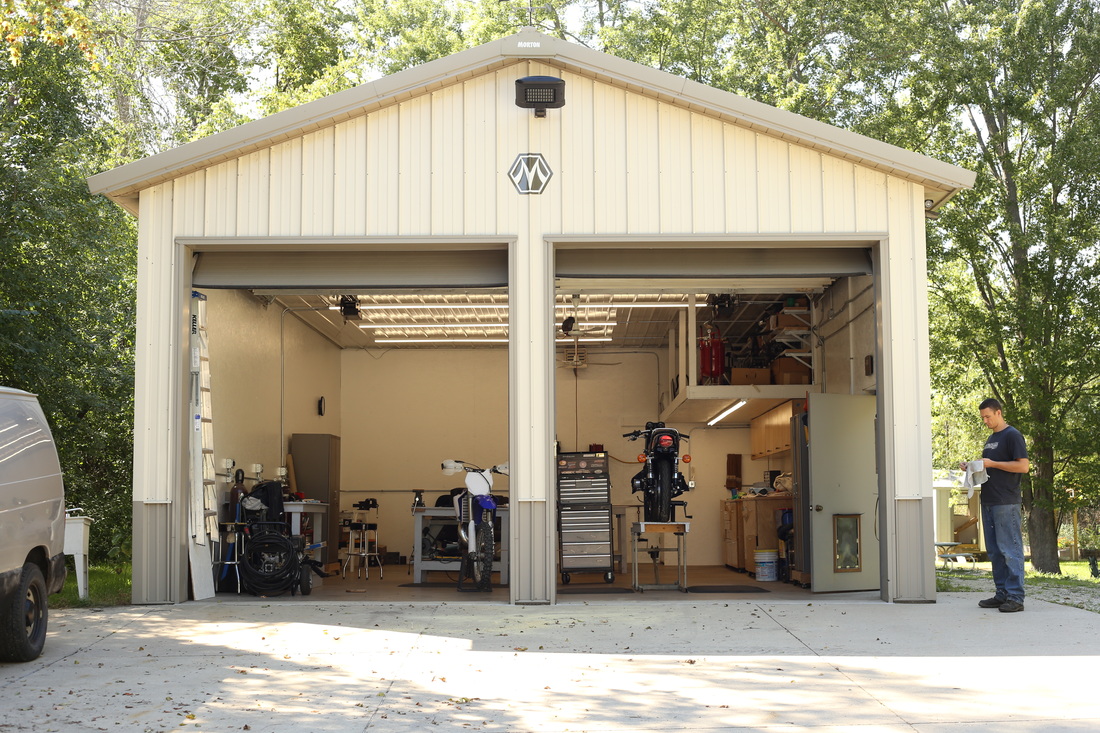
I’m going to put emphasis on me being lucky here, but I’m starting out with a 24’ x 36’ Morton building which features radiant floor heating, a small electric heater mounted to the ceiling, 12’ ceilings, and two large bay doors.
The Planning Stages
I spent the first month or so working in the shop without making any changes so that I could determine what I liked and didn’t like. Within that short period of time several things became readily apparent.
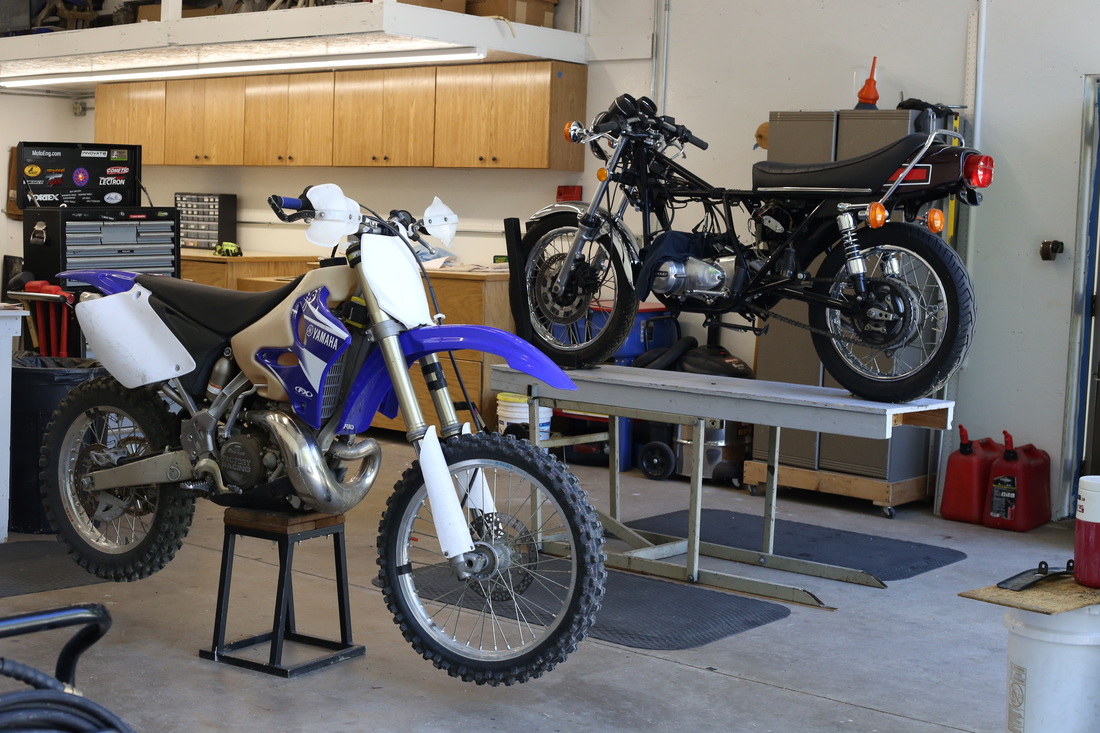
My long term plan is to do all things motorcycle in my shop, including maintaining bikes, rebuilding engines, tuning engines, making engines from scratch, casting parts, machining parts, doing fiberglass work, building frames, and restoring the occasional vintage bike. Yes, I realize I may need to add on!
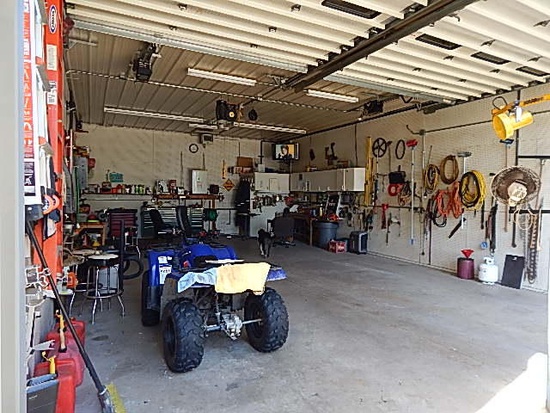
- The building was grossly underlit and it was difficult to see what I was doing.
- Energy was being wasted because there was no means to force hot air down once it had risen.
- There was nowhere to store anything.
- The walls, which were covered floor to ceiling in dirty white pegboard, bothered my eyes. Not to mention much of the pegboard had warped due to it getting wet.
- The electric heater was impressive at heating the building up quickly in the event that one forgot to turn the thermostat up for the radiant floor heat.
- The radiant floor heat took 2 to 4 hours to warm the building.
- Windows would have been nice.
- The cabinets were not very durable.
My long term plan is to do all things motorcycle in my shop, including maintaining bikes, rebuilding engines, tuning engines, making engines from scratch, casting parts, machining parts, doing fiberglass work, building frames, and restoring the occasional vintage bike. Yes, I realize I may need to add on!
The Workshop Floor plan
Since the list of things I want to do is very diverse, I’ve decided I’m going to try and keep my floor plan as open as possible. By doing so, it hopefully allow me to quickly convert from one function to another. My spatial awareness for large objects isn’t great so I modeled my shop in CAD to get a more concrete idea. Graph paper works equally well for those without access to CAD.
Workshop Lighting
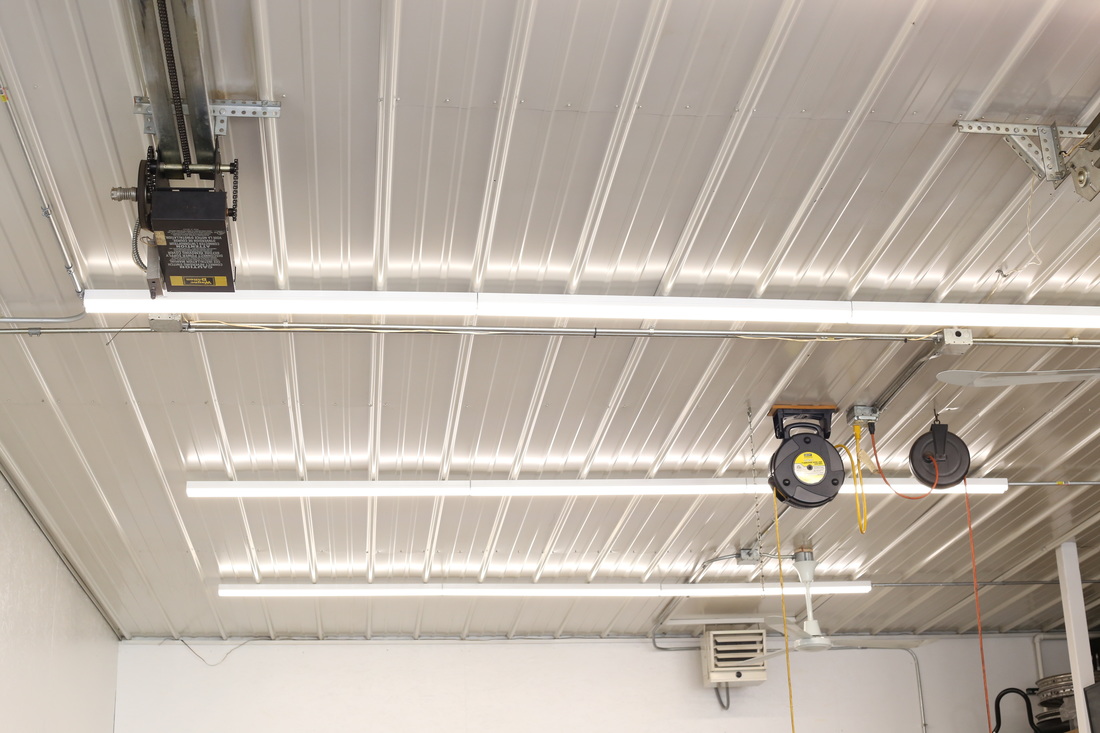
I wanted ample lighting for my shop which would be energy efficient, insensitive to temperature, and not make noise. The obvious solution was LED lights. I spent a lot of time researching LED shop lights and ended up going with a four foot strip light that my father recommended. The strip lights are made by Utilitech and produce 3600 lumens of light using 40 watts. They produce a bright white light and, best of all, they incorporate plugs so that they can be strung together with little effort.
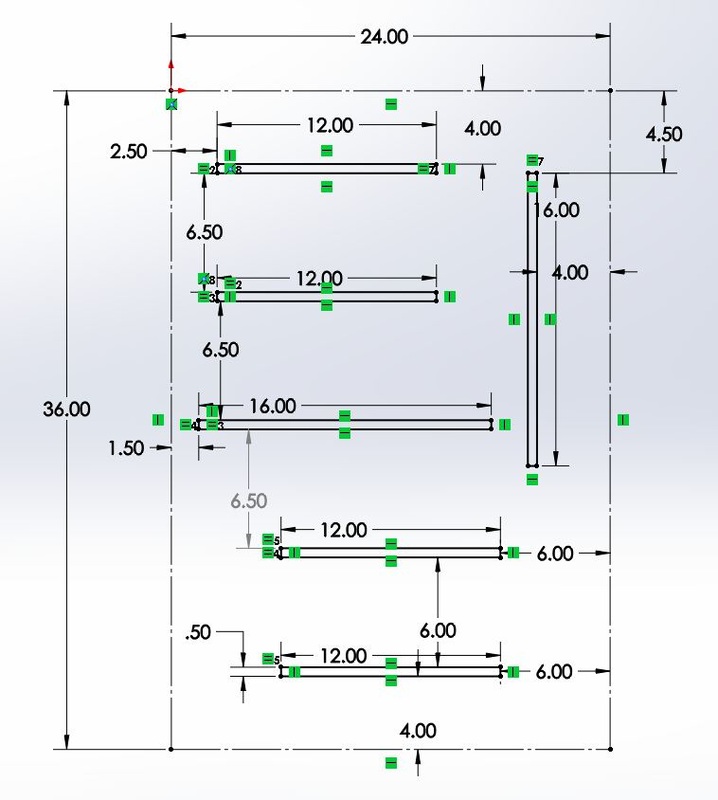
To determine the number of lights needed, a combination of past experience, intuition, and online calculators were used. I ended up needing 20 light fixtures and got them at Lowes where I was able to get 10 bucks off per fixture for ordering in bulk. Below you can see the layout and spacing I used for planning my light installation.
To determine the number of lights needed, a combination of past experience, intuition, and online calculators were used. I ended up needing 20 light fixtures and got them at Lowes where I was able to get 10 bucks off per fixture for ordering in bulk. Below you can see the layout and spacing I used for planning my light installation.
The Workshop Electrical PLan
The shop came with a 100 amp service, a decent allocation of 120 volt plugins throughout the shop, and some special plugins, like those for RV receptacles. The issue was that it lacked 220 volt plugins. Since I didn't want to confine where any particular machine has to reside, I would have to incorporate a decent number of 220 volt plugins. I also needed to accommodate service for my welders. Needless to say, some additional wiring was in order.
The next point of action was installing fans in the center of the shop so that all the warm air will be directed downwards when it gets down in the 15 digits here in Wisconsin. I selected a pair of cheap industrial fans with metal blades which are available at Menards.
The next point of action was installing fans in the center of the shop so that all the warm air will be directed downwards when it gets down in the 15 digits here in Wisconsin. I selected a pair of cheap industrial fans with metal blades which are available at Menards.
Workshop Storage
I’ve acquired a few project bikes over the years. On top of the amount of room three vintage bikes in pieces take up, I have tons of spare parts. Add in the prospect of needing room to store jigs, fixtures, and molds. As you can see, having a good sized area to store things long-term was essential. I decided to create a mezzanine storage area which would span half the length of the shop, come out from the wall 5’, and reside about 7.5’ off the ground. This would also allow me to have a very well lit area below the shelf where I can focus on detailed work. Structurally, the storage area would have to support a lot of weight so it will be tied into the rafters.
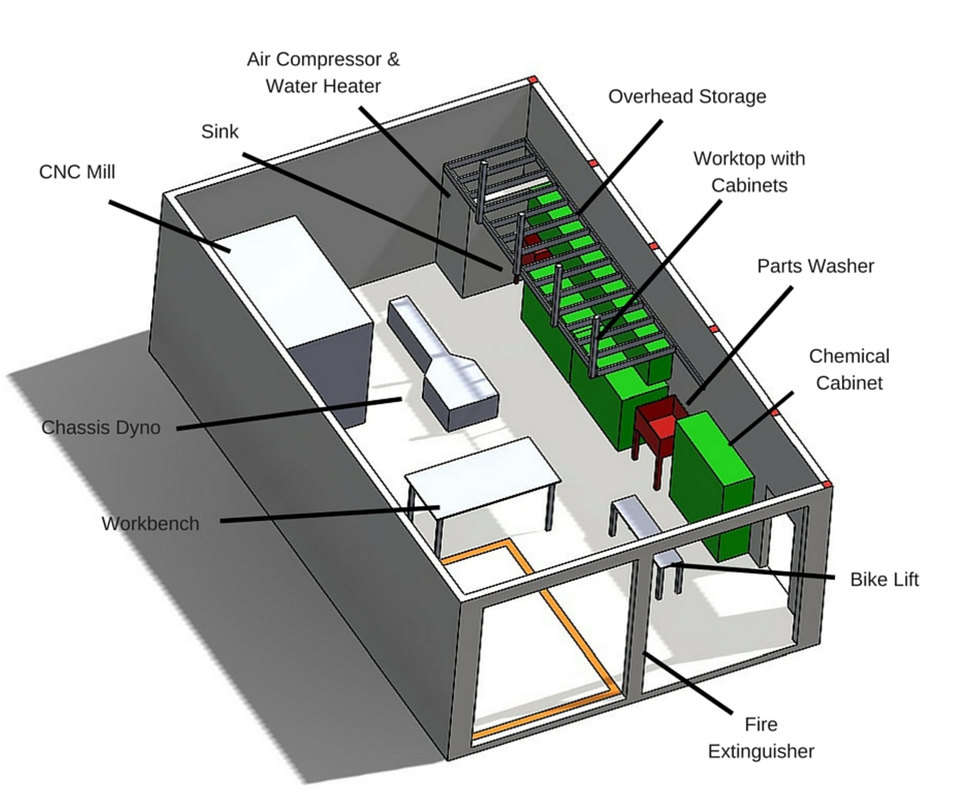
The Expensive Things
While I’m hopeful I’ll have a CNC mill and lathe someday along with a dyno, I’ve not done a lot of extensive planning other than predicting where I think these things may go. The CNC equipment will require 3 phase power and either a phase converter or additional electrical services will be needed.
Workshop Security
The previous owner left me with a nice video surveillance system which features four cameras and constant recording. Nowadays home security systems are affordable enough, anyone putting the effort into a shop they love may want to consider one.
Taking Action
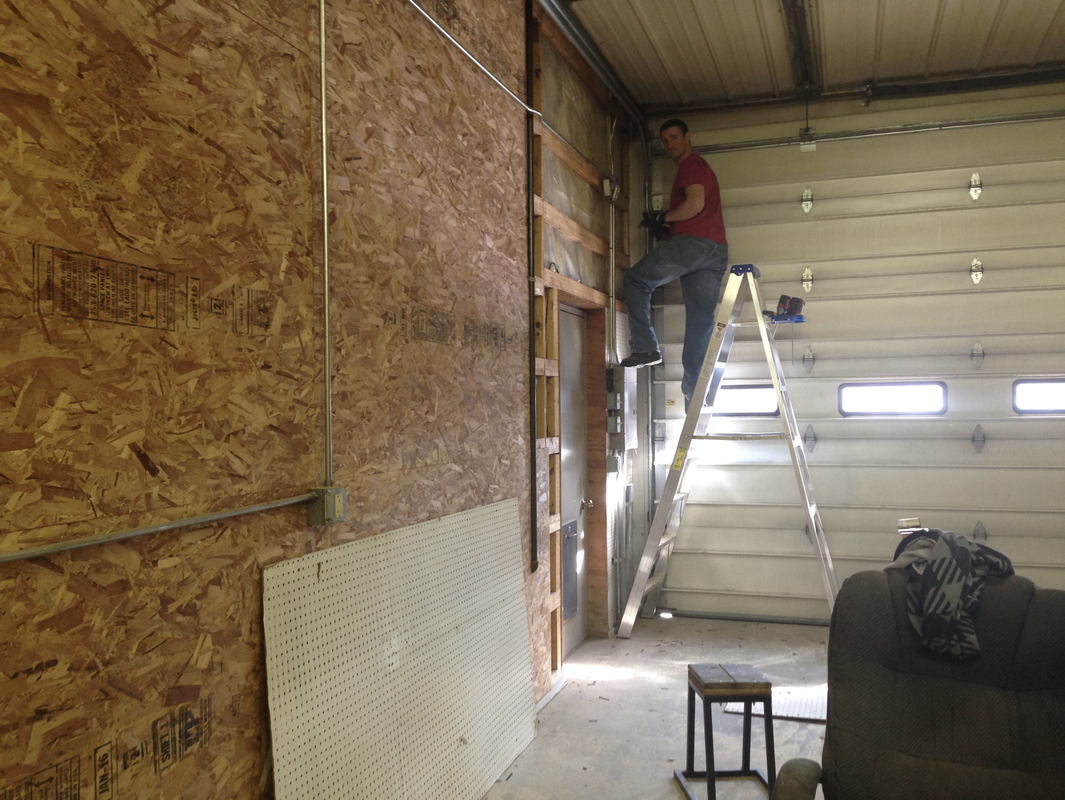
I started my shop transformation by removing all the pegboard and installing ⅝ OSB plywood. I’ve worked in shops in the past with OSB covered walls and I felt it offers a good compromise between durability, affordability, and noise dampening. I found tackling one wall at a time worked well because I could keep power on at least one side of the shop. Plus it didn’t make the job feel overwhelming. (Special thanks to my amazing girlfriend for many weekends of her time and help).
Once all the new plywood was up, I wanted to get it painted before continuing on with other projects. I went with white due to the color’s natural ability to reflect light. This helped the shop seem bigger and, more importantly, aided in lighting it. I chose a semi-gloss paint because it is the most washable of all the sheens, which will hopefully making cleaning from time to time easier.
My shop project got a big boost in productivity when my father came to town for a couple weeks. In that time we were able to build the overhead mezzanine storage area, add and rewire outlets, install the lights, and install the ceiling fans.
Shortly after the mezzanine was built I added shelving to it. I went with adjustable industrial supports so that I could tailor the space to my needs. The shelves themselves are simply 2 x 12's cut to length and painted.
Shortly after the mezzanine was built I added shelving to it. I went with adjustable industrial supports so that I could tailor the space to my needs. The shelves themselves are simply 2 x 12's cut to length and painted.

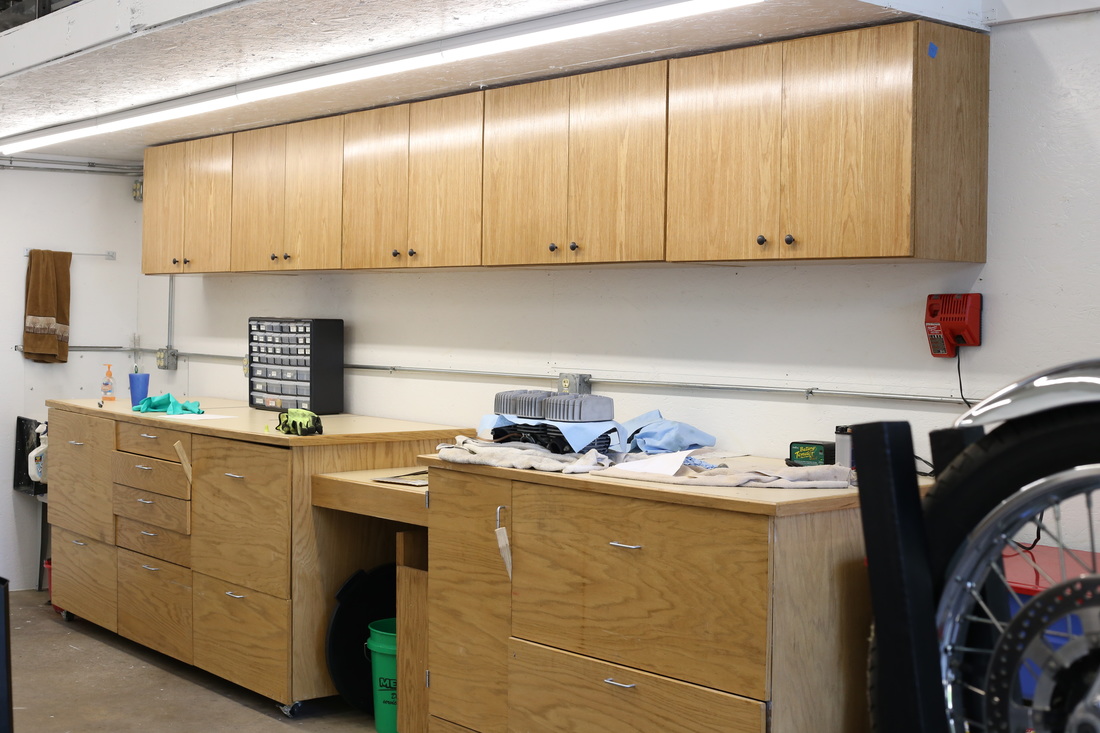
The wall mounted cabinets are a frameless design made from red oak veneer plywood. If you're interested in building these cabinets you can check out the plans they're based off of here: Frameless cabinet plans. I added some cost to the cabinets by going with red oak, however, the total for the project was still only around $500. To me, this wasn't a bad price considering some of the more costly commercially available options. Significant cost could be taken out of the build by using Melamine instead of plywood.
The large counter top cabinets were built by my father a number of years ago and relocated to my shop this spring. They're not in perfect shape anymore, but beggars can't be choosers! Similar finds can be found on Craigslist if you don't mind secondhand storage solutions. It's always a good way to save a buck, depending on how important a new set are to you as you plan out your own dream workshop.
The large counter top cabinets were built by my father a number of years ago and relocated to my shop this spring. They're not in perfect shape anymore, but beggars can't be choosers! Similar finds can be found on Craigslist if you don't mind secondhand storage solutions. It's always a good way to save a buck, depending on how important a new set are to you as you plan out your own dream workshop.
LED strip lights mounted and smoke tested. If you're interested in these lights you can check them out here: Utilitech 4ft LED strip light
I want to briefly touch on how nice anti-fatigue floor mats are. A coworker's son worked at a place getting rid of a bunch of stuff including some Hog Heaven floor mats which I gladly picked up for free. My only regret has been not getting more.
I've used other floor cushioning systems before and highly recommend selecting mats that do not have any perforated holes in them. I've used perforated mats previously and they collected dirt, were a pain to clean, and picking up small parts off the floor was problematic.
I've used other floor cushioning systems before and highly recommend selecting mats that do not have any perforated holes in them. I've used perforated mats previously and they collected dirt, were a pain to clean, and picking up small parts off the floor was problematic.
Do you have an awesome shop setup you want to share or some practical planning tips? Please leave a comment below and share your experiences and ideas!
If you enjoyed this post and are looking for more dirt bike maintenance tips and tricks, subscribe to my eNewsletter by entering your email below!
If you enjoyed this post and are looking for more dirt bike maintenance tips and tricks, subscribe to my eNewsletter by entering your email below!
Sign me up for the eNewsletter!
I'm ready to take my dirt bike knowledge to the next level.