|
I’ve slowly been accumulating suspension parts so that I can rebuild and change the spring rates on my Triumph Tiger. While I had accounted for all the parts I needed, I realized I forgot to think through the tools necessary to do the job. I’m used to working on twin chamber off-road forks and shocks and the requirements for the cartridge forks differed, as did the shock. Today I want to discuss how to compress the fork springs so that the damper adjuster, spacers, and spring can be removed.
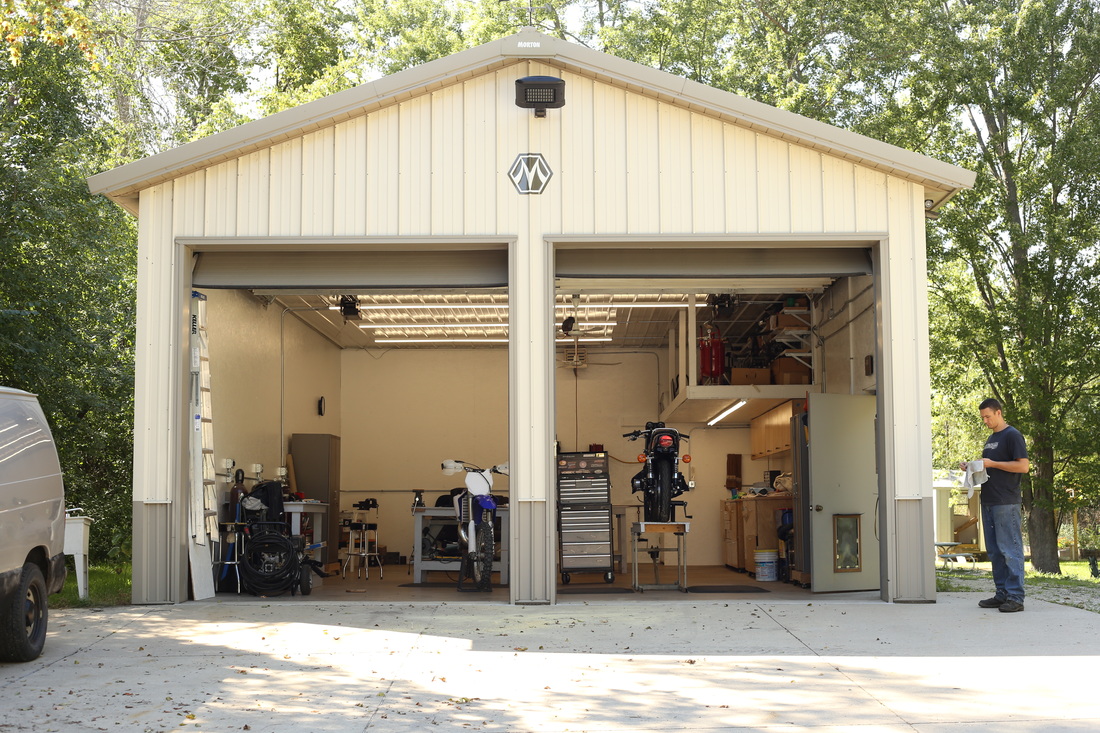
This year has been full of changes, including becoming a workshop owner-- I mean homeowner, for the first time. I was the lucky guy who was able to purchase a property which had a house, a shop, and some land, all within his budget. The property is by no means perfect, however it lends itself well for future improvements and is all I could have ever asked for in terms of a place to call home.
I know many of you out there love spending time in your garage or shop and in this post I want to share my plans for my shop. Some of the projects I’ve already tackled, while others will require larger monetary commitments in the future. Hopefully some of the features, projects, and plans I’m thinking about incorporating into my shop will give you some ideas and inspiration of your own.
This week I wanted to share an excerpt from the Race and Performance Engine Building chapter in my book, The Four Stroke Dirt Bike Engine Building Handbook. If you've been wondering how high compression pistons work and if they are right for your application, read on!
Piston upgrades are normally considered when changing the compression ratio is desired or larger valves are installed. In both instances the shape of the piston is altered either to reduce the volume in the combustion chamber or to allocate additional room for larger valve pockets. The compression ratio defines how much the original air/fuel mixture which was sucked into the engine is compressed. The following equation shows how an engine’s compression ratio can be calculated. While I don't normally re-post articles, one of my mentors lead me to this series of Q & A write ups featuring a few of the lead engineers at KTM. I enjoyed reading them, learning a bit more about how KTM operates as a company, and liked the technical information they shared about their bikes.
If you enjoy this sort of thing - check 'em out. Trust me, there is something for everyone - two-stroke, four-stroke, enduro, and motocross discussion! Engine Development: https://transmoto.com.au/2017-ktm-exc-range-the-engine-guru/ R & D Insights: https://transmoto.com.au/2017-ktm-exc-range-rd-insights/ Design Philosophy: https://transmoto.com.au/2017-ktm-exc-range-design-philosophy/ What did you think of the articles? Is KTM heading in the right direction? Leave a comment below and let us know what you think!
In my last post I shared an account of what happens when dirt gets past the air filter and into an engine. This was a telling tale, however I want to go further and discuss key components of what can be done in terms of maintenance to limit the chances of sucking in dirt. Whether you ride a two-stroke or four-stroke, it makes no difference, the importance of keeping dirt out cannot be overstated.
I want to start off by thanking those that left constructive comments in my previous post. Your insights into filter maintenance are much appreciated and help reinforce what I’m about to share. How often should I change my air filter? This depends entirely on the conditions you ride in. Dusty dry conditions will warrant more frequent filter changes than a damp riding environment where dust is non-existent. The amount of dirt accumulation that is acceptable is subjective, but I always err on the safe side. As an example, my filters are blue when freshly oiled and as soon as they start to become blotchy and start to turn color I change them. Can I change my air filter too often? Yes and no. I say yes only because every time the filter is removed there is a chance for dirt to enter the engine. A sensible changing regimen decreases the odds of dirt getting into the engine as the filter is removed/installed. What to Use I’ve personally been using FFT filter oil, however, there are many great options out there. No Toil’s water based oil system is something I’ve heard good things about and would like to try too. Asking other riders or doing a quick search will certainly turn up more great options as well. Removing the Filter The main point I want to mention here is to be careful when removing the filter from the airbox so that dirt does not come off the filter or surrounding areas and find its way into the intake. On most bikes, fitting the filter between the subframe is a tight fit and dirt can occasionally come off as the filter is pulled up.
I thought this week it would be a good idea to share with you an example of what can happen when dirt gets passed an engine's air filter. This will be a short post, but a picture is worth a thousand words. In my next post I’ll go into detail on how to properly care for your air filter to help ensure that this never happens to you.
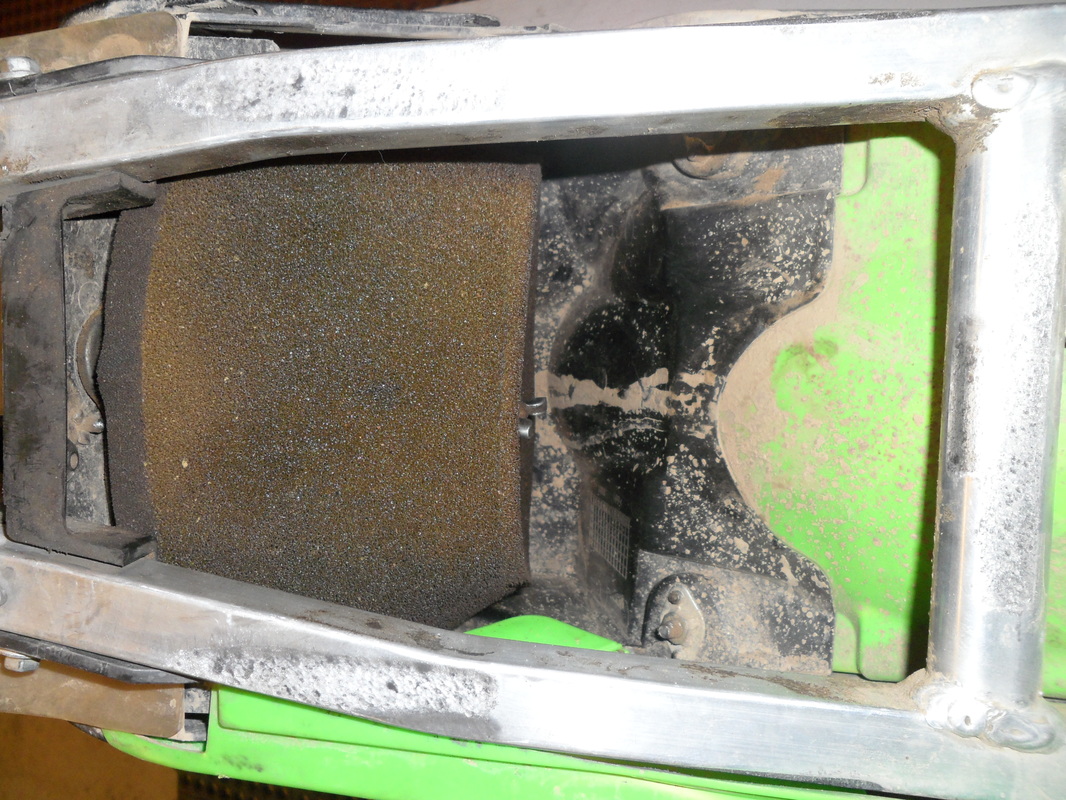
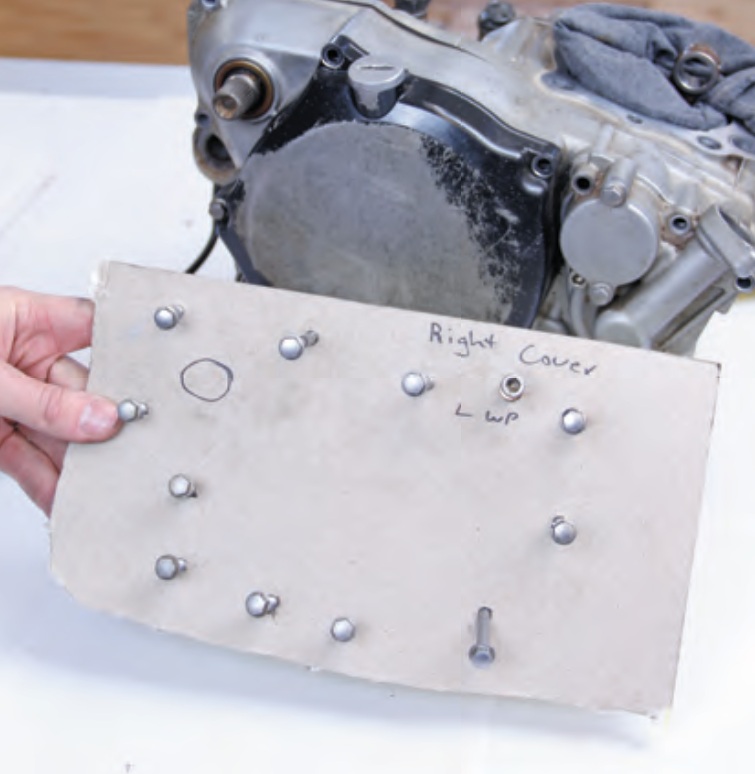
The series of photos below shows a sad case where dirt has found its way into the engine and wreaked havoc. The photos are all from the KX250F I bought on the cheap with the sole intention of rebuilding the engine and documenting the process for my book, The Four Stroke Dirt Bike Engine Building Handbook. Honestly, I couldn’t have bought a better bike for the project, nearly everything on the bike was worn out or screwed up from the previous owner. Here is how the air filter and airbox looked prior to disassembly. Alright guys, this week I just want to share a short and simple tip with you on how to stay more organized during an engine build. When it comes to major engine maintenance or repairs, usually the engine covers have to come off or the crankcases must be split. The covers and cases are almost always retained using different length bolts. The repercussions of installing the bolts in the wrong order upon reassembly can be very damaging. This is especially true if you install a bolt that is too short for its location and only a couple of threads engage, ultimately stripping the threads when you tighten the bolt. So what’s an easy way to keep track of cover or case bolts that are arranged in a pattern of different lengths? My favorite way to organize these bolts is to take a thin piece of cardboard (think cereal box thickness) and then slit the approximate bolt pattern into the cardboard so that the bolts cannot get mixed up. A picture is worth a thousand words so check out the one below. You need not be an artist to apply this tip, simply slit the pattern, add a couple reference points and you’re done! Do you have any organizational tips you’d like to share? Leave a comment below because I'd love to hear about them!
In today's post I'm going to shift focus back to the engine and talk a little about valve technology. Valve technology and manufacturing techniques have changed substantially from the earlier days of engine development and I want to share with you some information about the current valve technology being implemented in your engines. I also want to discuss one way you can get a feel for how much life is left in your valves. Let’s get started.
The following excerpt is copied directly from my book, The Four Stroke Dirt Bike Engine Building Handbook. If you want to learn more helpful tips, which will bring your maintenance knowledge and engine building skills to the next level, I’d like to invite you to pick up a copy of my book by clicking here. Be sure to use the offer code rebuild2016 to get 15% off when ordering!
Alright, on to valves shim sizes. The cylinder head assembly of most engines will wear out before it resorts to telling you it has had enough by catastrophically failing. Diagnosing these wear signs and knowing when it is time to replace components is the key to keeping the cylinder head assembly from failing. Due to the aggressive camshaft profiles, high compression ratios, and high RPMs required to make a lot of power, the valves and seats typically are the first parts to wear out within the cylinder head. Worn valves and seats will cause the engine to become difficult to start, have low compression, and have reduced power.
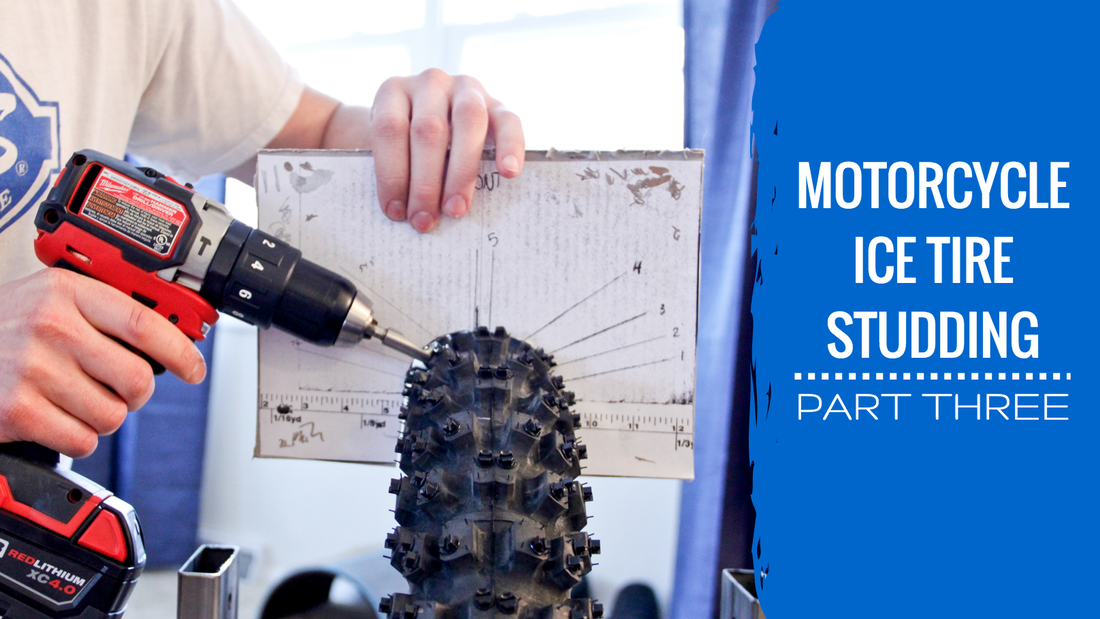
In my previous post with the help of Two Wheel Endeavor’s, Jarrett King, I successfully mounted my Mitas Ice Kings to my dirt bike rims. This week I’m going to stud my tires, with Jarrett’s help. We’ll be covering how to determine the number of screws you need, sharing Jarrett’s recommended process for studding, and providing tips and tricks to help ensure you have the best performing and longest lasting tires once they have been studded.
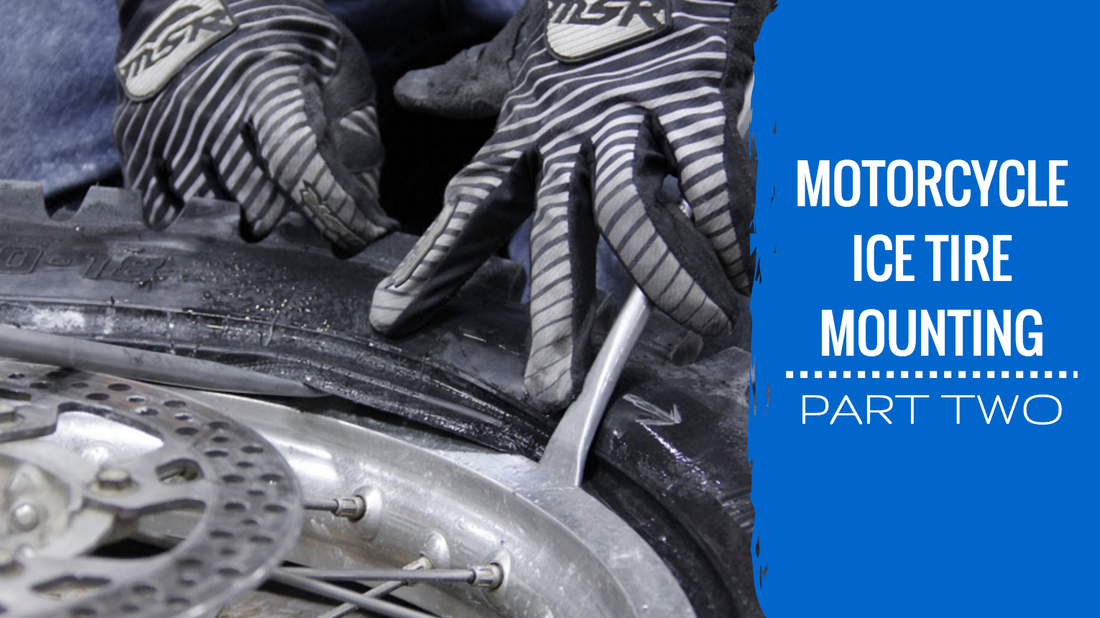
In today’s post Jarrett and I are primarily going to focus on mounting ice tires. Most ice tires are heavy duty, they may require an additional tire liner to be installed during the mounting process, and in general they can be difficult to work with. I’ll be working through the mounting process with Jarrett’s guidance and using his tips to ensure I don’t puncture a tube.
To best illustrate the mounting process, studding process (next week’s post), and all the knowledge Jarrett shared in our previous post, I’ll be preparing a new set of tires. Jarrett will continue to chime in with (much needed) guidance and commentary. We’ll get into more detail on why things are done in a specific way, and share examples of tire builds that you can use as a reference. My first set of ice tires was a Bridgestone front and Kenda rear combo built by Jeff Fredette. I liked the Bridgestone front, but have had some trouble maintaining traction with the Kenda rear on anything but clean ice. I decided this year that I wanted to try something new and after talking with Jarrett, I was sold on the Mitas Ice Kings. Full disclosure, I am not an affiliate of Mitas Ice King Tires, I just love their product. To me, the Mitas ice tires are advantageous for a number of reasons. First, they were designed for the ice and have a rubber compound that was specifically made for cold weather riding. Second, the tires don’t require any internal tire liners, which simplifies the mounting process and may save a little weight. Third, the tread pattern was designed to work in conditions where the ice isn’t perfectly clean. Finally, since the tires were designed knowing that screws would be installed, the tires are also more tolerant of being screwed into. This results in a longer lasting tire. Needless to say, the following walkthroughs on mounting and studding will feature a set of the Mitas Ice Kings |
InspirationsCategories
All
Archives
November 2022
Favorite Films |


